Finishing Epoxy

Hi,

I’ve messed around with two-part epoxy. The mixing, pouring and shaping aren’t an issue. It’s getting that amazingly clear finish that I’d like to know more about. Is it really just sanding with finer and finer grit paper? Are there other steps that are needed? I’d like to get that magical luster of the best work I’ve seen.

The San DIego Woodturners have a class in using epoxy for turned objects. Since we’re trying to fill cracks rather than cover a surface, some steps might not apply. That said, they teach two not immediately obvious steps.

  1. Warm up the bottles in a water bath before puring out the amount you need. This makes it much less viscous.
  2. After you have combined and stirred the 2 parts, you now have a bunch of small bubbles. To get rid of them, place the mixture in a vacuum chamber for a few minutes. This is a pressure cooker that is hooked up to a vacuum pump.
  3. pour away…

I’m speculating that tiny bubbles might interfere with clarity. Could be all wrong, just a thought.

1 Like

So you’re saying there’s now a third reason to get a vacuum pump:

  1. Veneer
  2. Hold Down
  3. Fluid Stabilization

It’s on my short list of tools to buy because of the cascading projects.

Hi Travis,
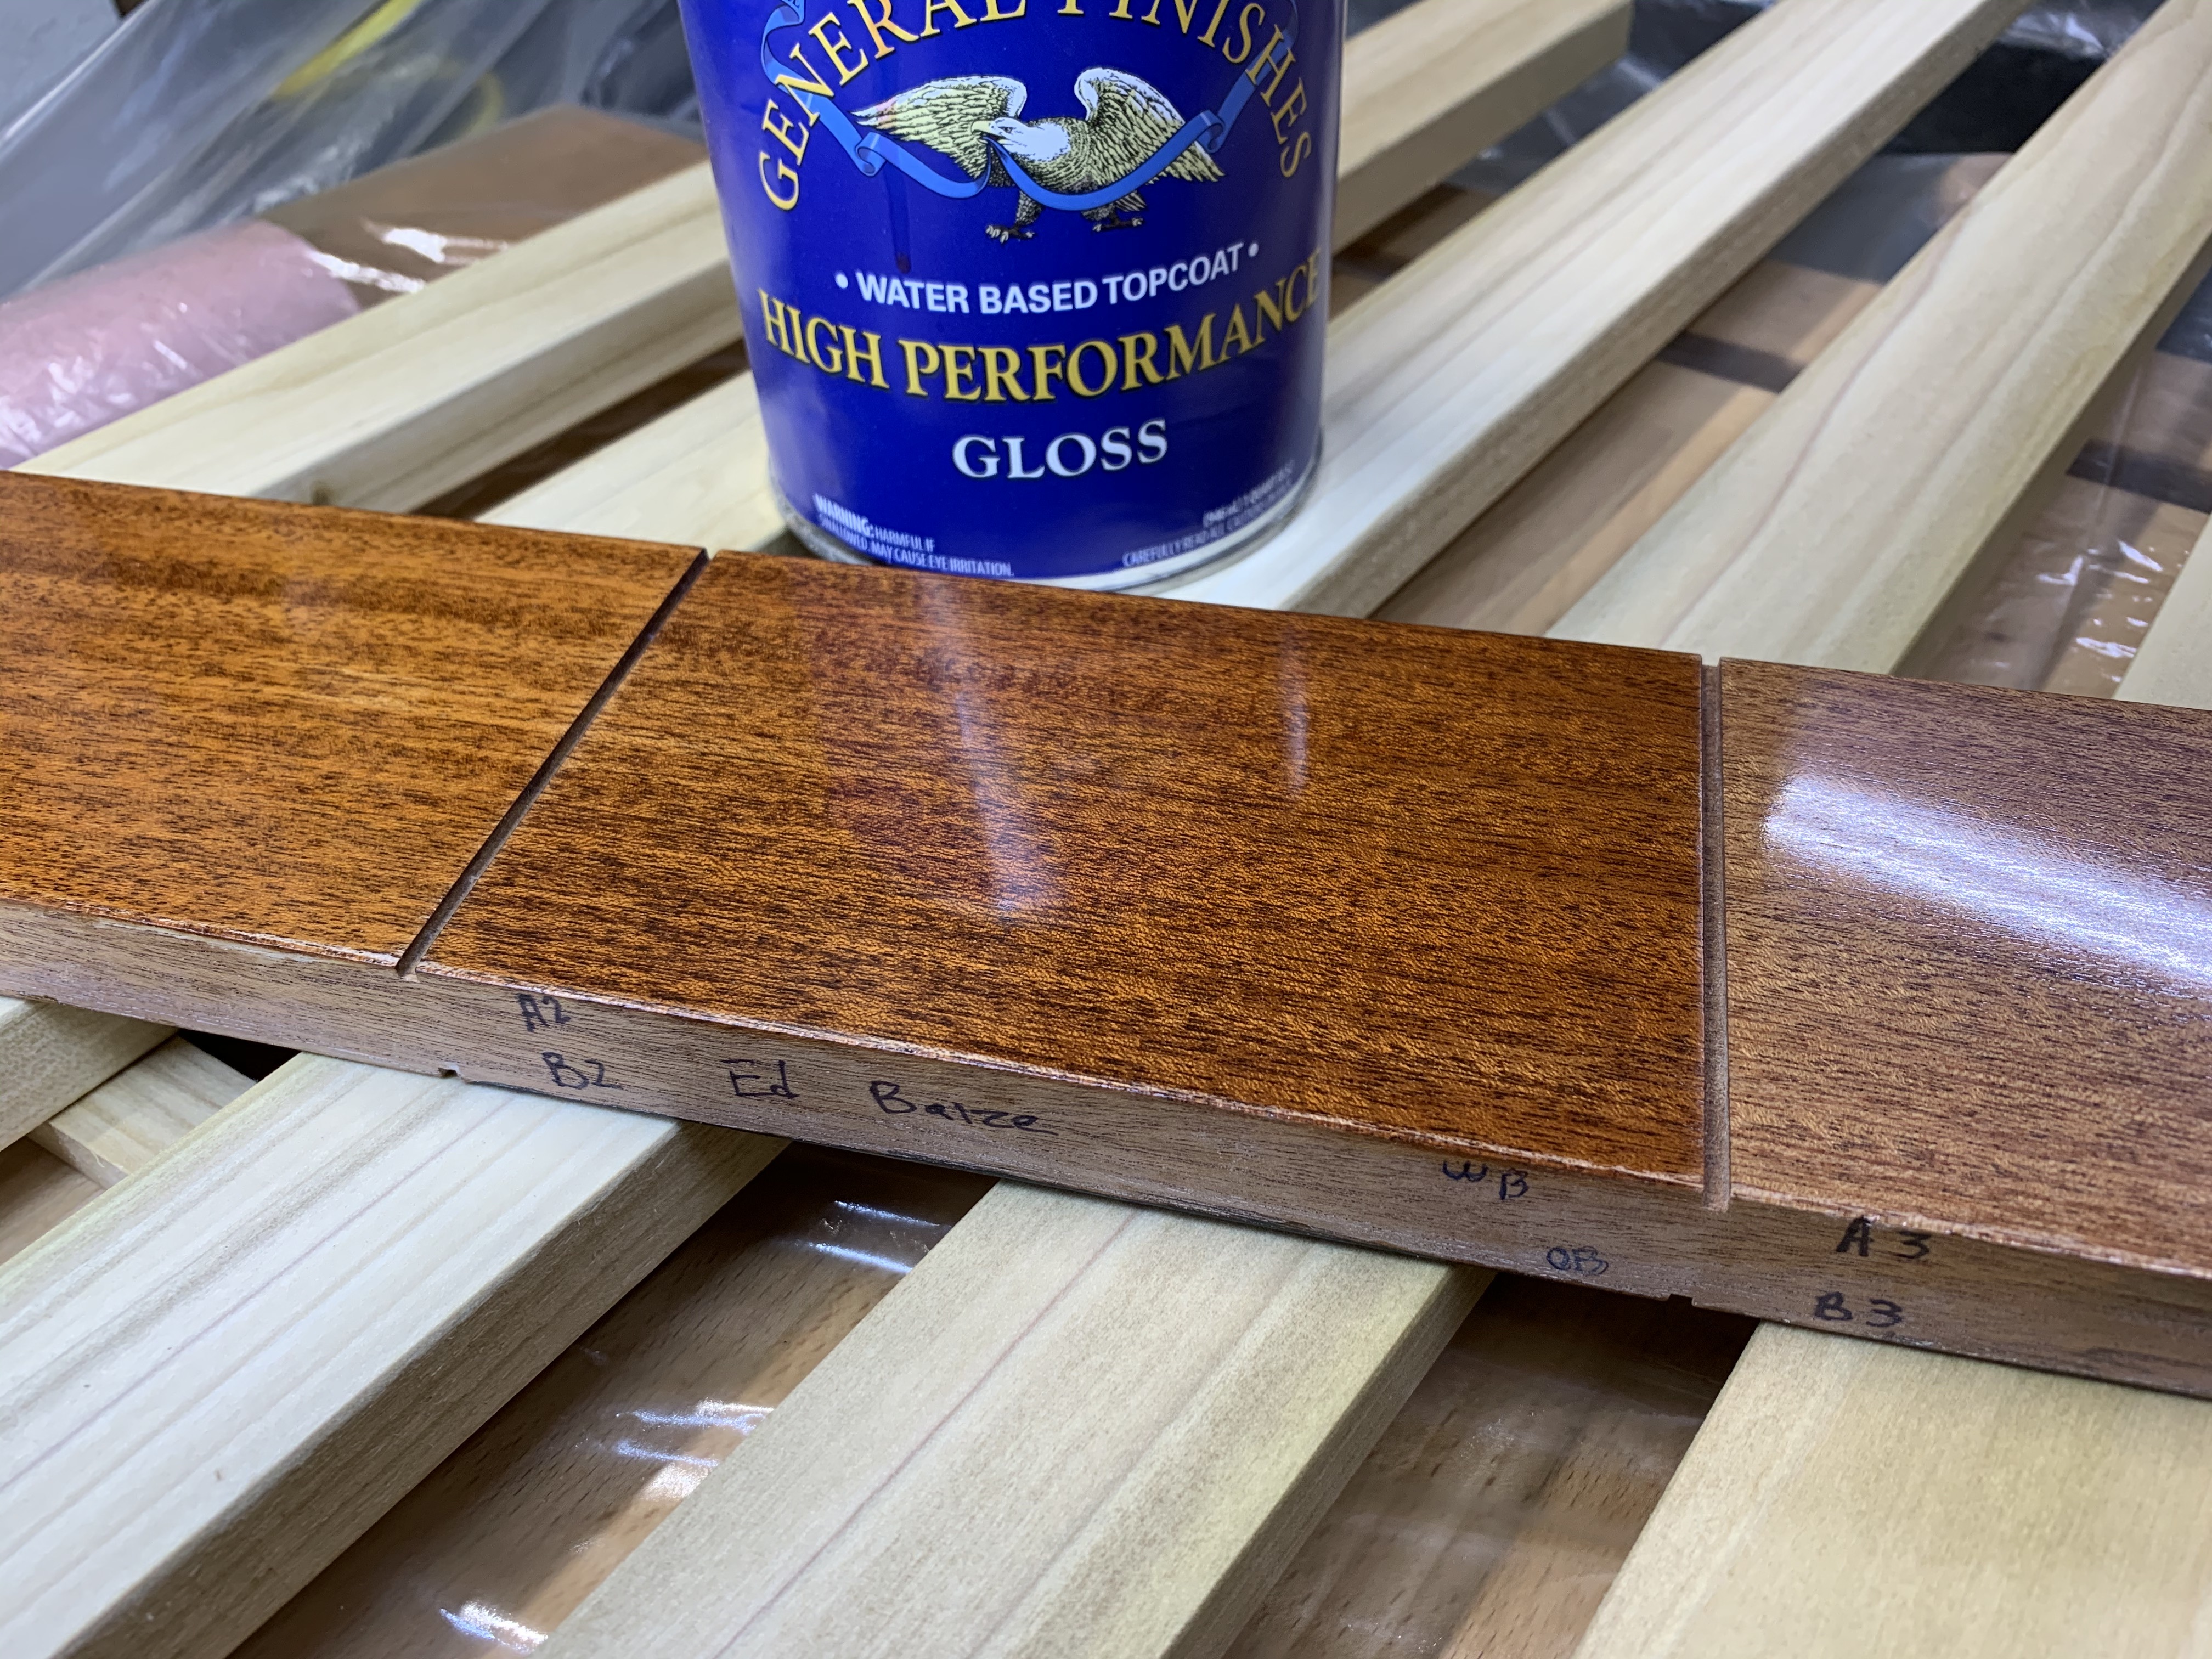
Think automotive finishing, Yes, continue to sand up through the grits with wet/dry sandpaper: 400, 600, followed by Meguiar’s #1 Medium Cut Cleaner, wipe dry, Meguair’s #2 Fine Cut Cleaner, wipe dry, Meguair’s #9 Swirl Remover, wipe dry, Meguiar’s #7 Show Car Glaze, wipe dry. Allow 2-4 days & apply a paste wax. This will get you to a gloss finish. More steps for high gloss, fewer for satin. Use mineral spirits with wet/dry paper. Micromesh pads another good option. It all about removing finer & finer scratches with higher & higher grits, rubbing compounds, polishes.
This is from Palomar College CFT 195 Wood Finishing, credit Darren O’Hare.
I have done a lot of epoxy work for boat repairs & even building small kit boats.

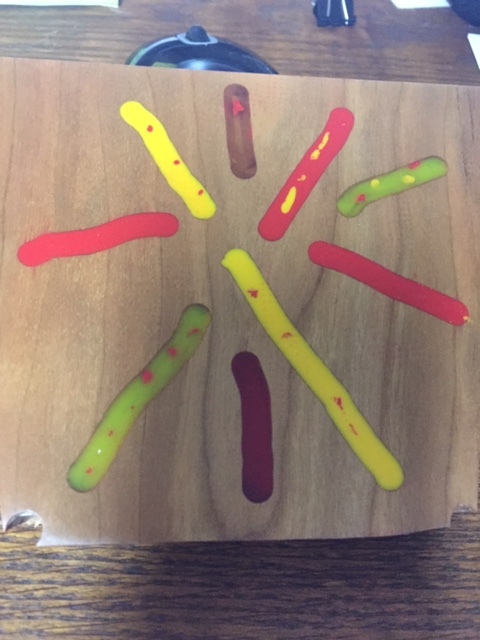
Attached is an epoxy test piece I did with various color pigments on cherry.

Wow, that sounds like quite an investment of time and elbow grease, Mike. I suppose it’s the allure of the final look that motivates you through the stages. I’ll have to think of the epoxy finishing as a background activity.

At what store locally would I buy those products?

In general, auto parts stores but I see my information on specific brands is dated. Basic concept the same, you need a medium cut cleaner/rubbing compound, followed by a fine cut cleaner, swirl remover & finally a show car glaze. I will see if I can find alternative types/brands available locally.

Yes, finishing at this level is a lot of work. Powered RO (random orbital) sander & buffer will help.
After taking CFT 195, I learned making your project is only about half the work. Finishing can easily take nearly the same amount of time.

Medium

Fine

Swirl Remover

Show Car Glaze

Right?

Correct.
Also, the general process is ‘rubbing out a finish’. Check out a YouTube video or 2 for other methods or products. Meguiar’s is just one…

Travis,

What you are looking for does not necessarily require Epoxy. Here is a test piece from my CFT-195 class. Notice the detail of the LEDs in the light fixture:

!
I did this with General Finishes water-based Poly:

Then I did this as my final project, you’ll recognize the pattern from the last Fall SDFWA workshop:

Padauk, Holly, Purpleheart, Aluminum, and Brass. Again, using water based poly.

What I used to create the mirror smooth finish was many coats of poly, let it harden for a week or so, flatten it with 320 Grit clog-resistant (stearated) dry sanding, then I went to Micro-mesh abrasives (https://micro-surface.com/index.php/products-by-application/wood-finishing.html). Starting with 1500 and proceeding to 12,000.

I could do a Zoom on this, but I would need at least a couple of weeks to prep a piece and let it harden.

-e

1 Like

This would make a great Zoom session so line 'er up! :slight_smile:

Thanks, I look forward to giving it a try.

For anyone interested, I will be demonstrating how to get this mirror polish finish this Saturday at 10:00 AM (May 30th).

If you click on the link above, it will take you to PunchPass where you can register for the Zoom Session. You will see that it is labelled as part of the CNC SIG, but don’t let that dissuade you, this has nothing to do with CNC.

If you forget to register, and just want to join us on Saturday, you can click here.

I always wondered when I heard people talking about “rubbing out a finish”. If you’re wondering about that, here is a chance to find out what that means.

-e

I once made a vacuum pump by putting a fish tank air pump in a jar with 2 holes which I glued air line barbs into. One barb is for the output hose from the pump and the other barb is just open to the inside of the jar. That one is the vacuum line. Not lots of pressure but better air pumps will produce better vacuum. And you probably have a pump or two lying around.

Or visit an aquarium shop:
https://www.youtube.com/watch?v=k-64AgZp9OE

My idea might not work fast enough for resin though but it seems Harbor Freight might be your friend for the more powerful option:
https://www.youtube.com/watch?v=vUegCHjiIts

1 Like

Pretty cool options; the marshmallow bloating was a good demo.

DIY syringe based system for $25 but you’ll need your own jar and hot glue. I’ve been thinking about doing some silicone molding too so what the heck.

All but the syringe for $12:
https://www.amazon.com/Pietypet-Splitter-Distributor-Standard-Connectors/dp/B07L49H3K4

The Syringes, 8 for $11:
https://www.amazon.com/gp/product/B07PLTWW88