Several years ago my daughter asked for a sewing machine. When we got the one she wanted we found out that it is not designed to work “within a table,” but “on a table.” I used it a fair amount of times and found it a bit awkward, so did Cindi. “Dad, can you solve this issue?”
With desired width and depth known the project began. Sized to meet multiple needs including setting up biology and physics assignments for a high school teacher and designing and setting up sewing projects, off to a design mode.
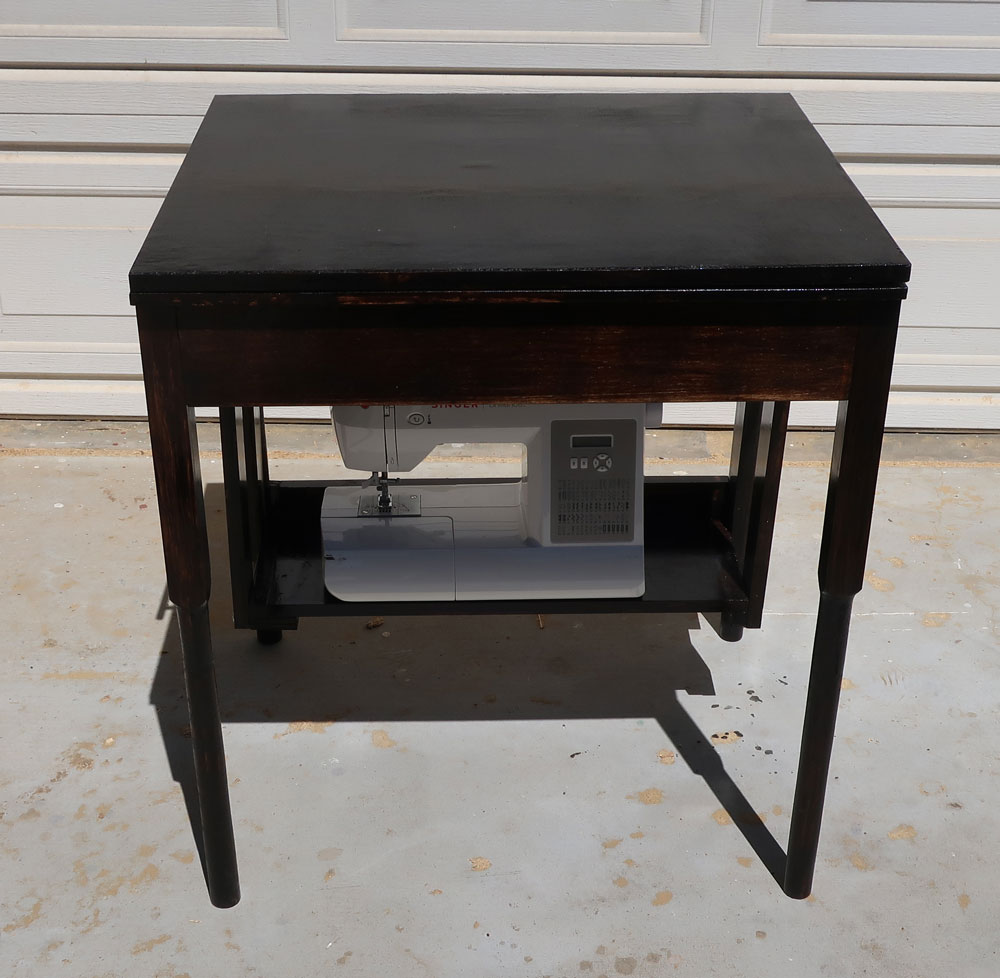
One of the issues is the sewing machine has no attachment features, as a “tabletop system,” so… insert the machine into the side of the table making its sewing surface the same height as the table. The floor of this box has to have a slope as the sewing machine is not “square.” Nor is the machine square so some tedious work there. Now fill in the gap so the tabletop is a level working area when the sewing machine is not in place. Since I now have this insert, use the space and make it a drawer.
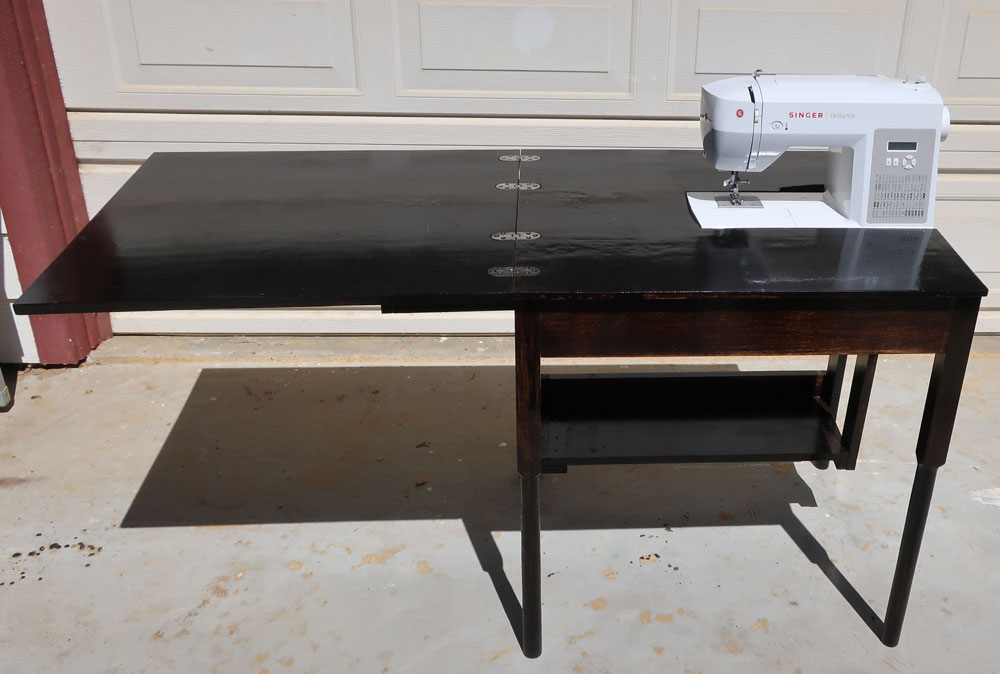
Oh, wait, I have a bunch of space on the other side as well and, even with sewing table hinges, a bit uncomfortable, so design the second drawer to add support to the flip top.
Now solve the storage issue by adding a shelf under the table to hold the sewing machine. Far enough back that it is not interfere with the legs of the user.
Next problem is installing the sewing table hinges. The CNC did it, the math was interesting. Numerous runs before my caliper, Carbide Create, and the Shapeoko all agreed at “pretty close.” Then more math to get four inlets on the stationary top to match the four inlets on the flip top. I have several scraps in the workshop to prove how close the math has to be.
Cindi wanted the finish PolyShade Expresso Gloss to match other furniture in her den. The stuff goes on VERY thick and VERY dark.
End result? Pretty nice, not perfect, approximately 24” deep x 28” wide table that opens up to be about 56” wide, with two drawers, one of which is actually an insert to provide a smooth working table when the sewing machine is stored below. The legs and the shelf can be easily removed if the table needs to be transported. The power supply fits into the drawers. Both the sewing machine and the insert fit pretty close.
Having made one, with tons of lessons learned, almost want to make a replacement and incorporate in the first run most of the alterations, modifications, changes, adjustments, and afterthoughts.
Off to the next project.
Thanks,