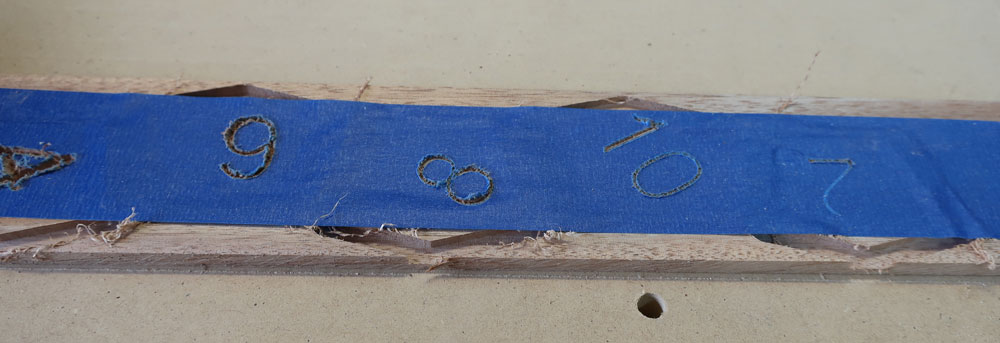
The numbers photo had the tape placed on it after it was zeroized. To the left of the 4 is a 12 that was not even touched by the Vee bit.
Thanks,
Rex

The numbers photo had the tape placed on it after it was zeroized. To the left of the 4 is a 12 that was not even touched by the Vee bit.
Thanks,
Rex
Rex, can you provide us with the Carbide Create file so we can see your intentions?
Rex,
I hop that you have found your solution by now. If you haven’t, please bear with me if I ask questions that seem redundant to you. It appears that the depth of cut in each figure is consistent for that figure.
I am a little confused in that you have trued up your sacrificial board and you are still getting a variation in the depth of cut along the X axis.
What software are you running? VCarve, Carbide Create/Motion, or?
Can I assume that you have tried multiple areas on the X/Y field and they all turn out the same?
Also, in the photo (135350), was the beginning of the job on the left (shallow cut) end or the right (deep cut) end?
Were all the cuts made during a single run of a single file?
I see that tabs were shown in all 5 cuts. If the job started on the right end of the wood and proceeded left, did you end up “air cutting” the beginning of each cut as you proceeded to the left?
Did you create your own job to true up the sacrificial board, or was the job provided by Shapeoko?
Depending on your answers, I would suggest running your file which was used for truing up the sacrificial board, again. However, run it as either an “air cut” at a designated height above the board (e.g.: 0.25") or at a depth of 0.001". In the “air cut”, do not start the router. In both cases, periodically pause the job and determine if the height/depth is consistent throughout the cut.
If the sacrificial board appears to be true, then try running the “triangle” job, again. When the job is finished, and if the problem remains, then before you remove the wood, run the job a second time, complete with re-zeroing Z. Has Z-Zero changed? Did the job run with the same depths on the second pass?
I am anxious to hear. I am envious of you Shapeoko XXL!
I hope that you and your family are safe and well.
Pat Duffy
Pat,
I am a little confused in that you have trued up your sacrificial board and you are still getting a variation in the depth of cut along the X axis.
Pat, I have run several cuts so far. Most have the depth consistent within the path. I have not taken a caliper and checked it. However, from path 1 to path 2, there is obvious depth differences. And the paths are all set as one unit, selected with Control or Shift.
What software are you running? VCarve, Carbide Create/Motion, or?
Pat, correct, Carbide Create and Carbide Motion.
Can I assume that you have tried multiple areas on the X/Y field and they all turn out the same?
Also, in the photo (135350), was the beginning of the job on the left (shallow cut) end or the right (deep cut) end?
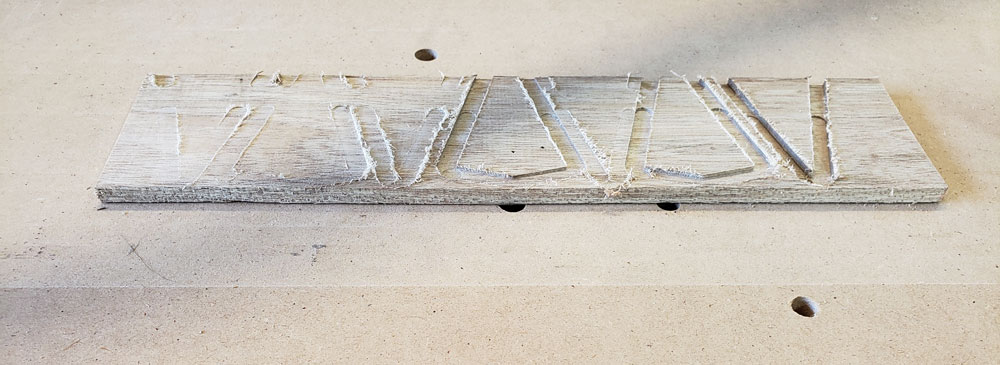
I have tried about 1” from the front, about 2” from the front, and about 3” from the front. Same results. And the depths seem to get shallower as it cuts. To explain that, the figures are left to right 2, 4, 6, 8, 10, and 12. It may cut 4, then jump to and cut 8 & 10, then go back and cut 6, then cut 12 followed by 2. And each cut seems to be shallower than the one before.
Were all the cuts made during a single run of a single file?
Yes, one cut file for all the numbers. Another cut file for the profiles.
I see that tabs were shown in all 5 cuts. If the job started on the right end of the wood and proceeded left, did you end up “air cutting” the beginning of each cut as you proceeded to the left?
Do not quite understand, the mill cut into the wood on the first pass, I initially had the depths set at 0.15 to make two passes for a final cut of 0.25, which I increased to 0.27 to ensure it cut thru. As explained earlier, the paths were not left-to-right. And they do not appear consistent. I have not paid particular attention, but while 4 may be the first cut on this run, it may be 6 on the next run.
Did you create your own job to true up the sacrificial board, or was the job provided by Shapeoko?
I created the file. And, with the machine off, I checked the clearance using a level and an end mill moving the cutter to various places on the table. It appears consistent.
Depending on your answers, I would suggest running your file which was used for truing up the sacrificial board, again. However, run it as either an “air cut” at a designated height above the board (e.g.: 0.25") or at a depth of 0.001". In the “air cut”, do not start the router. In both cases, periodically pause the job and determine if the height/depth is consistent throughout the cut.
Will try that later today or tomorrow. Weeds are demanding my attention today.
If the sacrificial board appears to be true, then try running the “triangle” job, again. When the job is finished, and if the problem remains, then before you remove the wood, run the job a second time, complete with re-zeroing Z. Has Z-Zero changed? Did the job run with the same depths on the second pass?
Pat, did this on one trial. I have run several of the files already. Same cuts, no difference in the depths. No new depth.
I am anxious to hear. I am envious of you Shapeoko XXL!
I ordered it using my smartphone while I was in Orlando over Thanksgiving. The combination of my smartphone, my brain, and their homepage was giving me problems. I wanted the XL.
The system will not allow uploading the .c2d and .nc files.
Lesson learned, the eccentric nut for the Z belt came loose. Reset the tension, tightened it, off and running.
Thanks,
Rex
Learning to properly tighten those eccentric nuts is key to getting good cuts from the Shapeoko design.
Congratulations on having noodled it out!
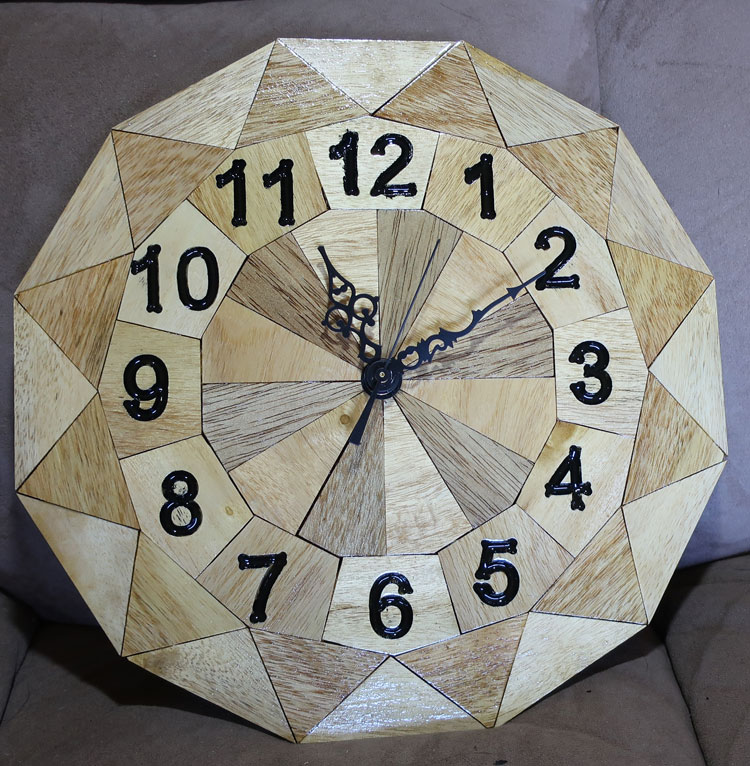
I finished my first CNC project with the Shapeoko XXL. I think, because of the size of the belts, after some usage all three belts, X, Y, and Z, need to be retensioned. For the Lilli the Bean Clock, I had Carbide Create / Motion set for two passes with the 0.25 end mill. Using wood planed to 0.300, the cuts were 0.170 on the first pass and 0.305 for a total depth. The sides of some of the pieces are “shouldered” every so slightly and I figure that is from slop as the belts “settled in” with usage. The numbers were V-bit carved to 0.200". Using painter’s tape, it did not hold up well and maybe regular masking tape would do better. Some of the individual pieces had to be recut as they broke or fragmented along the way. The second, remake pieces were slightly different than the first cut.
Also, once the glue starts to set, DO NOT GO TO DINNER. With fast set wood glue, they will not be moveable 45 minutes later.
Lessons learned.
The Bean thinks it is neat and it is going up on her bedroom wall.
Rex