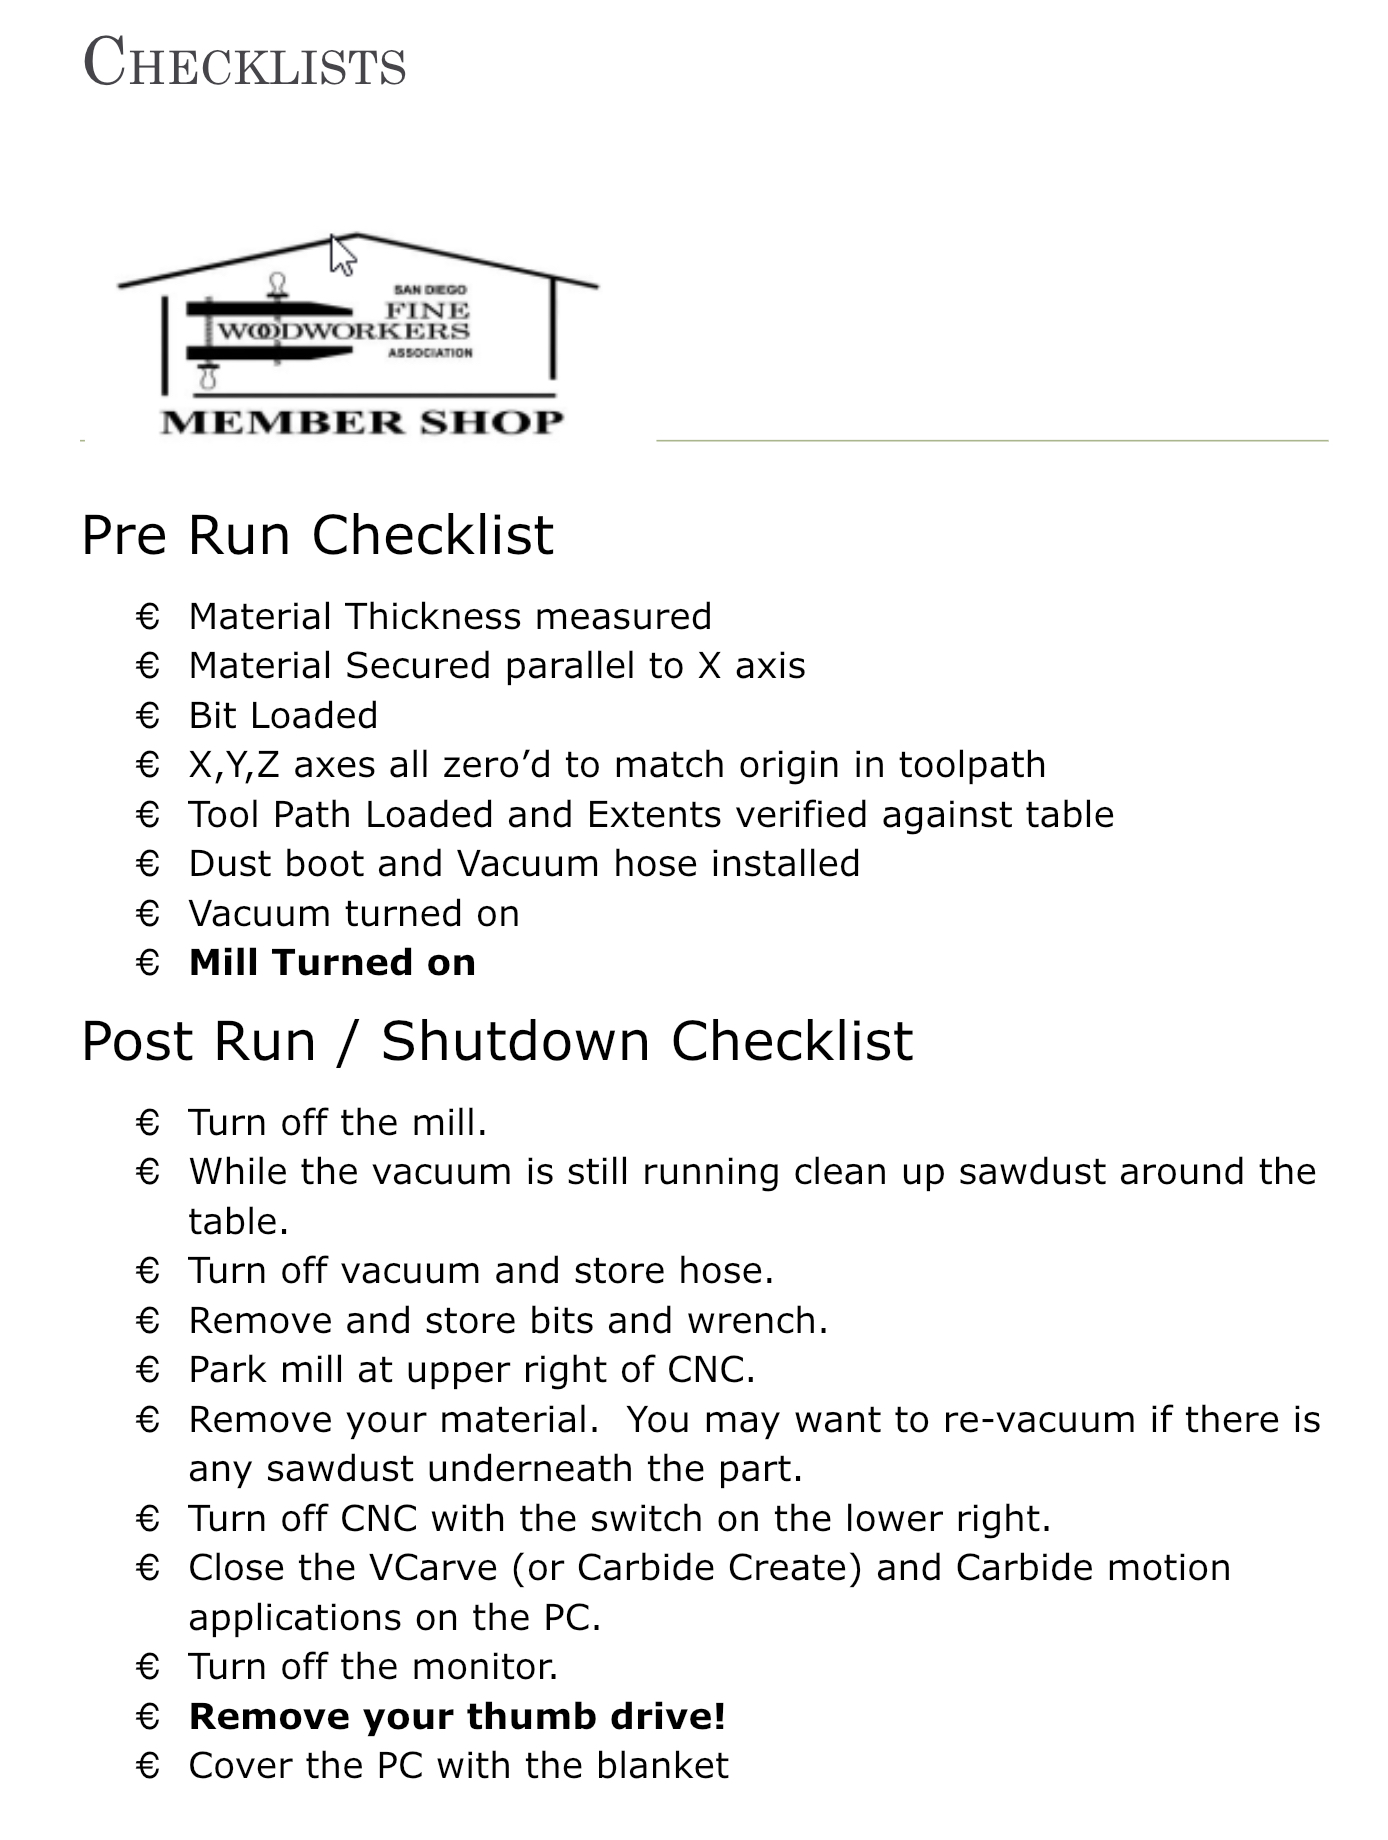
In the quest to try and keep my spoilboard from looking like a modern art painting will all sorts of random grooves and lines from various projects I like to play with my Z axis coordinates with with the following technique on profile or deep pockets cuts that go entirely through the piece. Here is what I do.
-
Think about the thickness of the material. Even though I’m using a 1/2 in board it will likely vary over the surface in different places.
-
Put 1/2 inch for the depth of the profile or pocket cut in VCarve (or whatever SW you are using)
-
Using the probe or manual on the CNC set the X and Y 0,0’s as you normally would.
-
Using a piece of paper and VERY CAREFUL lowering of the router / spindle bring the endmill down to the surface of the spoilboard, NOT the surface of the material. Lower until the paper is just unmovable. I like to stay here or a bit higher for “onion skin” bits of material left that can be easily broken off or sanded.
-
In your CNC control SW (mach3, CM or whatever) manually enter the Z coordinate of -0.5. This makes the lowest dimension that the bit will travel be the surface of the spoilboard.
One important point that you should include in your pre cutting checklist (you do have a checklist, right?) is to do a sanity check before hitting GO that X,Y and Z zeros “look right” by lowering your bit to the material and verifying the coordinates.
Let me know if you have questions,
Perry