Unicorn in Positive and Negative Prints

I cannot explain it. This is the same file printed twice. The left unicorn is “in the negative,” the right unicorn is the second printing and is “in the positive.”

I can only assume that somewhere a zero got turned into a 1 or a 1 got turned into a zero between the file and the extruder.

My pseudo grandchildren (next door neighbors) are getting cookie cutters for Christmas. They do a lot of baking. Unicorns, dinosaurs, mice (Mickey and Minnie) Lego people, whatever.

Thanks,

Rex

The left print looks like a print structure to support an air cookie cutter. :grin:

Since this has kind of a wide footprint and low height, I turned off Brim and Supports.
Agree, it looks like it decided it was going to print all the supports and expect someone to fill them in later.
I am going to keep it around just for fun.
Thanks,
Rex

What slicer software and version?

Were any setting changes required and if so, is it possible you clicked a box or two which were not intended?

I use Prusa Slicer/Slic3r and usually I will save the project(3mf) after it’s printed successfully. It eliminates having to go back and figure out what specific settings I used to make a successful print the first time.

Tough to explain that… it doesn’t look to need support but that’s what the left one looks like and why would there be nothing where the object was supposed to be. Strange. And look at the two long zig-zags going up off the saddle area which are of little use for anything. odd indeed.

Doug,
I am using PrusaSlicer Version 2.3.3+ Win64. I save many of my projects as .3mf as well, like you said, if you want to print them again they are preset. Opened the Unicorn up as a project, it looked good. Supports and Brims was still off.
As a “What would I get this time?” without saving it again, printed it again from the original save and got a good print.
I have been changing the Scale Factor of many of my cookie cutters (originals too big) and dinosaurs (originals too small) so I have been adding that to the gcode file name as well - 150, 175, whatever. When multiple filaments are used including that - 2 Fil, 3 Fil, etc in the gcode file. Numerous of my prints are multiple color / filament prints.
Still think somewhere along the line something like a 0 got switched to a 1 or a 1 got switched to a zero. The second print effort came out correct
Yes, some of the weird “extensions” are totally unexplainable.
Just curious, I have not deselected it, why is “Skirt” a default on? “Your print is going to be within the unnecessary boundary called Skirt?” (Print Settings - Skirt and Brim)
It does insure that the filament start is clean / pure of the current color.
And life goes on.
Thanks,
Rex

1 Like

If you feel it’s a bug in the application and can reproduce it, PLEASE post back to Prusa about it so others don’t end up with this face after they see the ‘negative’ print.

image

BTW, I put some Start GCode in my Slicer settings to draw a fat line in the front left corner before printing. I used to use a loop around the object it once interfered with fitting on the print bed so I switched to the fat line in the corner.

Doug,
I think it was something within my system that screwed up.
Are you saying you stopped printing the skirt as it interfered with a printing?
If so, why the big thick line? The “How am I doing?” line in the front left, default to the printer, is common and as I understand it, not removable. (I have been wrong more than once in my life - 1 wife and 3 daughters. I am seldom right.)
Thanks,
Rex

Only in that for years I would select the Slic3r “Print Settings” option under “Skirt and bring” to do a Loop which cleared the nozzle of air, old filament color, and primed the nozzle for printing. My main printers were 2 delta type printers which have round print beds. I used to use that same method once I acquired 2 rectangular bed machines(Makerbot Replicator and Ender 3). But at one point I ran into a problem where the Loop wouldn’t let me print because it would extend outside the print area. I didn’t like cleaning off brims…

Somewhere I found some G-code for the Start Code( under Printer Settings → Custom G-Code ) that did a couple inches of nozzle clearing in the front left corner with ~1.5" of a very fat over-extruded line followed by about .5" of a less fat line.

My guess is that the Prusa default configuration has some custom Start G-Code which prints that line in the front left. Might be similar to mine if it’s really fat(lots of plastic) followed by a less fat line. I don’t see a reason for any other nozzle clearing things like Loops or brims. I only use brims when the part doesn’t have enough of a footprint and might come free since I often don’t watch my prints and let them run on their own for hours.

BTW, I would do so much better in life if I accepted being wrong every once in a while Heck, even if I wasn’t wrong and just accepted being told I was. Damn DNA just doesn’t allow that. :confused: I know the Dog House well.

Doug,
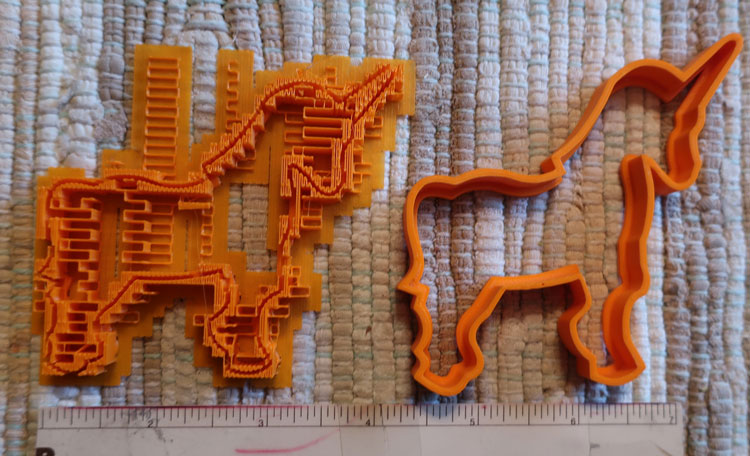
No, I have not removed the skirt. I do not understand why it is there. It seems to be some sort of announcement. “Hi person, I am going to print your desire within this fence.” I see no functional use or requirement for it and figure if I delete it, I will find out the undesirable consequences of that action.

I agree and I save many of my projects as .3mf files just in case. Since my wife is giving me tons of them, and I mean TONS of them, I separate them into an active directory and a history directory. I have burned through three full spools of filament and have four more with more than 50% consumed and a couple more well on the way all since mid-late August 2021.

I had to downscale one of my projects as the skirt was on or over the print area border as I remember. I chose not to remove the skirt as I do not understand its function. It printed at 95%. I am amazed how much printing time changes with even a 5% reduction in size on a large print. Yes, I understand why.

That big fat “How am I doing line” in the front left is interesting. I have not watched it or timed it but it does seem that the extruder movement is slower than the normal print movement at the start of that line and does increase speed as it nears the end. The line is wider at the start and then tapers. I assume, guess, Z height does not change during this print so it is either extruder movement rate or flow rate causing the difference in the line. Interesting. Some claim it is a Z height check. Not sure, however, if I were programming a Z height verification process, I would keep extruder movement and flow rate consistent during the test strip. I use the skirt for a Z height check. More accurate in my opinion.

Doug, my parents wanted a puppy, I came out so they named me Rex. I have lived the early years of my life in the dog house. Then I got married, thinking life could get better. Then I had three daughters and no sons. From Day 1 of my life it seems to be headed downhill. Each day I pray I hit rock bottom to stop the descent but the fall just seems to continue.

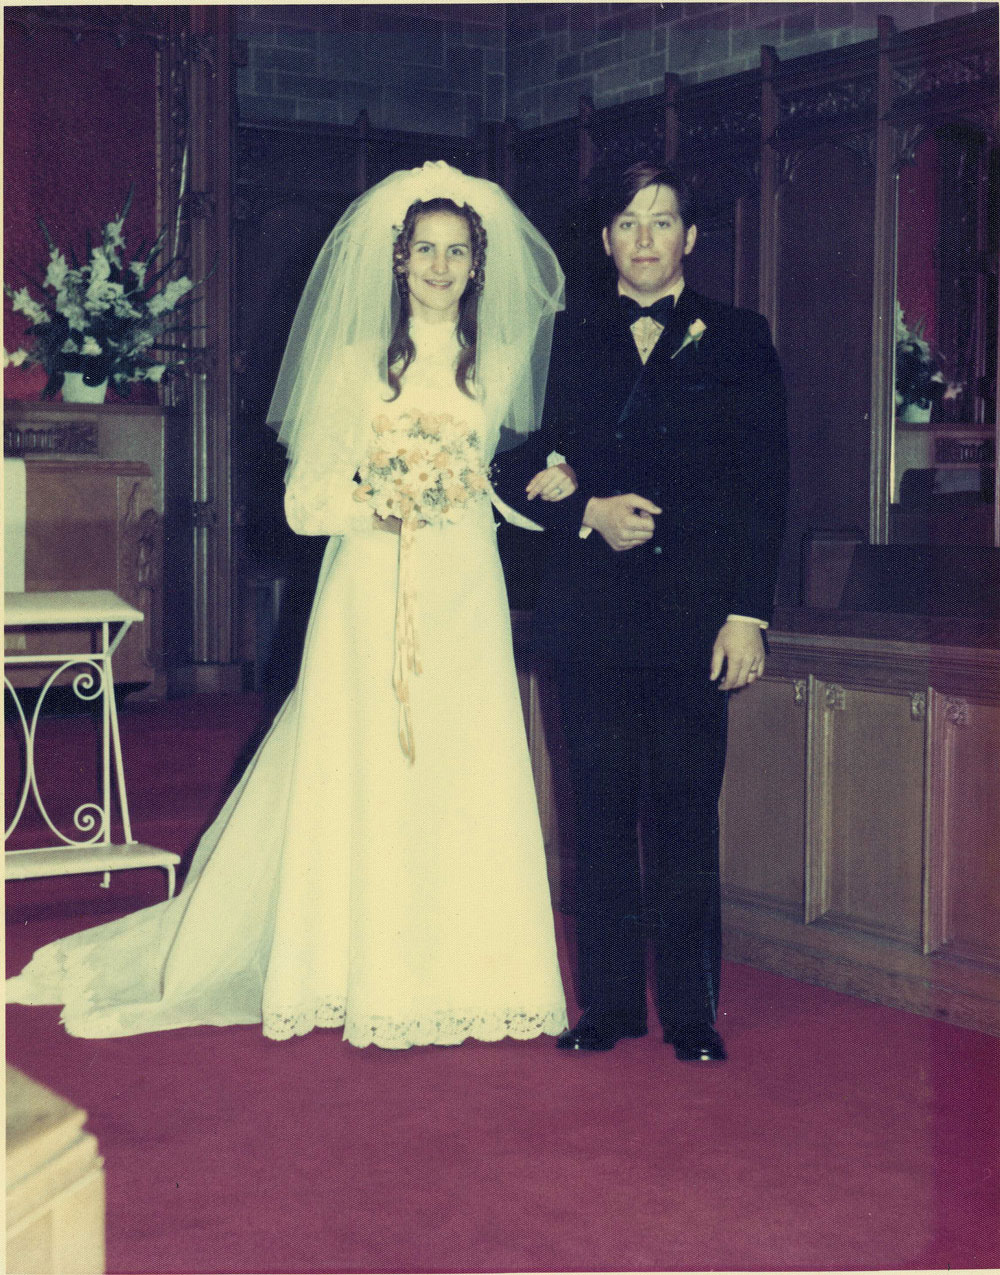
(June 17, 2022, we will be at Disneyland celebrating our 50th wedding anniversary. I have learned if I do not laugh every once in a while life is really dull. A photo from a long time ago. Yes, I got very lucky when I met Joyce October 5, 1970. I remember the date and approximate time - 5 p.m. because of a job change.)

Thanks,
Rex

1 Like

I don’t use the skirt much at all, only Loop and Brim for most of my 3DP years. If you don’t have an enclosed 3DP and doing stuff like ABS then I’ve seen the Skirt option used to keep any cool air from hitting the base of the model like a wind block. Otherwise I don’t now why it’s used.

The Brim should be understood as it will help in lots of cases. Like printing a very round ball which would otherwise have a very small contact area with the bed and likely fail as the overhangs work at wiggling the little base loose. In cases like that, I might add a 5mm wide brim(10mm circle). Your cookie cutters have a natural brim in how they are often printed upside down so the lip is your ‘brim’.

Doug,
On my PrusaSlicer defaults what appears to be the skirt is not the brim, but a few strands around the overall print.
I no longer use the Brim unless, as you say, the print has a small footprint, OR, it is a valuable / high time consumption print. When you are talking a 8 hour print, what is another 8 minutes for insurance?
Printing Christmas ornaments right now in gold and silver. A lot easier to have multiple colors of filaments than to paint the prints.
Thanks,
Rex

1 Like