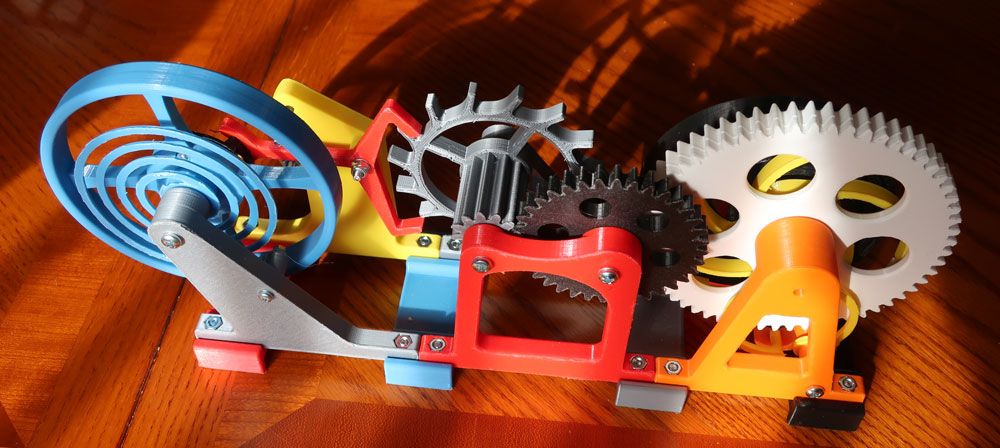
By LarkysPrints
I built the Watch Escapement Desk Toy by LarkysPrints because I like knowing things and I like to teach people how things work. In order to make the explanation easier and the presentation more colorful, I used multiple colors. With that in mind, if you want to follow that track of thought and production, I recommend you print the four brackets, Part Number (PN) 11 of Drawing 1, PNs 11 and 21 of Drawing 2, and PN 25 of Drawing 3 all in one color. And PNs 1 – Spring Frame Back and 8 – Spring Frame Front of Drawing 1, PNs 1 – Train Frame Back and 10 - Train Frame Front of Drawing 2, and PNs 1 – Balance Frame Back and 17 – Balance Frame Front of Drawing 3 all in one color. After that, mix them up as you can. I have seven colors and used them all. I should have done better on my mixes.
The Bill of Materials is wrong.
There are four M3 nuts – PNs 3, 4, 36, & 37 on Drawing 3.
PN 25 on Drawing 2 is shown as M4 x 60, this interferes on my print with PN 8 – Escape Wheel of Drawing 2. M4 x 45 fit perfectly.
PN 23 on Drawing 3 is shown as M4 x 40, this is way too long in my print, I used a M4 x 30.
In the U.S. at a local True Value Hardware store the cost of metric hardware exceeded $22. In the U.S. I recommend you use one of the U.S. standard hardware conversions. One bolt was $0.79 U.S. in metric, similar size in #8 was $0.19 U.S.
Mine is made out of PLA and I can get it to ratchet through two or three clicks before it stops. I need to work on the adjustments some more but have other projects demanding my time.
Be very aware of how the parts are going to print when you slice them.
Balance – “Back” or smooth face of the balance down saves supports.
Balance Frame Back – Ensure it is lying flat – watch the extensions for the bolt stabilizers.
Balance Frame Front – Ensure it is lying flat – watch the nut tower – facing up.
Bracket – Four are needed, print with the feet up.
Escape Wheel – Toothed gear up.
Gear Train – Small gear up.
Hair Spring – Spring on the hotbed, square drive extension up.
Impact Pin Housing – Extended portion up.
Main Spring – Ensure that the shallowed area for the lug from the Spring Frame Front is up.
Ratchet – Square drive up.
Ratchet Spring – Pin up.
Spring Barrel – Full face down, concaved tooth area up.
Spring Frame Back – Smooth back down, extensions up.
Spring Frame Front – Pin up.
Train Frame Back – Smooth side down.
Train Frame Front – Smooth side down, bolt boss up.
My print time for the 23 files was just over 50 hours with the Brackets and Gear Train printed “the expensive way.” I am using a Prusa i3 Mk3S+ and the PrusaSlicer.
Neat project, a lot of work in the design and I appreciate it. Now I need to get it to work.
Thanks,
Rex