Issues with Lightburn - Preview and results not the same

The PDF is the complete statement with photos sync’d.

I am having issues with three associated projects. I am trying to replace me energy eating branding iron for burning my projects with an identity. Lightburn is showing an acceptable preview and the Ortur is not producing it. I have three sizes formatted, 2", 3", and 4". The files can be e-mailed - raschildhouse@cox.net or rex@schildhouse.com.

A few other projects on the Ortur came out really nice. I love the precision of the burns. Even with the 2" burn, the text is readable.

The 2" burn:

The 3" burn:

The 4" burn:

An original branding iron burn:

Any comments on how to resolve this would be appreciated.

Thanks,
Rex
Ortur-Lightburn Made in Workshop Issue-2021-01-15.pdf (513.1 KB)

Does the machine seem to move around or is the engraving so fast that it could possibly move the machine?

My guess would be 2 problems. One is your machine is moving due to speeds being too fast. Could be laser speed or could be moves. Look for setting your max x and y lower in your machine settings.

The other problem where it stops engraving the year could be related in that your machine is moving around so much it triggers the onboard accelerometer and the machine stops engraving. Again, slow down or at least mount your machine on something stable or maybe just camp it down.

I had problems with the wheels not being round. Not sure if I damaged them, or had them too tight on the rail, or why they weren’t round. I found new ones on Amazon and replaced them, then the print was much straighter.

Here is a link to the package of wheels I bought:
https://www.amazon.com/gp/product/B07GF9VGHD/ref=ppx_yo_dt_b_search_asin_title?ie=UTF8&psc=1

There is a cam on one of the wheels to adjust how tightly they are forced against the aluminum extrusion that form the rail/track for the wheels.

@Rex are you getting these messages?

Doug,
Yes, sorry for the delay. Working on a solution. Or more questions. Or, to provide some more information.
The Ortur is anchored to a piece of 1/2" plywood with French Cleats so it hangs up really nice, out of the way. The base is about 14" by 22" and it appears pretty stable. I am placing it on the Shapeoko, which is stable in itself. Movement was set as 75, now 30, changed burn power from 50 to 20 - Speed x Power = Burn and I want a brand, not a cutting. And identical results even if I move the pattern to various locations.
One of my first projects was to burn a grid for placement and the X and Y lines of that grid are straight. Attached is a photo of the grid I burned today. Lines are pretty straight and true to image.
Just used Image Trace to build a new file and headed down to the workshop to try it.


Headed down to the workshop to try another run.
Broke the 2" burn file down to individual elements, in an attempt to burn each element in its own run. Did not work. It appears they moved from their original placement and I do not remember doing that.
Oh well, off for another run - after taking puppy to the corner and back.
Thanks,
Rex

Seems there are lots of things going on here if not only are lines not getting etched straight but also items not getting placed correctly.

IMO it is time to start on some scraps and start working out each problem.

if you have the machine bolted to a piece of plywood and that’s either good and heavy or it is held down from moving you know that’s not the problem. You can also tell if it doesn’t finish a design by looking at the status/progress bar in Lightburn.

For the lines, they don’t look straight to me but the grain is showing so if a straight edge proves the lines are straight in X and Y then that’s not a problem either.

Onto the burning of each element… make sure the machine goes to the home position first so it knows were 0,0 is. Then you need to make sure you have “Absolute Coords” set for the Start From: setting. It’s just below the Start button. I will often used the “Cut Selected Graphics” to etch different parts at a time and to use the framing options to make sure things are where I expect/want them to be.

1 Like

Doug,
Will look into the info you provided. Attached is a test run of two simple lines of text. Came out 4.5 on a scale of 0-4 - better than expected.
What I am thinking, because the branding burn is a compilation of numerous elements, is that the elements have unseen borders and that is interfering with the other elements.
Thanks for the - take it to Home / Absolute Coordinates info. I am sending it to “Home” for the individual element burns and I dissected the the mass into individual elements and things went all over. Most likely my mistake.
With the bad weather coming, I have a CNC project for tomorrow, the workshop is not heated. Then I will bring the Ortur up to the house and work in the dining room.
Have you found or seen a face shield effective with the light spectrum of the Ortur? My searches are not showing up anything and the provided glasses and my eye glasses are simply not agreeing. I purchased additional glasses from Europe and they are somewhere in the world.


These letters are 0.25" high. Impressed.
Thanks,
Rex

1 Like

Very good Rex, it looks like it’s not the printer and could be the design. There’s so much of these things in the design side just as with 3D printers I learned I needed to learn 3D CAD. Fun but when you just want something to work it can be tough getting to that point each day you try something different.

Oh man, a laser eye protection face shield would be great! I too despise having to where the laser glasses over my regular glasses. They do sell the acrylic in the right color for blocking the laser wavelength but don’t know if it’s as effective thin enough to work as a face shield… If it does then we can make the parts to hold the laser protective sheets. I made lots of face shield holders for hospitals when Covid-19 first hit…

Doug,
Will be on the Shapeoko tomorrow. One test I want to try is putting two lines of text next to each other. I suspect that there will be interactions.
And want to ensure my single element burns are from Home.
Will let you know how it goes after the bad weather starts.
Thanks,
Rex

1 Like

Doug,
Send me an e-mail, rex@schildhouse.com or raschildhouse@cox.net
Something is going stupid. Hooked the big computer to the Ortur and everything is on Y=0 regardless of where it is in Lightburn.
Thanks,
Rex

First,
Thanks for all the input from the group AND ESPECIALLY DOUG. I took it “off line” as it was getting a bit messy. So, I tightened the Y axis belt a little, based on input from Doug. And noticed a switch down there. Seems that switch was not hitting the stop so the Ortur never seemed to find Home. Tried bending the tab, no luck. Had to wrap the contact post in electrical tape, trial solution. Now the Ortur bumps Home, pulls off, bumps Home again, and is happy.
The Y belt is a bit tighter.
And this is the first run of the 3" brand.
MAYBE resolved.
Thanks Doug and the Guys.

1 Like

Okay, update on the update. Late night work and posting compounded to really screw things up. And I need to clarify X and Y axis of the Ortur. (Thanks for the additional input Doug.)

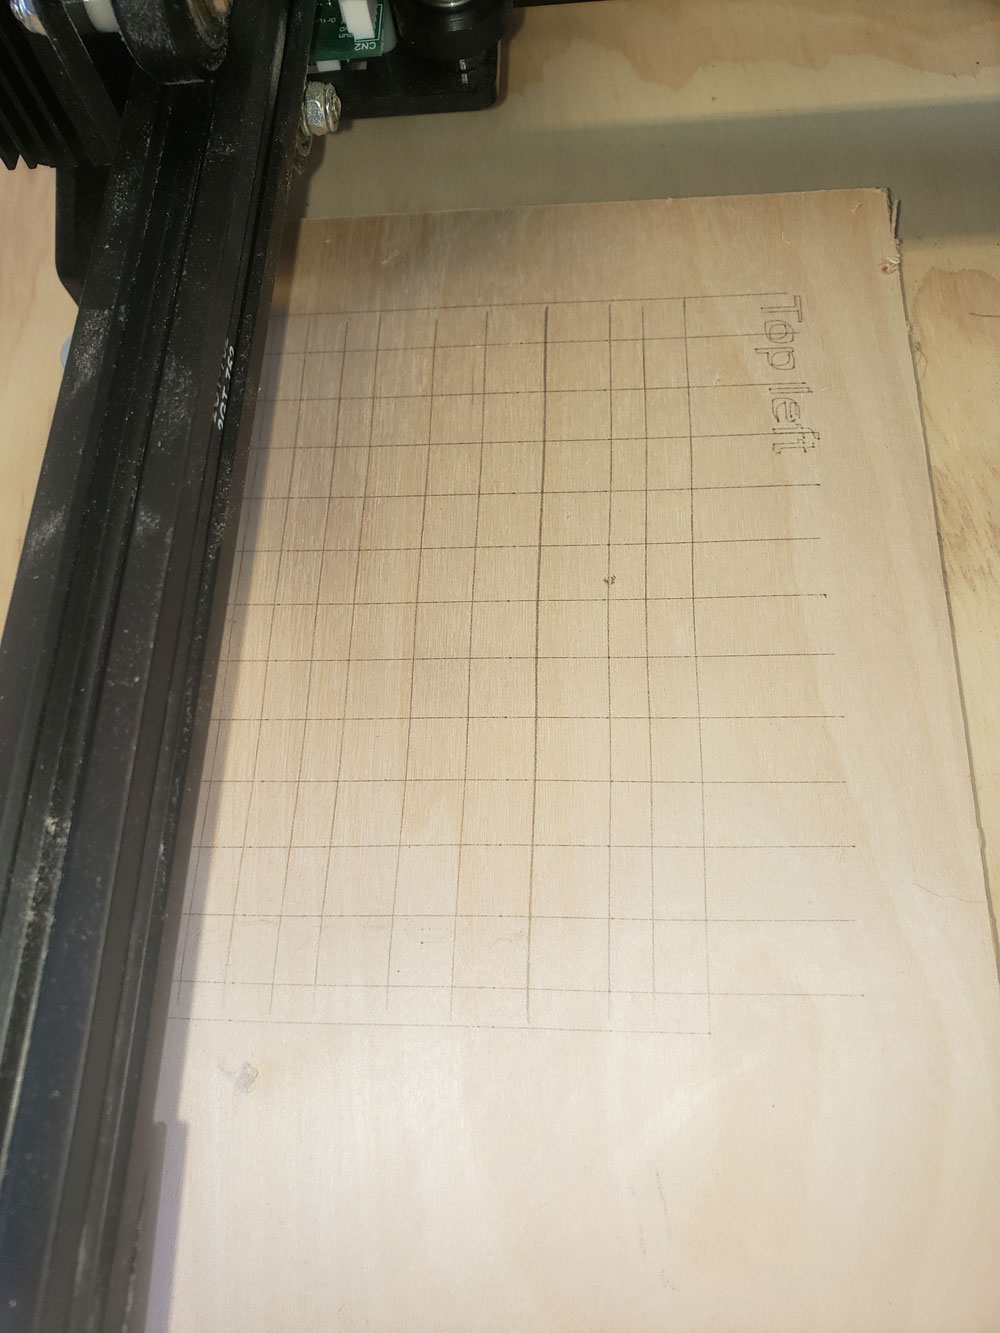
When I got the Ortur 180 x 180 several months ago I put it together and it worked fine, no issues. I installed it on ½” piece of plywood and etched a grid on the plywood as a reference. No issues and nice output on some sample text. Then, with French cleats – suggestion or comment from someone on the Forum, it went up the shop wall for other projects and missions that had priority. Having the Ortur on a ½” piece of plywood that is approximately 23” x 15” gives it a pretty stable base.

Issues were interacting and with the help of numerous Forum members, especially Doug LaRue, I will step you through my issues with the Ortur and their outcomes.

I updated the firmware to 1.40 in the middle of this process. Ortur provided good guidance and there were no issues.

There are tons of videos on YouTube about LightBurn and I watched, learned, from many of them. And SDFWA has a good video on the Ortur and I watched it in its entirety once and started it several times. Maybe this is a repeat of some of their materials.

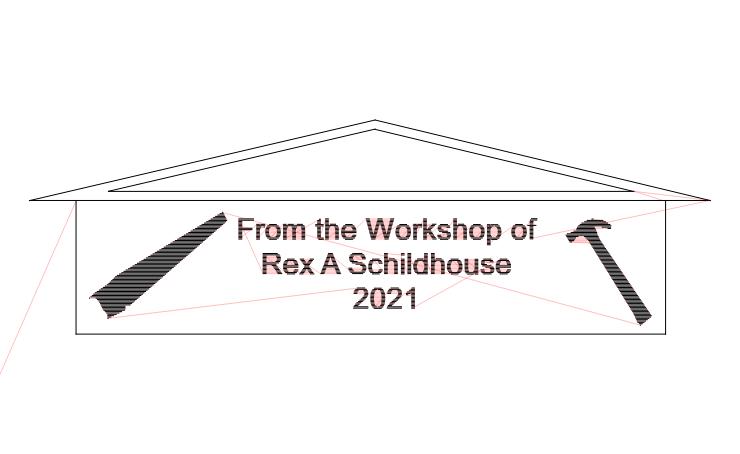
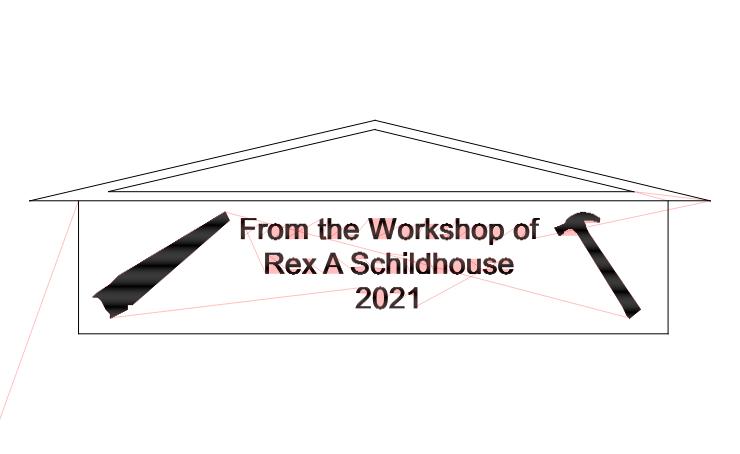
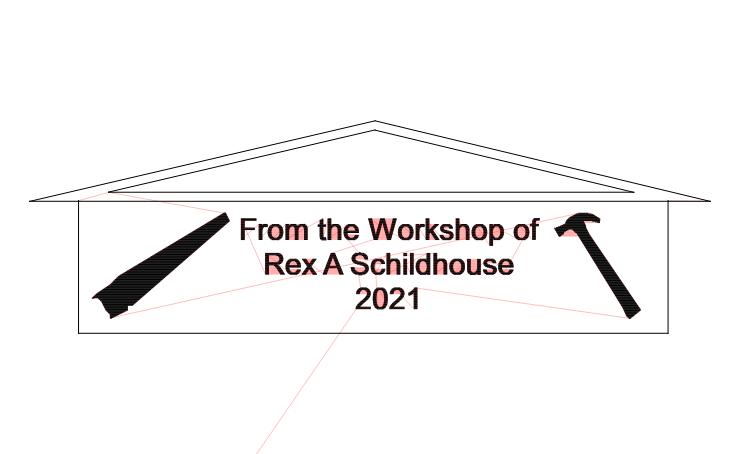
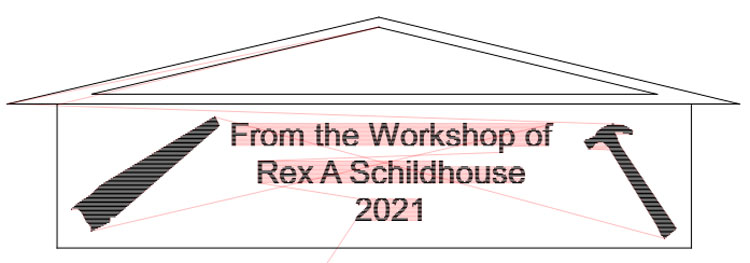
When I had time I added LightBurn to my software library and brought the Ortur out of hibernation. And it had issues. Here is a copy of what LightBurn had as a preview.

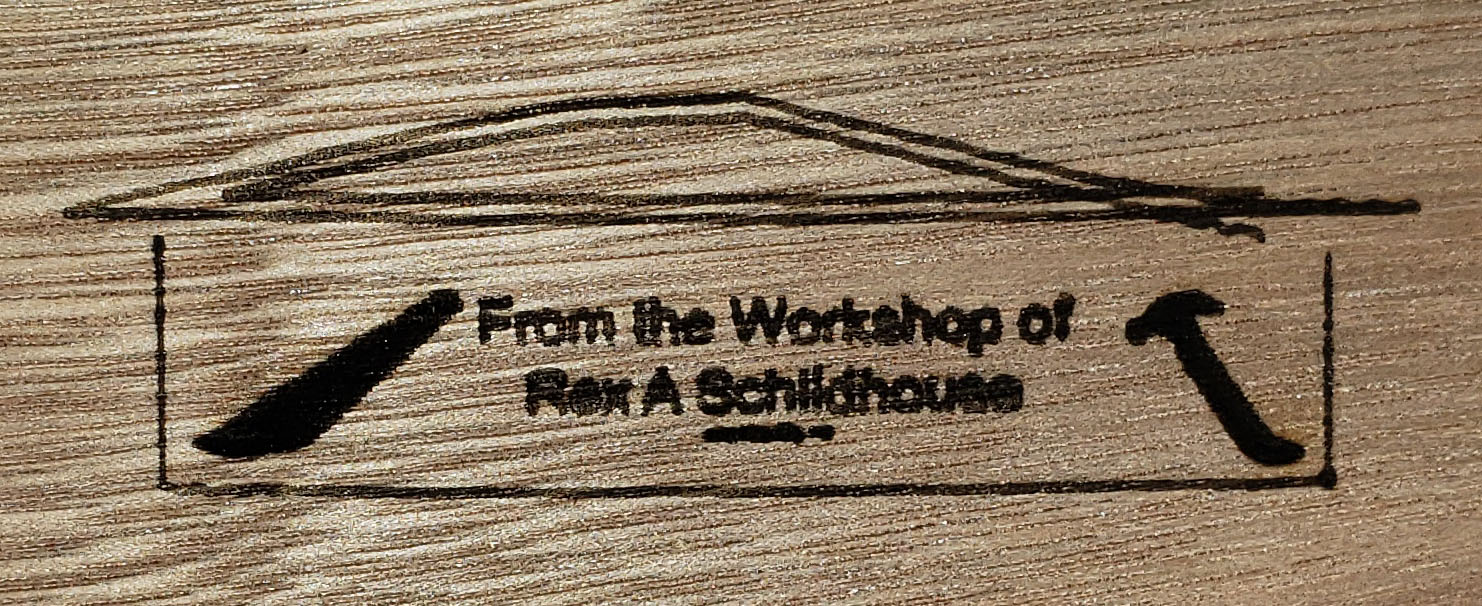
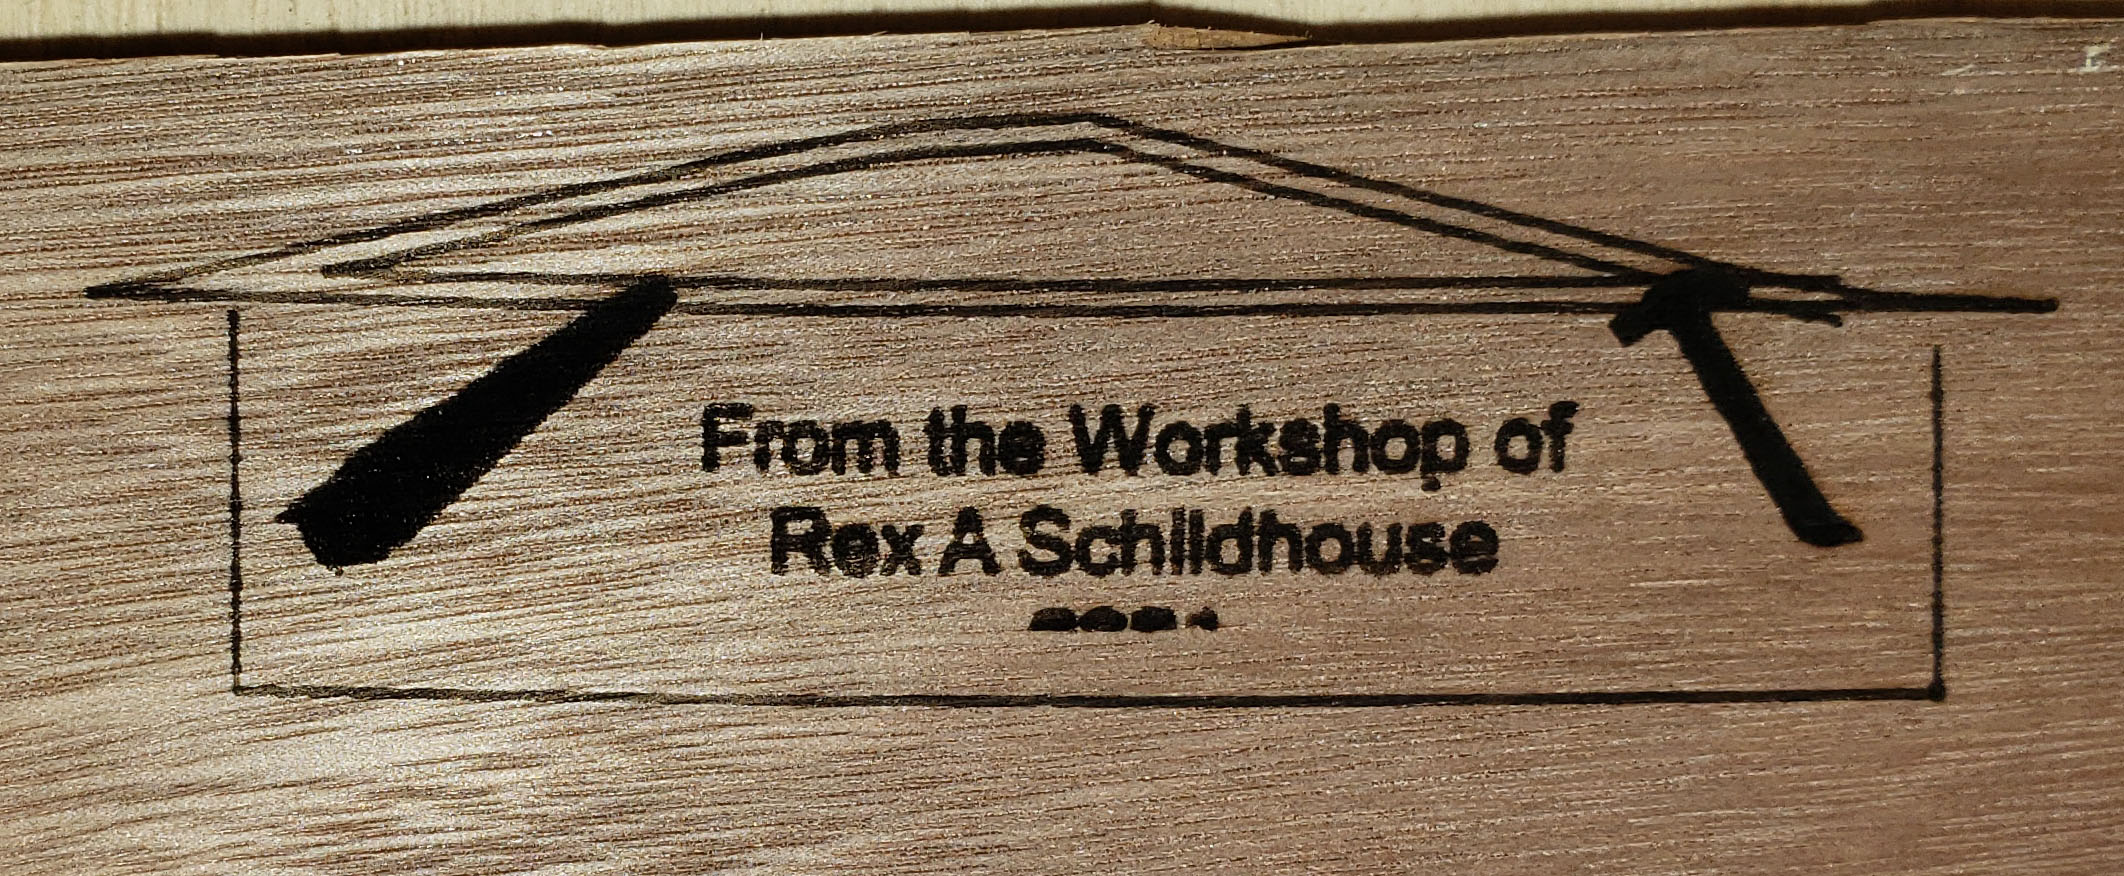
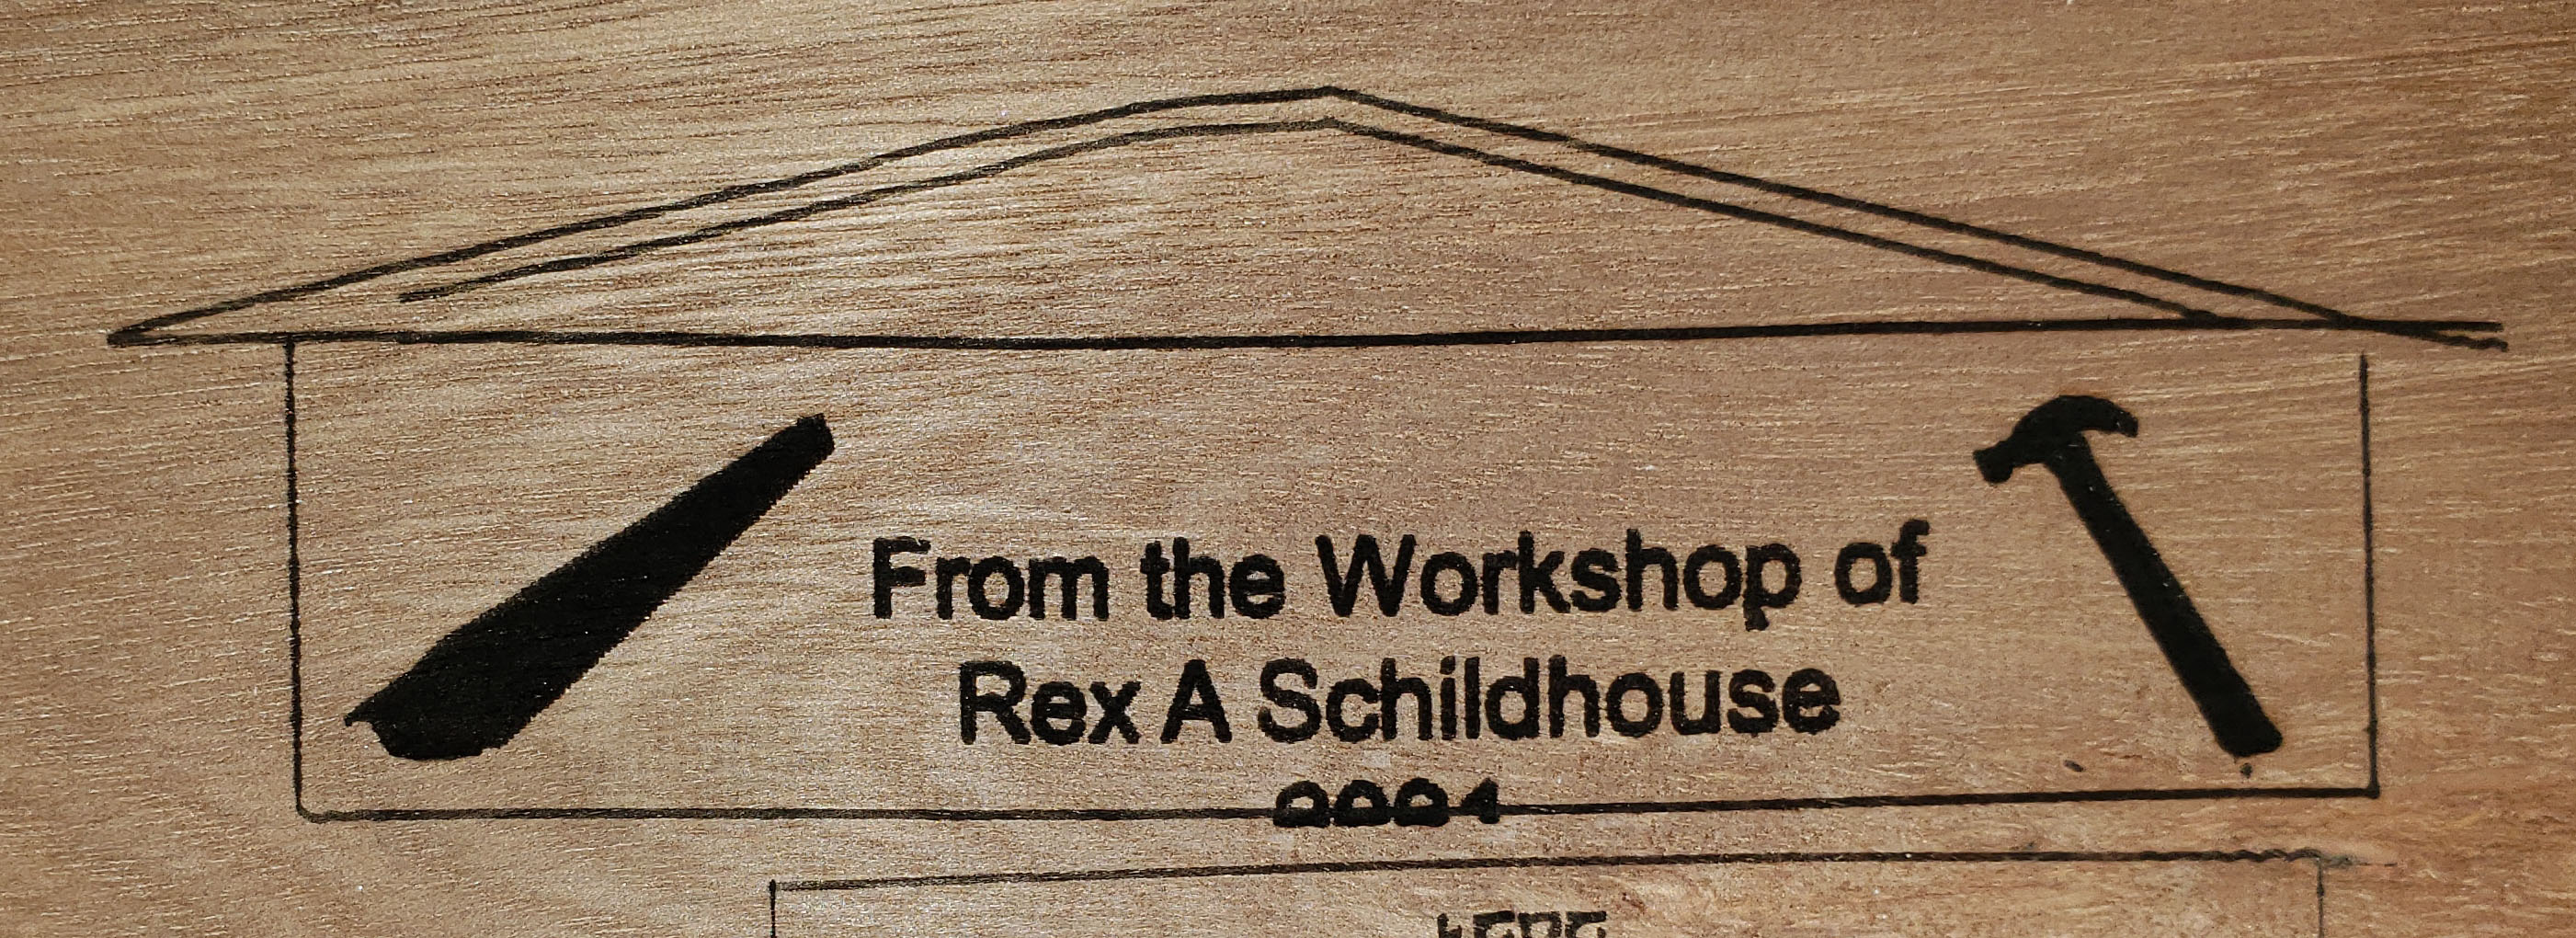
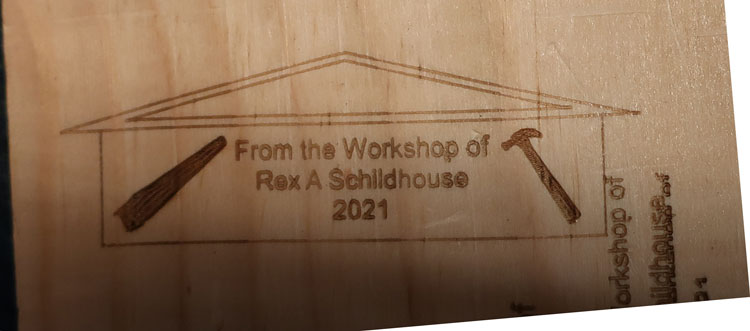
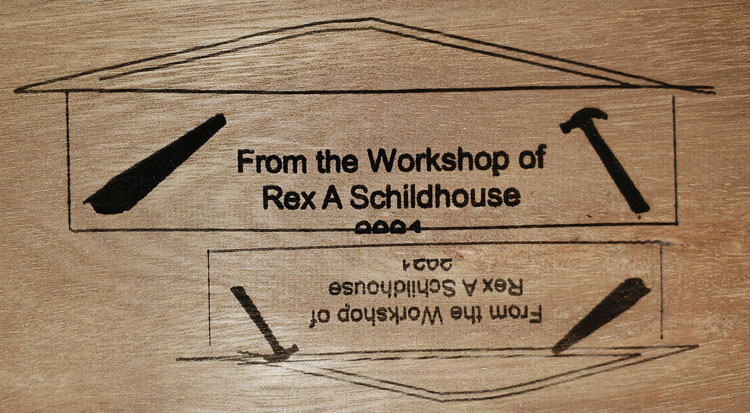
Here is what the Ortur actually produced. The lines of the roof are bad, the date is bad, etc.

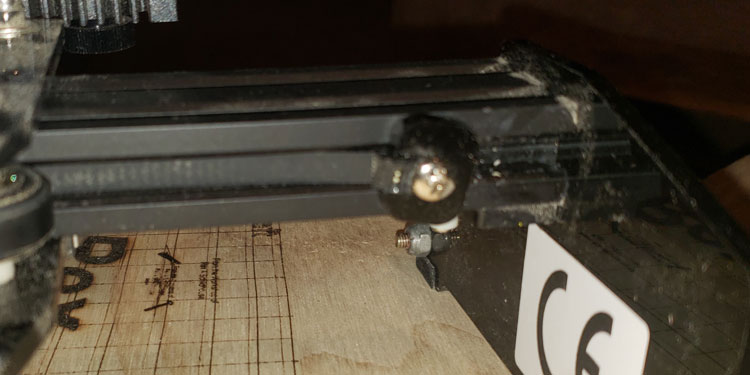
And with sample, simple text, the Ortur was performing well. So I was confused. Searching the Internet provided no solutions so I went to the Forum and got some really good comments and I started working on it. Knowing one thing and realizing that one thing are not the same. In the process of solving the issues I adjusted the tension of the Y axis by removing this screw, pulling the belt through 1/8” or so, and reinstalling it. That addressed the Y axis belt “stretch” that probably occurred while the Ortur was hanging in the workshop over the summer. The photo is before tensioning.

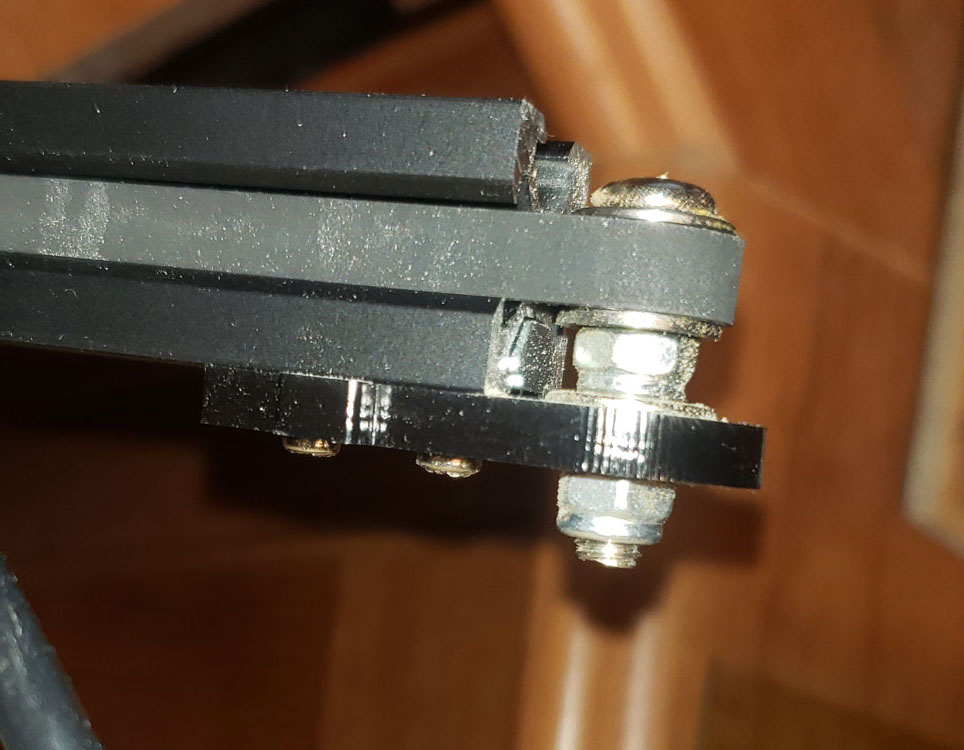
Then I tightened this belt, thinking this belt had something to do with the Y axis, it was late at night and I was moving from frustration to elation. No, this pulley at the end of the arm is only for the X axis belt. Now it is snug.

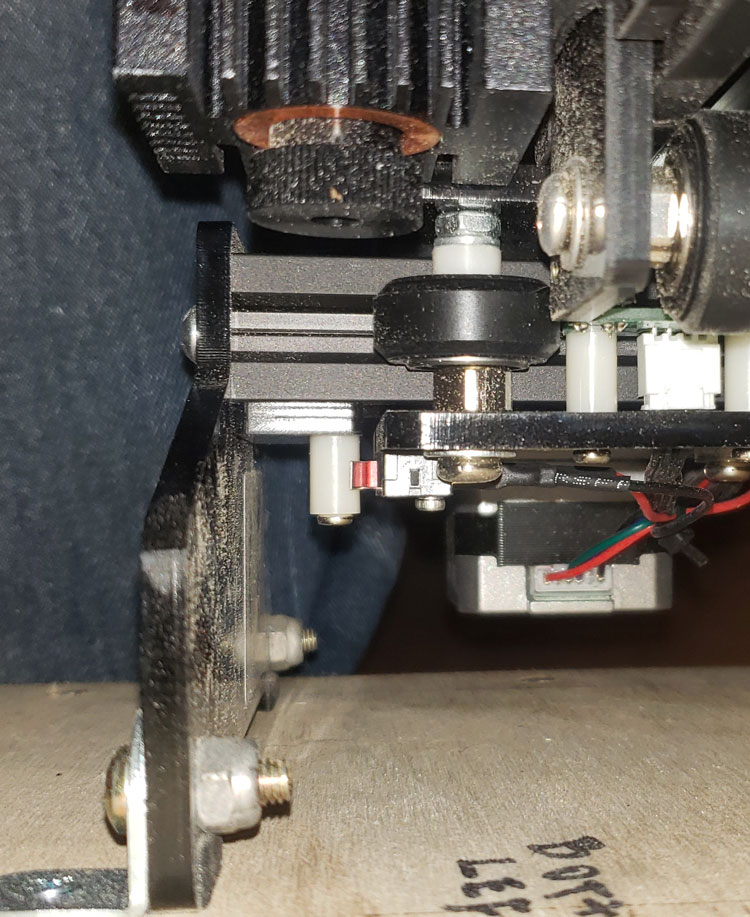
To get to those two screws I had to remove the Ortur from its deck. When I did that I realized there was a switch underneath. With an electronics background, got curious. One of the issues was that on a “Home” command the Ortur went to home nice and quietly, at other times it tried to motor through Home for way too long. The post / contact was inconsistent so the first effort was to bend the tab to ensure activation. Not consistent. Doug LaRue said that the post on his (non Ortur) laser was adjustable. So I tried with the Ortur. Moved it a bit, not much. Combination now is that I have consistent contact between the Y limit switch and the post. I think Doug’s comments about swapping hardware is good, however, at the moment, “If it ain’t broke, don’t try to fix it.” (If it ain’t broke, take it apart so it is.)

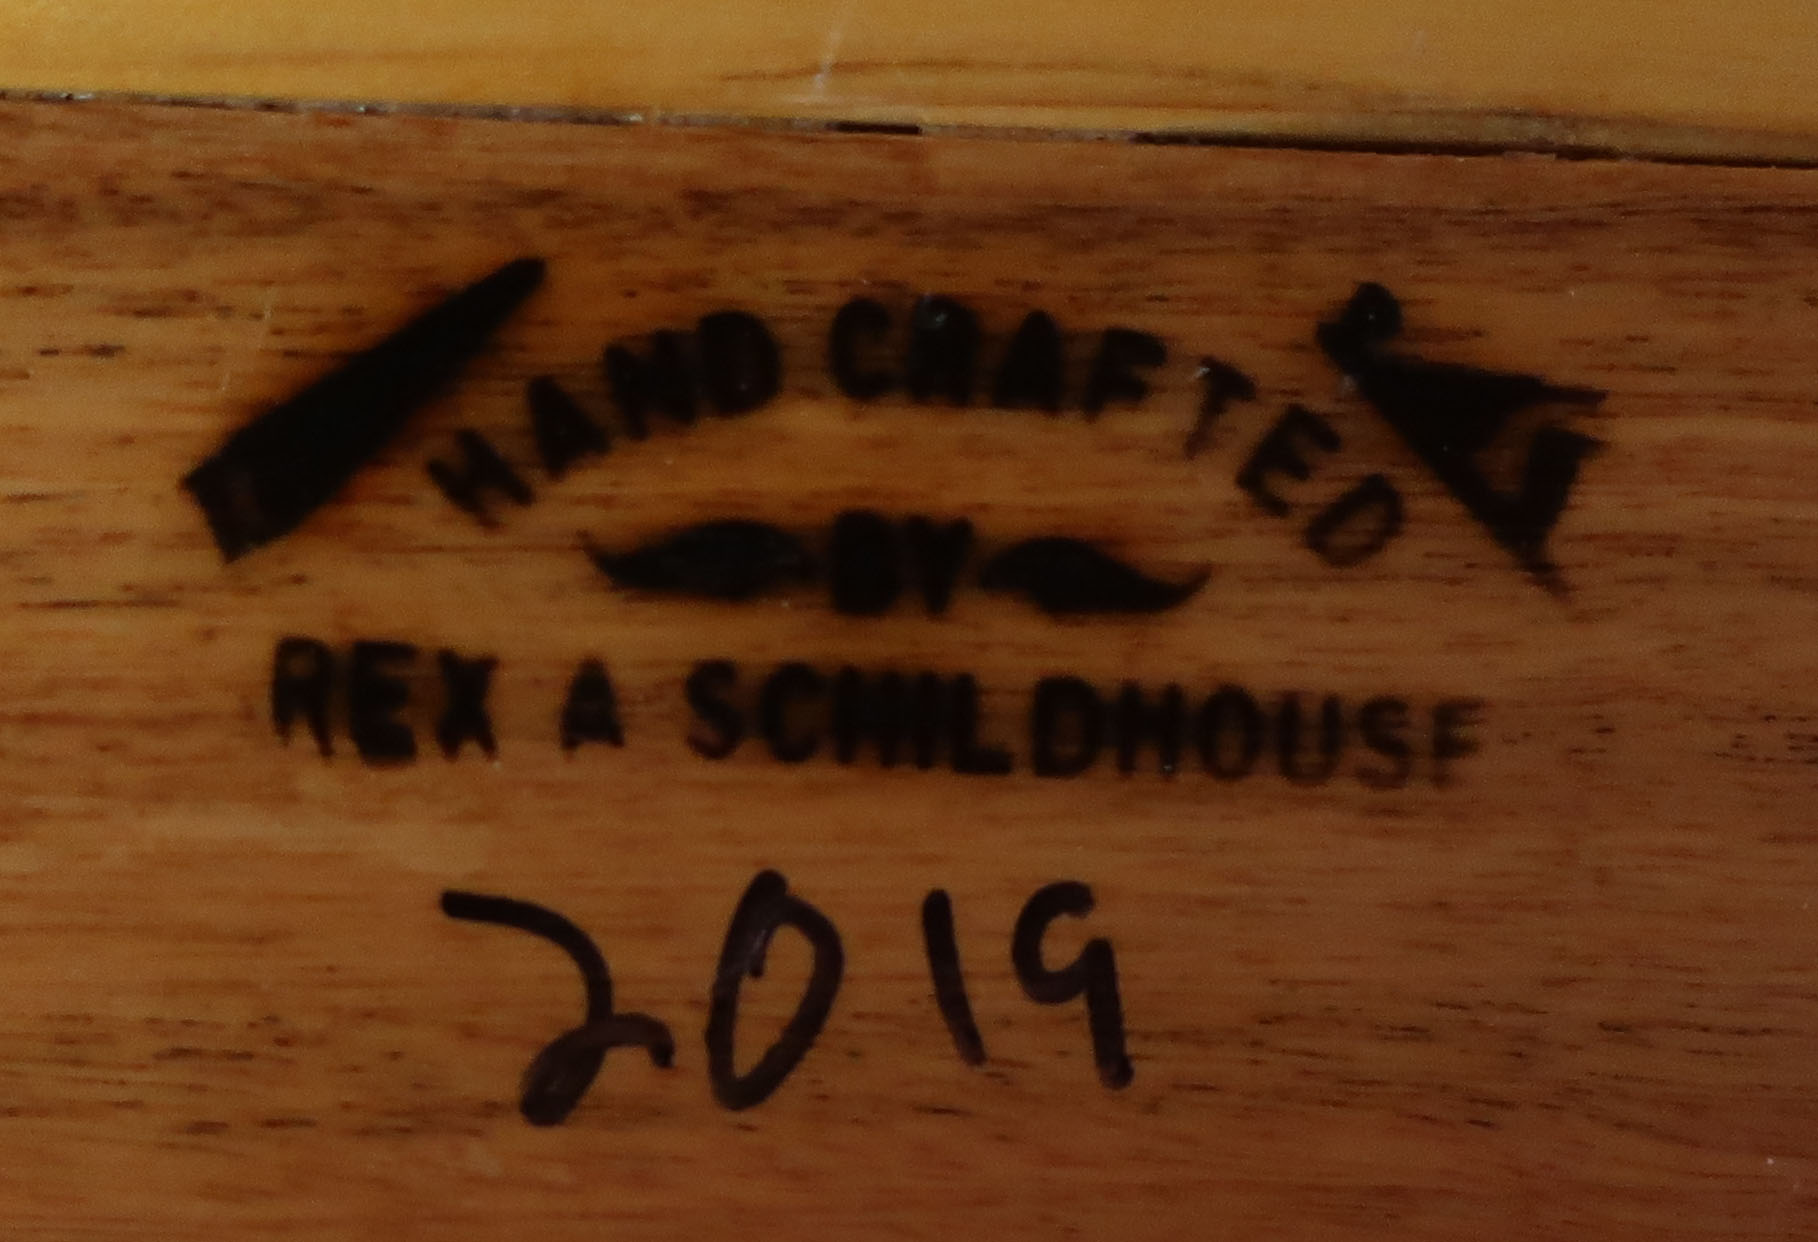
Back to running some test burns of my 2”, 3”, and 4” brands. All came out really well.

Did some test burns of text and other figures, all came out really nice. The Ortur is up and running for what I want it for primarily – to brand my toys and work instead of using my many years old electric branding iron which takes 15+ minutes to heat up and consumes power like a Naval Aviator devours steak at an all you can eat buffet. (What is a salad at a prime rib dinner? Interference, a delaying action.)

Impressed with the precision of the burns of the little Ortur, which was purchased based on recommendations from the SDFWA Forum.

Thanks to the Forum members for the help,
Rex

3 Likes