
and if we talk about it enough we’ll start to learn about the techniques used. 
1 Like

I am a complete newbie to epoxy but very interested in learning.
2 Likes
I would be very interested.
2 Likes
Travis that sounds great, Absolutely would like to learn more!
1 Like
I too am interested in this topic.
1 Like
So cool Seeing my work here! Thanks, Rob!
my Instagram is @shaneshardwoodstore if anyone has Instagram and wants to take a look. That is pretty much the only place I post my projects.
2 Likes
Shane…thanks for your patience and teaching me what you have. If you are willing to participate in a meeting with the SDFWA I can tell by the responses in this posting others would like to participate and learn. Maybe we could work together to put a little presentation together - if you are interested and willing.
1 Like
I’d like to be in on that training.
What about using the laser sig in Jan.?
1 Like
@alewisca To do the multi-pour results requires the clean lines of CNC. However, to get really precise detail with a single pour the laser works GREAT. While I muddied the waters by mixing both concepts here, I believe “multi-pour” is the predominant theme of this thread and hence CNC.
That said, etching shallow depths with the laser and doing side-by-side pours can produce some remarkable results. We have people like Lance and Cassiano who have experience with exactly that and I’ll bet we could muster others. Shall we give it a try?
Perhaps this is SDFWA’s epoxy moment? 
1 Like
It was I who muddied the water by mentioning lasers early on in this conversation. I had not considered that multi-pour was literally pouring OVER a previous pour and as soon as @SDFWA mentioned the requirement of the CNC it dawned on me that was part of the technique required.
But considering there is some level of overlap, at the very least the video of that SIG where it’s presented should be cross posted to the Laser SIG.
2 Likes
I don’t know whether you’ll have this topic at the next SIG
but just in case I wanted everybody to know it’s posted.
Anyone can register for the Zoom link with a free account.
1 Like
Those look awesome. I would like to learn more about the process.
1 Like
Count me is for learning more about this technique too.
2 Likes
1 Like
Regarding sealing the wood with optically clear UV curable glue… Here’s what is used on mobile phones and tablet screens - https://www.amazon.com/gp/product/B01B2ZLB5O
I don’t know how well it’ll spread and if the viscosity is so low it soaks in too much and requires too much material. There are dozens of this type of glue around these days and probably varying characteristics.
1 Like
Good Morning Travis, I finished up a couple of epoxy cutting boards and thought I’d post them. What I was wondering is if there is a projects section/thread (didn’t find it) or if I should just tack onto one of the epoxy inlay threads… What would you do?
Ian, given your calibre of work I can’t wait to see them!
Please post them here in the forums, within this thread
or if you prefer then in our Projects Built thread.
And if you don’t mind then I may post them to our Instagram feed.
I did a couple of serving tray / cutting boards recently. One of which I used the techniques talked about in the SIG meeting a few weeks ago. One was used many times before I was able to get pictures…
First the little one…
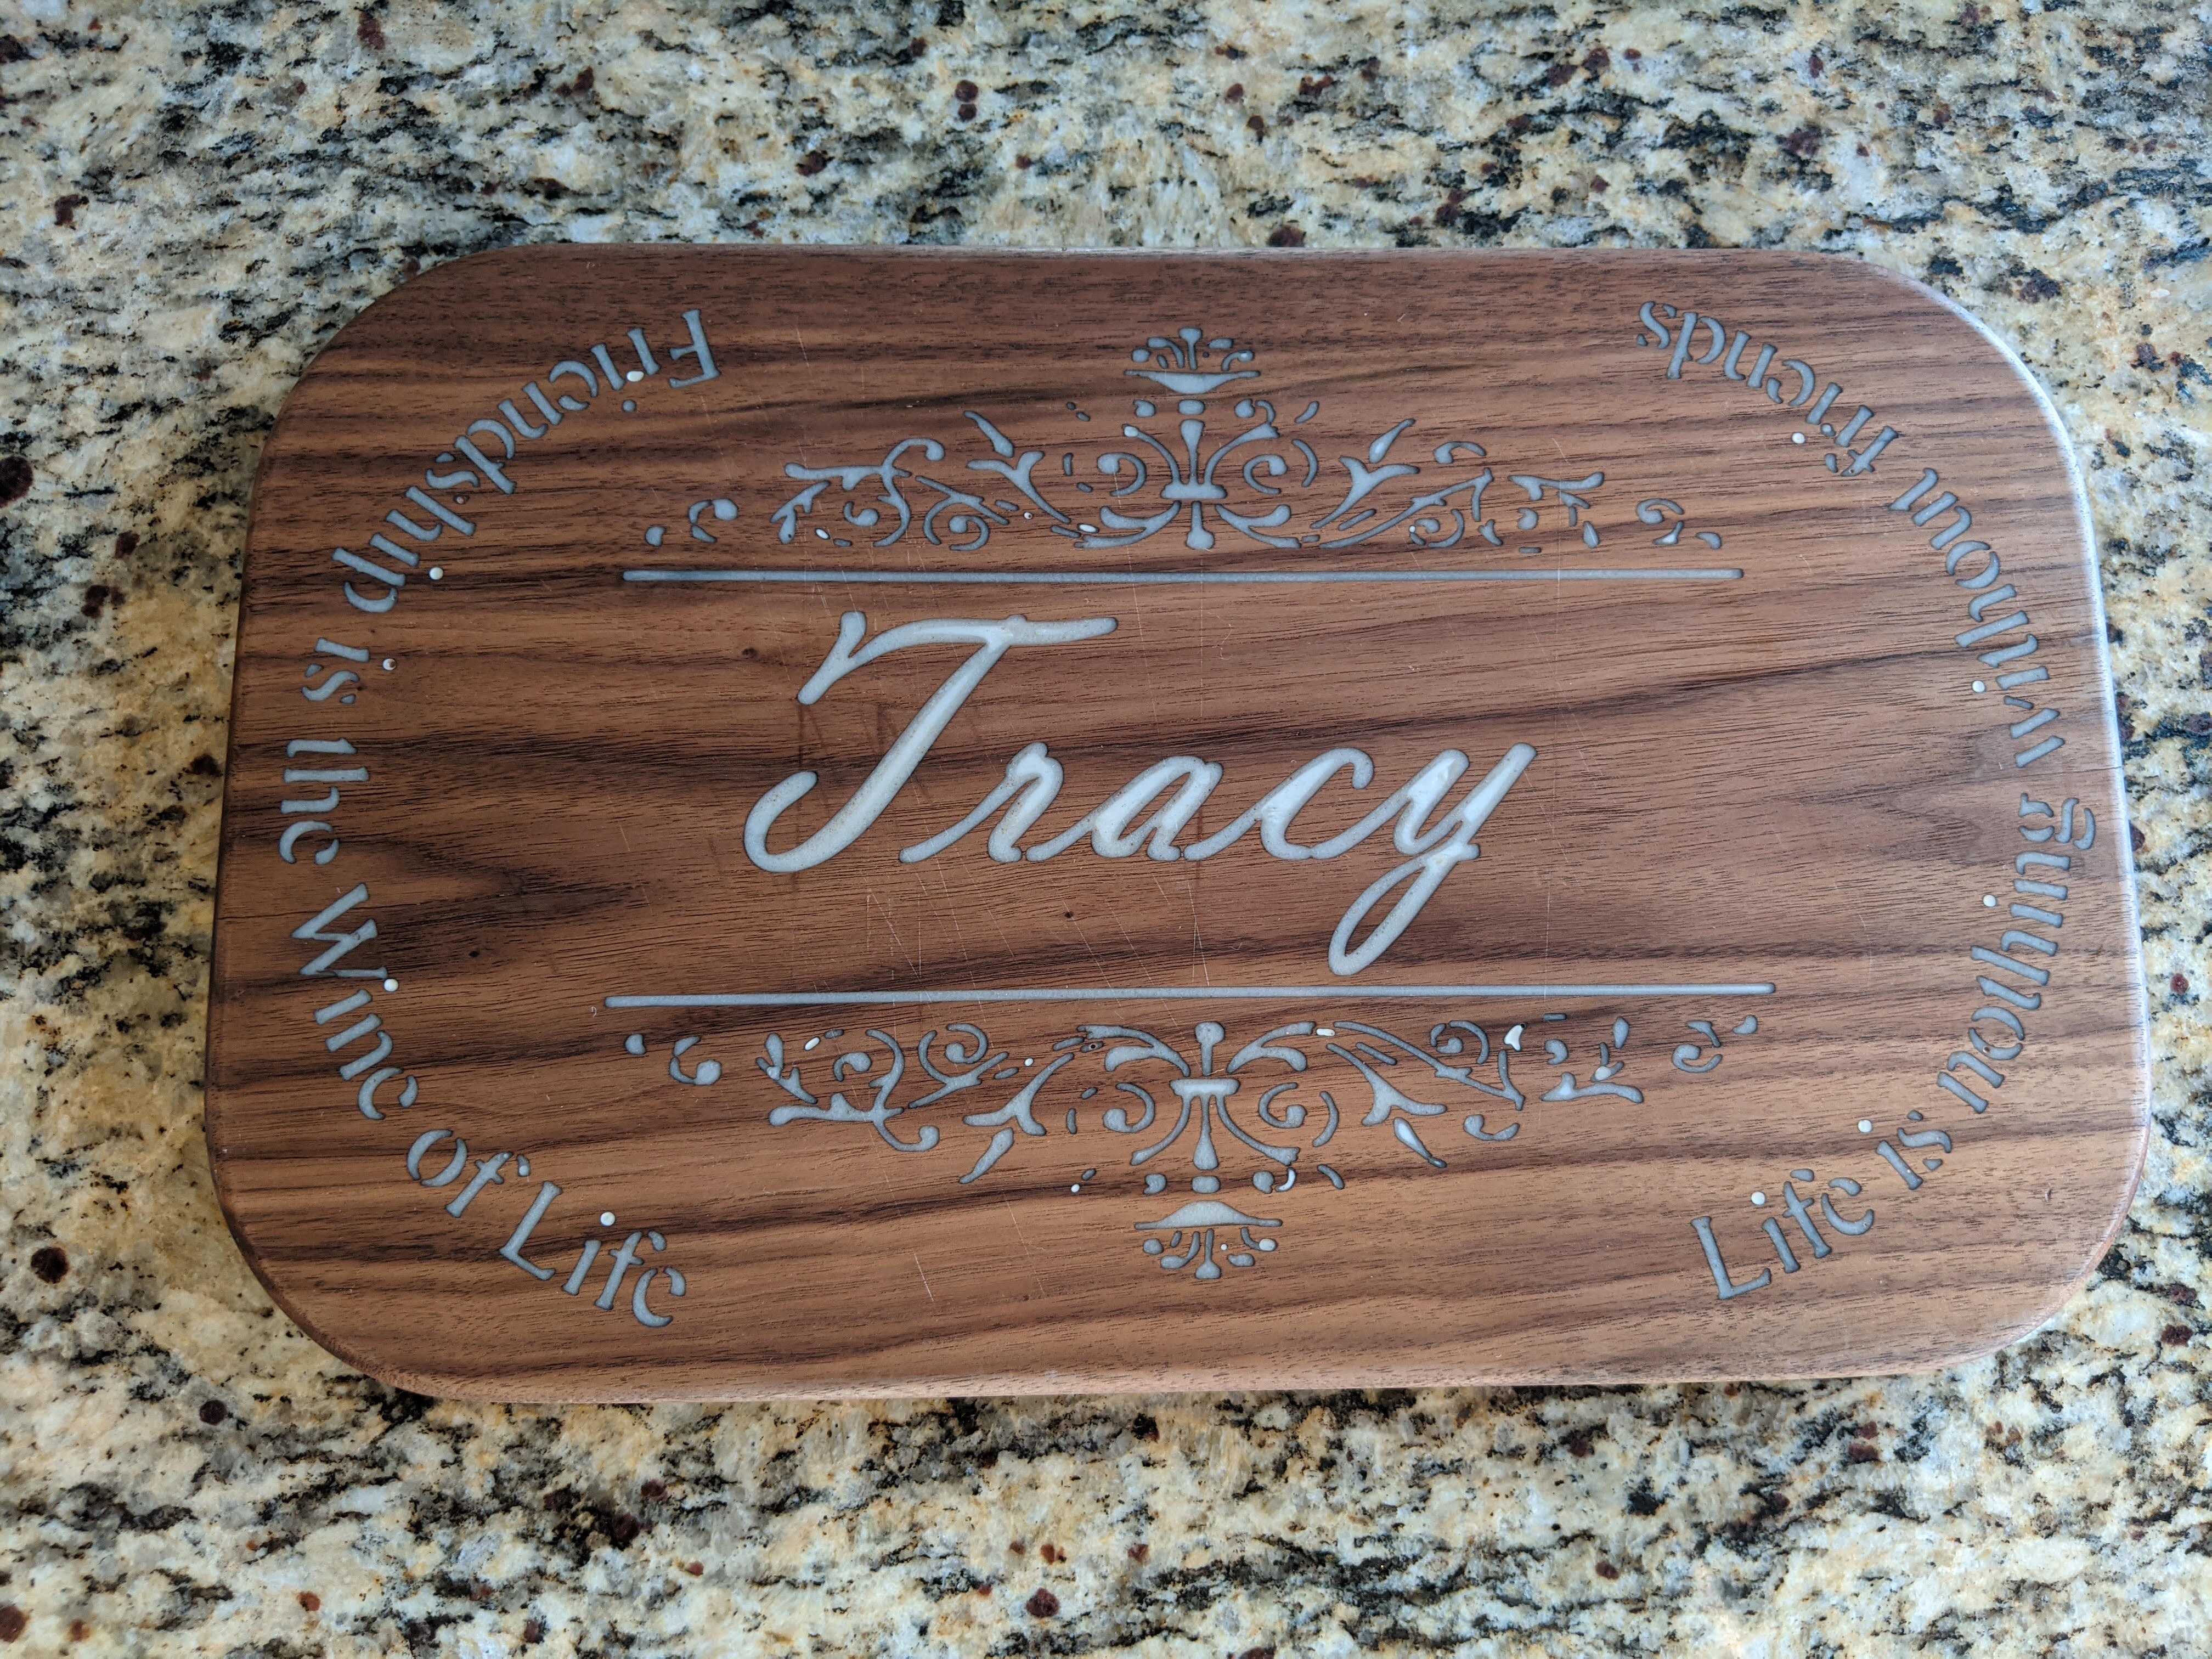
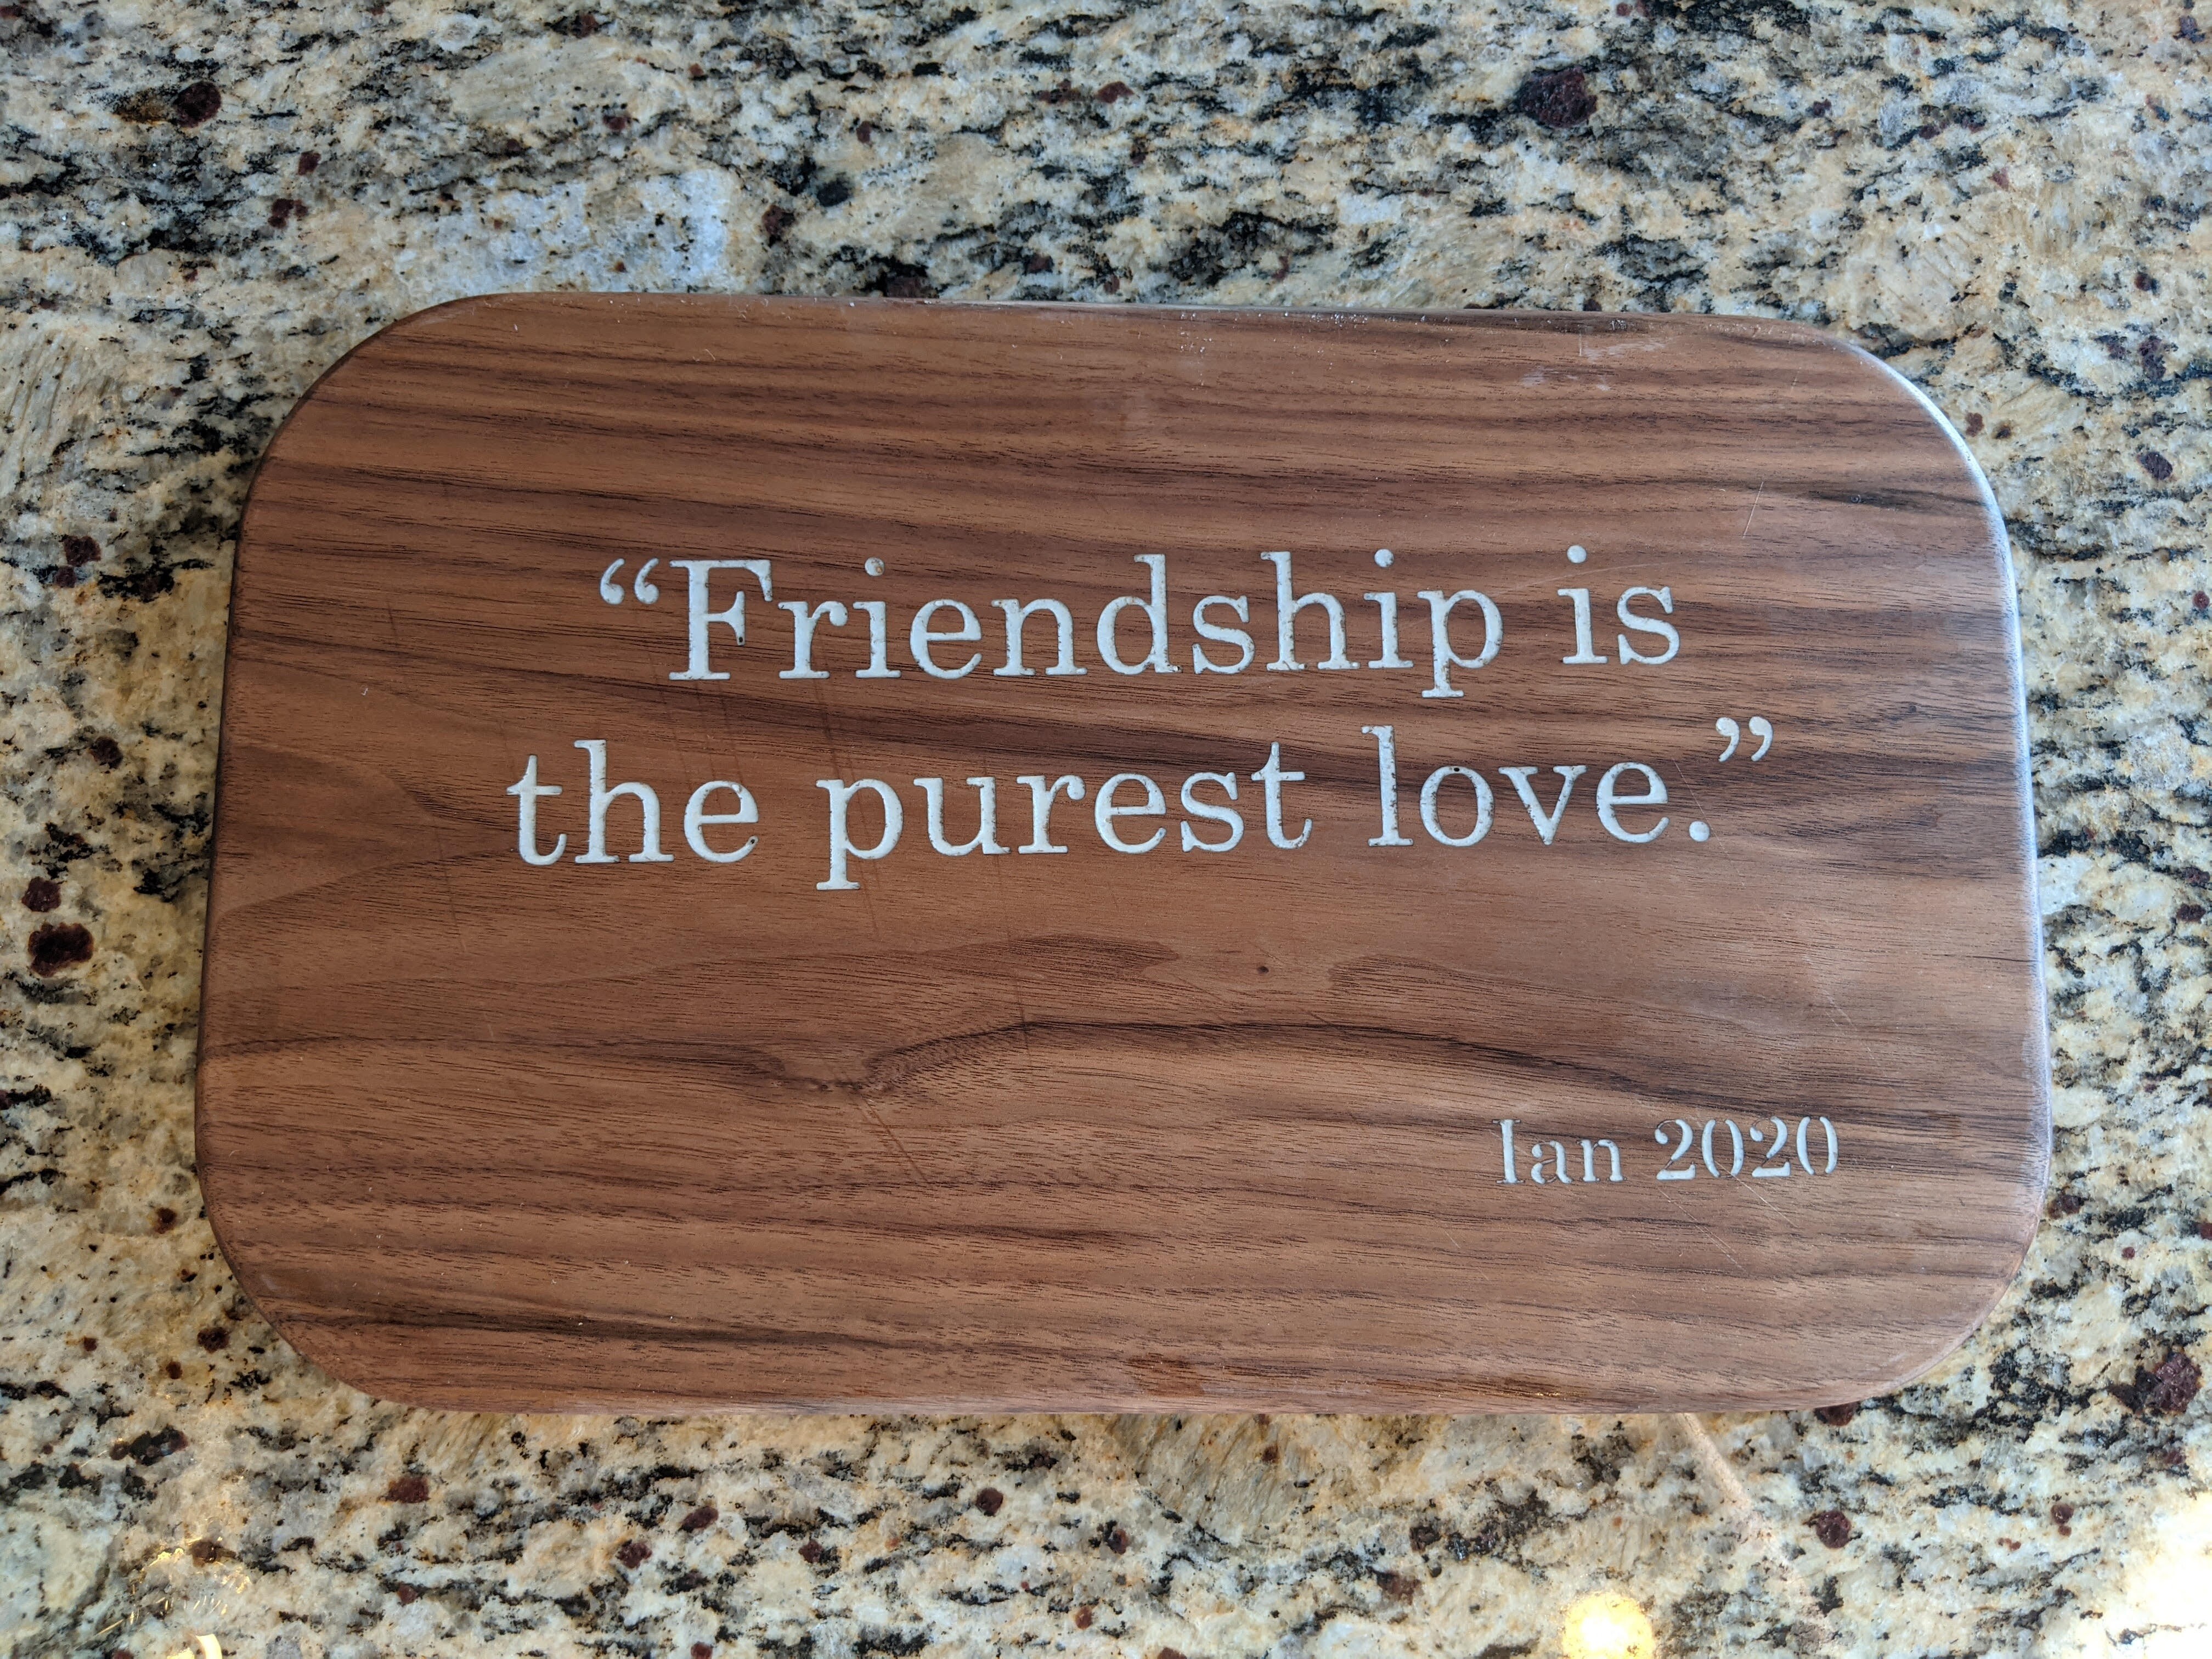
Then one a little more substantial, with a few multi-pours, including 2 re-do s because I didn’t like the color. If you zoom in the text is clear, just could not get the lighting right for this one. Sanded all the way thru the micro-mesh to get the epoxy smooth. One surprise for me was how the bottle glass, and Bella Text came out. It looks better in person then in the photos… (for once )
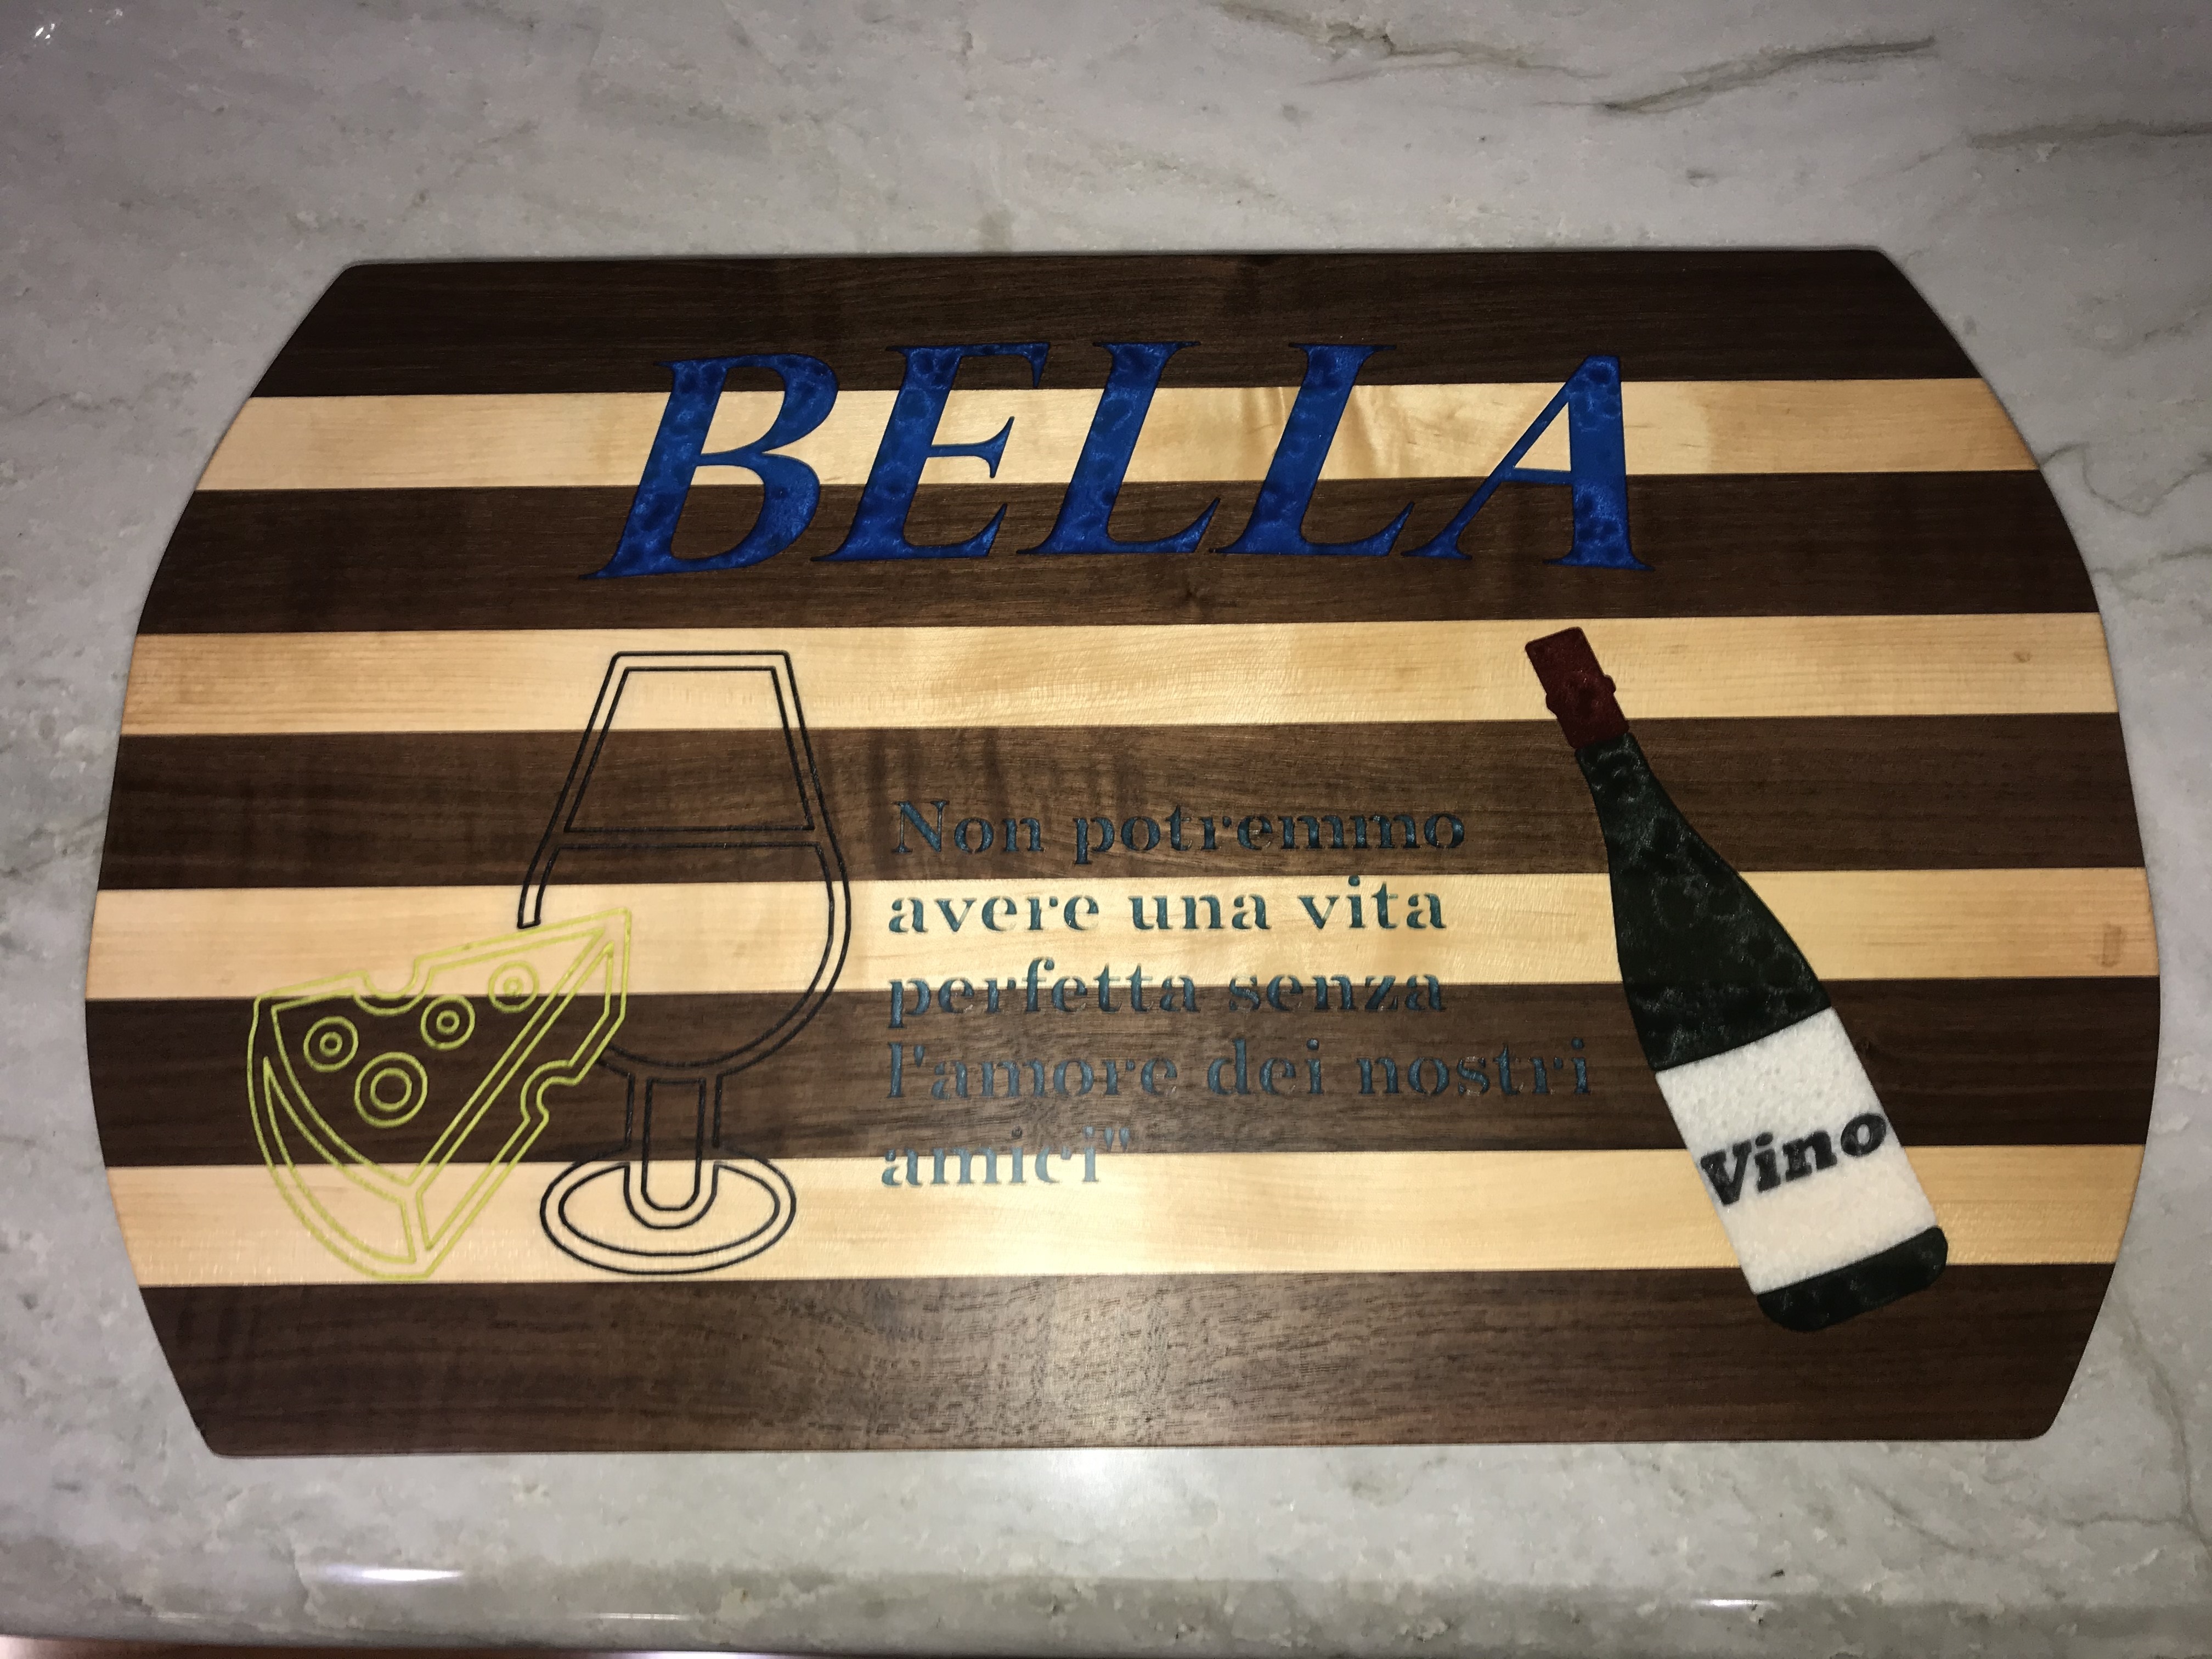
2 Likes
Very nice! I have not set aside the time to try this, yet…