
After taking the SDFWA CNC class with Pat Duffy, I was inspired to try a Vcarve inlay. First I checked out several info sources and Youtube videos. The best one for me was Howard’s video - nice walk-thru of how to do it step by step. You can see his video here.

I found a nice Pacific Northwest bearpaw artwork.

The intent is to inlay maple on walnut to make a lid for the Advent Whiskey Tasting samples box my brother made using walnut with maple dividers.
But I wanted the paw itself to be dark rather than light colored, so I put an ellipse around it. Also, being a novice I’m not ready to try different inlay wood for the red vs black parts of the original artwork. After a tiny bit of cleanup using node editing per Howard’s video, this is the result.

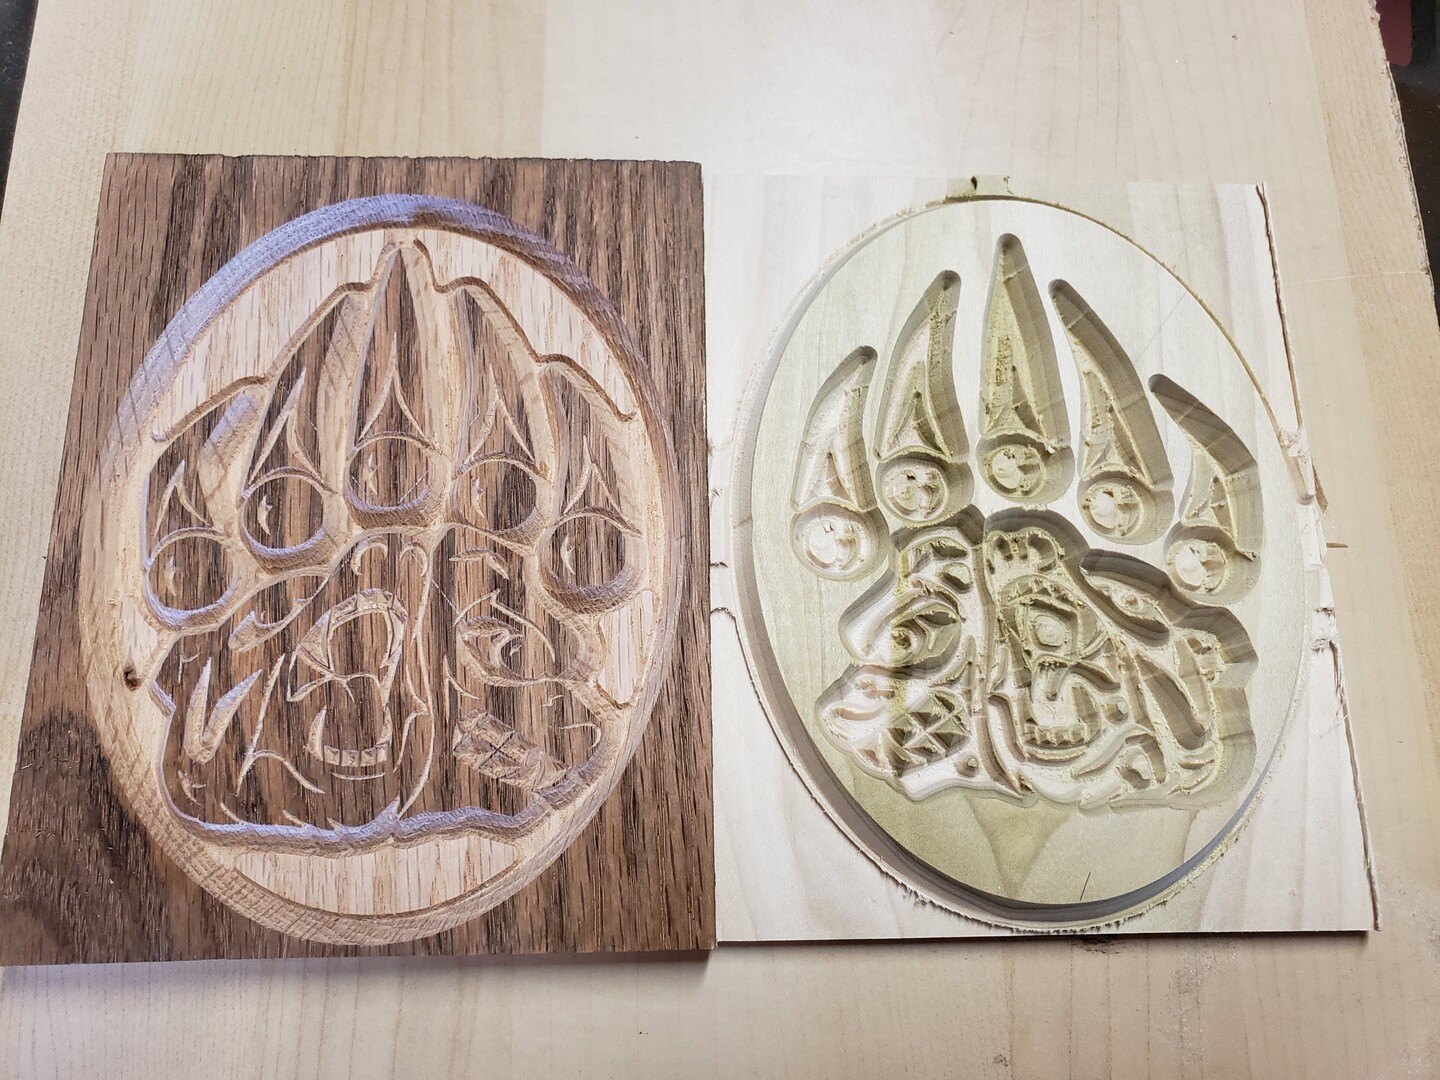
Knowing full well I would screw up the first few attempts, and having limited amounts of walnut and maple at hand, I used oak and poplar for my first trial run. I knew I needed more color contrast, so I put a walnut stain on the oak. There were numerous discussions online regarding whether to use a 90, 60, or 30 degree Vbit. I decided to go with 60.
The oak female carving came out well. The stain certainly showed the contrast well at this stage. The poplar didn’t do quite as well because it’s a bit soft. Some of the fine detail didn’t get handled well - perhaps a 90 degree vbit would have left a stronger detail and been less prone to chipping? There are some puzzling transitions between some arc segments. I read later that some people run the program twice to clean up the cuts a bit. This would likely have been good on the poplar.
I brushed both parts liberally with Titebond Original and clamped them firmly. Probably too firmly, as the finished part acquired a warp that I think is from the poplar being forced too far into the oak, and thus spreading apart the inlay side of the board. After curing overnight, I cut away the excess poplar. I don’t have a bandsaw to follow Howard’s approach, so I used the table saw with a crosscut sled and the blade just high enough to reach into most of the poplar without touching the oak. Lots of cuts sliding the sled back and forth while indexing the board slightly each time. Then onto the belt sander to remove the rest of the excess poplar, excess glue, and of course losing the stain in the process. The result wasn’t too bad for a test run and taught me a few things I will share.
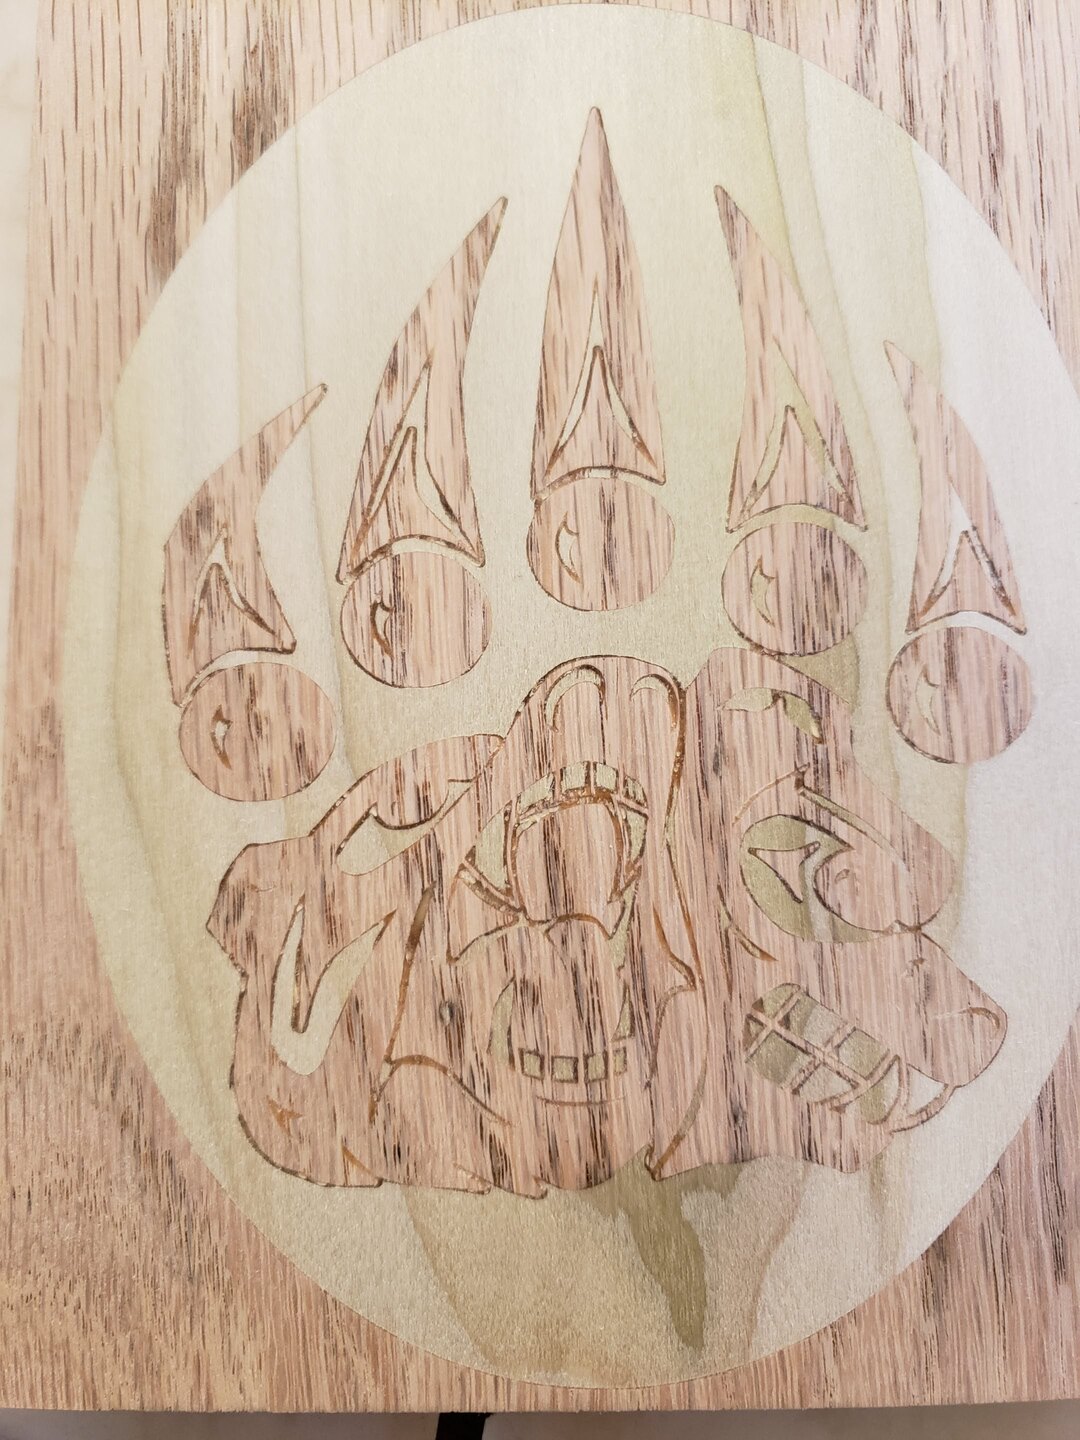
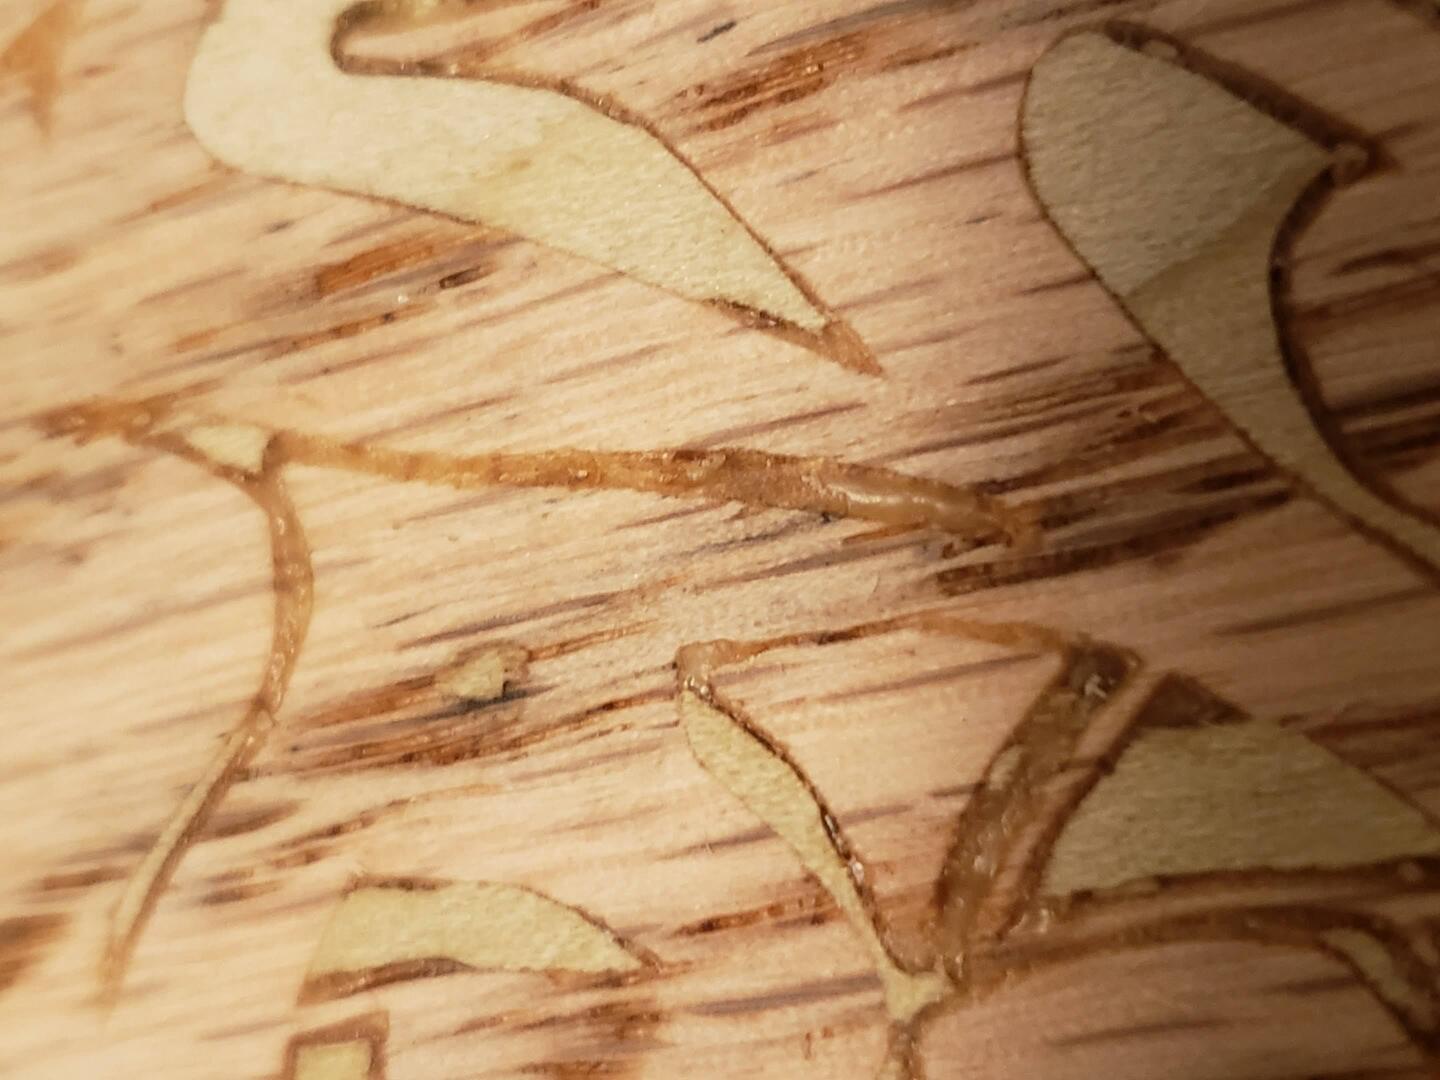
As expected, the contrast is poor, but in most areas the technique worked well. The fine lines washed out - no big surprise there. Here you can see that narrow lines are visible only as glue.
I was questioning the 3-2-1 parameters used by Howard, thinking that 0.1" in the cavity might be too much. So I cut the test sample to see inside.
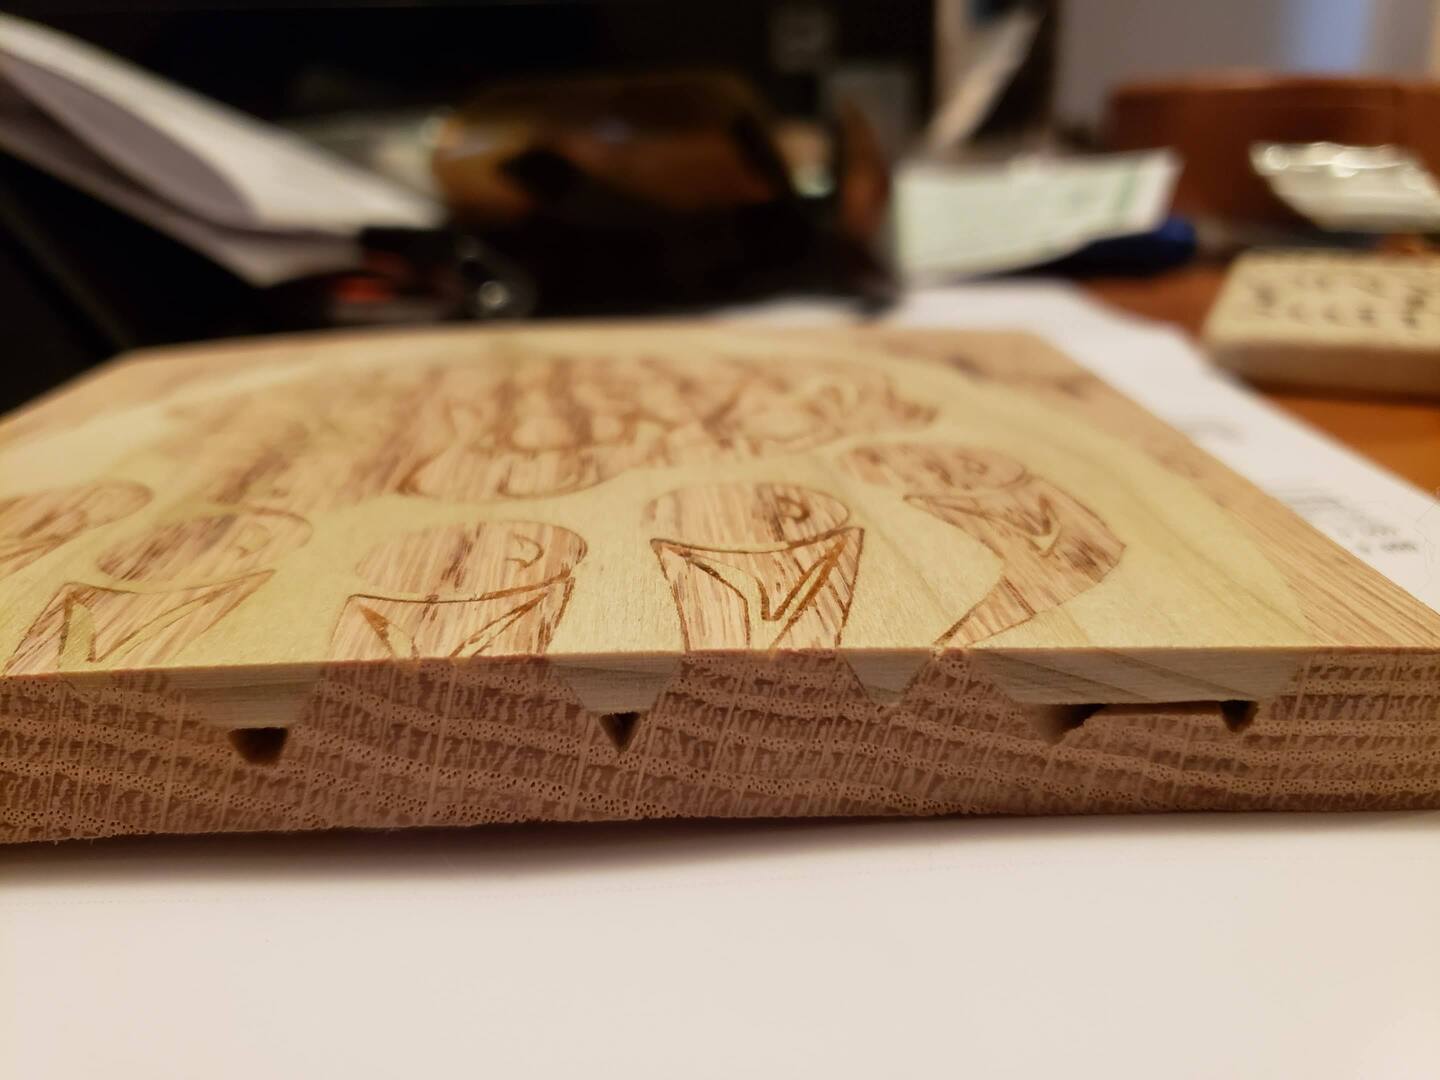
To my surprise, Vcarve didn’t hog out all of the area to 0.3" as I had expected. The land at the right of the picture looks like we only have about 0.030" of clearance or so.
I’m heading to the mountains for a week, so I’ll have to pick this up when I get back. My lessons so far are:
- Watch Howard. Don’t second guess him.
- Don’t clamp too hard, it will force the substrate to bow.
- Fine lines and little detail won’t come out reliably, at least not in soft wood. I think I would consider .030" as a minimum feature size based on this test.
- Make a sample or two in cheap wood before risking the good hardwoods.
- Soft wood seems to chip a lot - I likely need to adjust speed and feed to improve quality.
- The male piece has the delicate protrusions, so it needs more care. If there is a choice regarding machinability of wood used, the male part is the one that really needs consideration.
- Run the vbit part of the program a second time to clean up little details.
Do others have more words of experience on this technique? When I get back, I’ll be picking an alternate graphic with much less fine detail for my next trial and will share my experiences.