
Wait!
This is April 1.
Should we believe you? 
I already posted elsewhere that mine arrived today as well. I still need to know the details about the SDFWA discount license for LightBurn…
My laser arrived but my free trial period ended… 
-e
Discount Code: S@ndyW00d$
The code may be expired. I bought the GCode version and will try it out tomorrow.
-e
Nope, it’s not an expired code.
I checked with the LightBurn developer and he says we’re fine.
---------- Forwarded message ---------
From: LightBurn Software
Date: Wed, Apr 1, 2020 at 9:22 PM
Subject: Re: Expired Code?
To: Travis Good
You’re at 84 of 100.
And it’s no bother - I don’t mind checking for you.
J
I tried it twice with both versions of the software, no go. I am not sure why.
-e
Ed, the discount code is used on the website when purchasing.
During checkout click the link, enter the code, click Apply.
Your purchase price then drops: $80 -> $20.
I just tested it and can confirm that it works still.
My Laser arrived yesterday also - now I need to assemble it.
Now that lasers are starting to arrive I wonder if anyone wants to test this?
Doug suggested I could easily double the gradation by mirroring steps.
This concept could replace the acrylic for the head mount to help focusing.
1 Like
Here’s round 1 of my z axis hack:
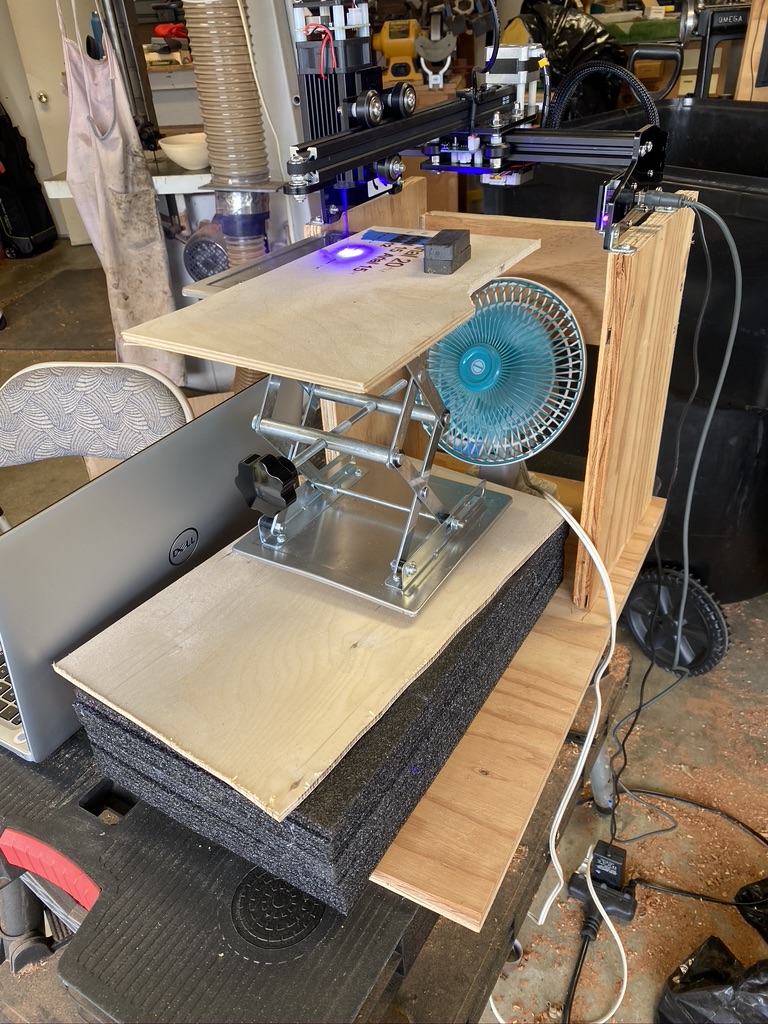
- I bought the 8x8" lab jack stand table which elevates about 15" in the air
- I attached sides and a back to a platform and then attached the laser to the top of the sides.
The basic idea is that with the lab jack stand table lowered, a tall object could fit onto the top of the jack stand table and be lazered. In addition, focus would be adjusted by turning the handle of the stand, once the lens was properly adjusted.
The picture shows the stand sitting on a 4" lift because I was not careful in sorting out the optimal length of the sides. Also, a woodturner’s shop is not ideal for cutting and assembling square objects (shame on me).
The fan is to scatter the smoke from the engraving, not ideally located but ok for round 1.
1 Like
How is that setup working so far? Looks like it will have quite a large spectrum of thicknesses you will be able to setup for? I got my Laser last week but have not found time enough from work to actually set it up yet. I have a few other projects I need to complete first.
so far, so good, but limited testing. will have to see how much shaking there is
Folks,
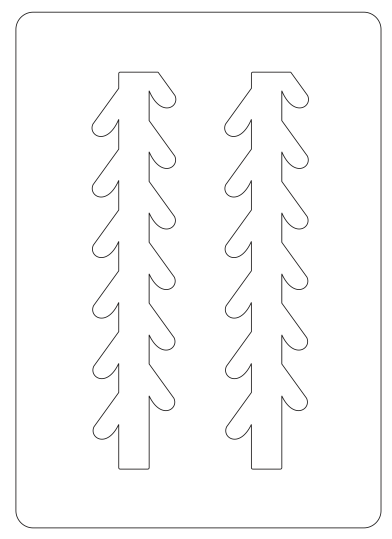
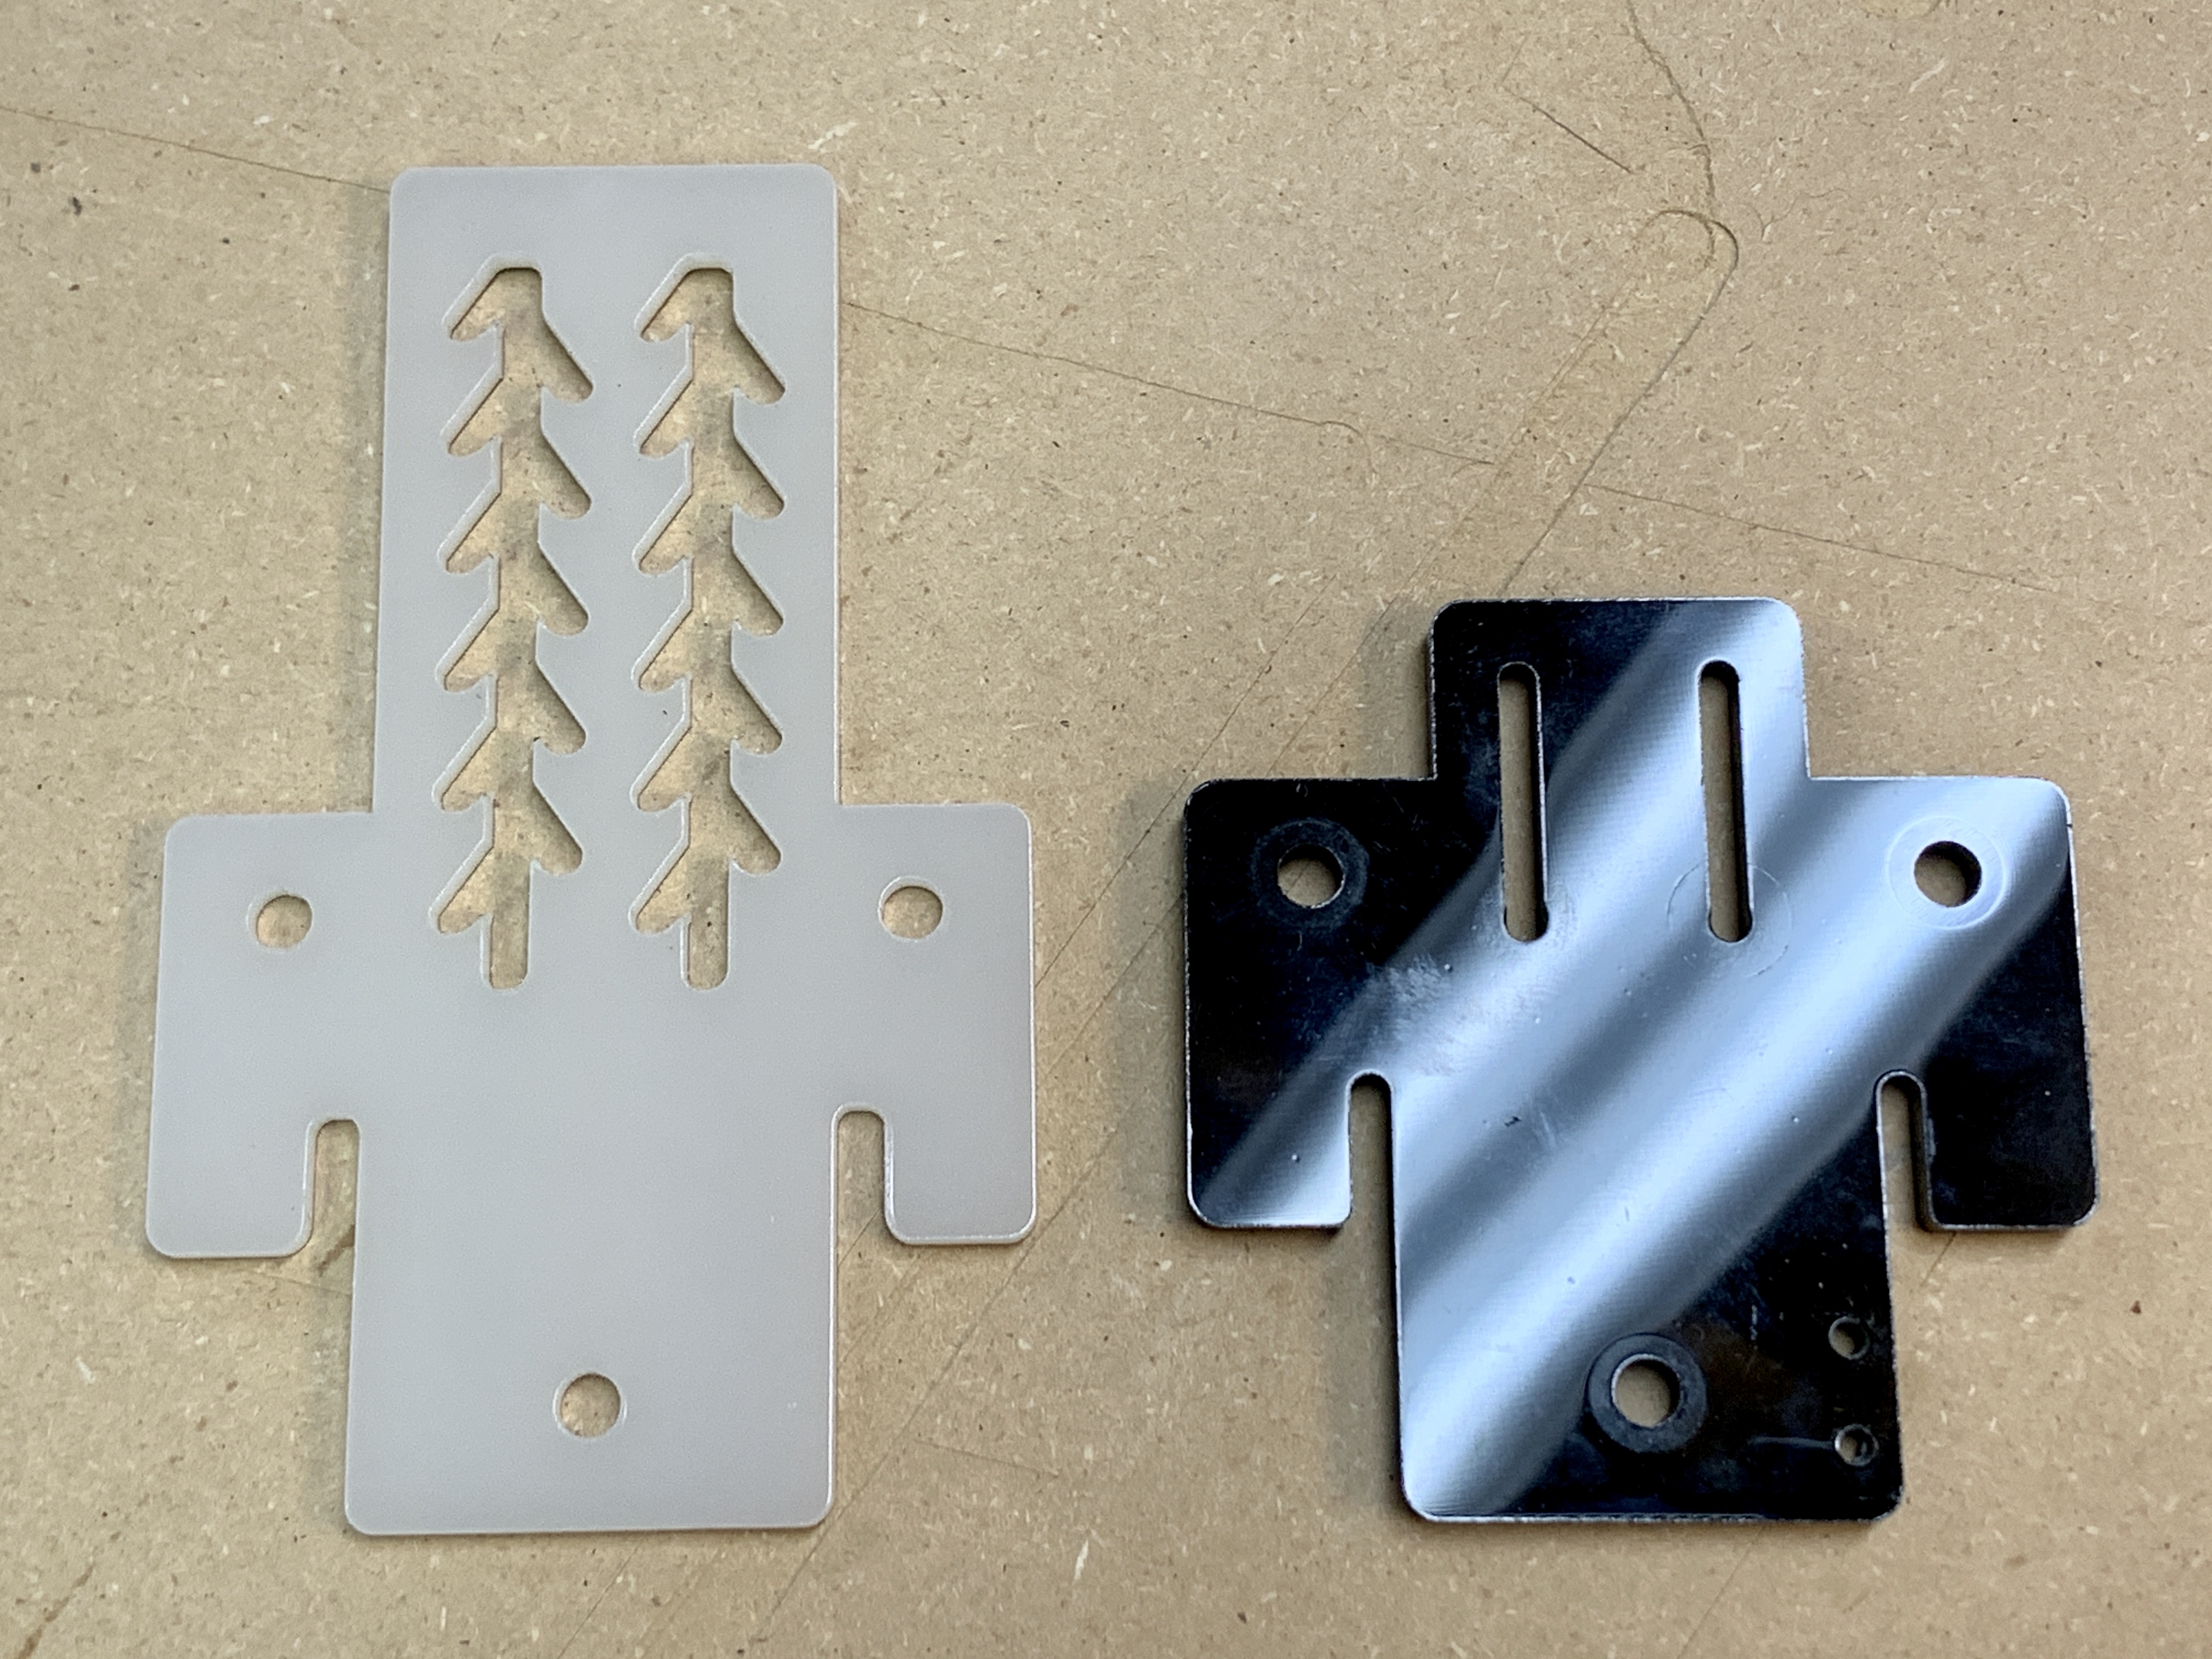
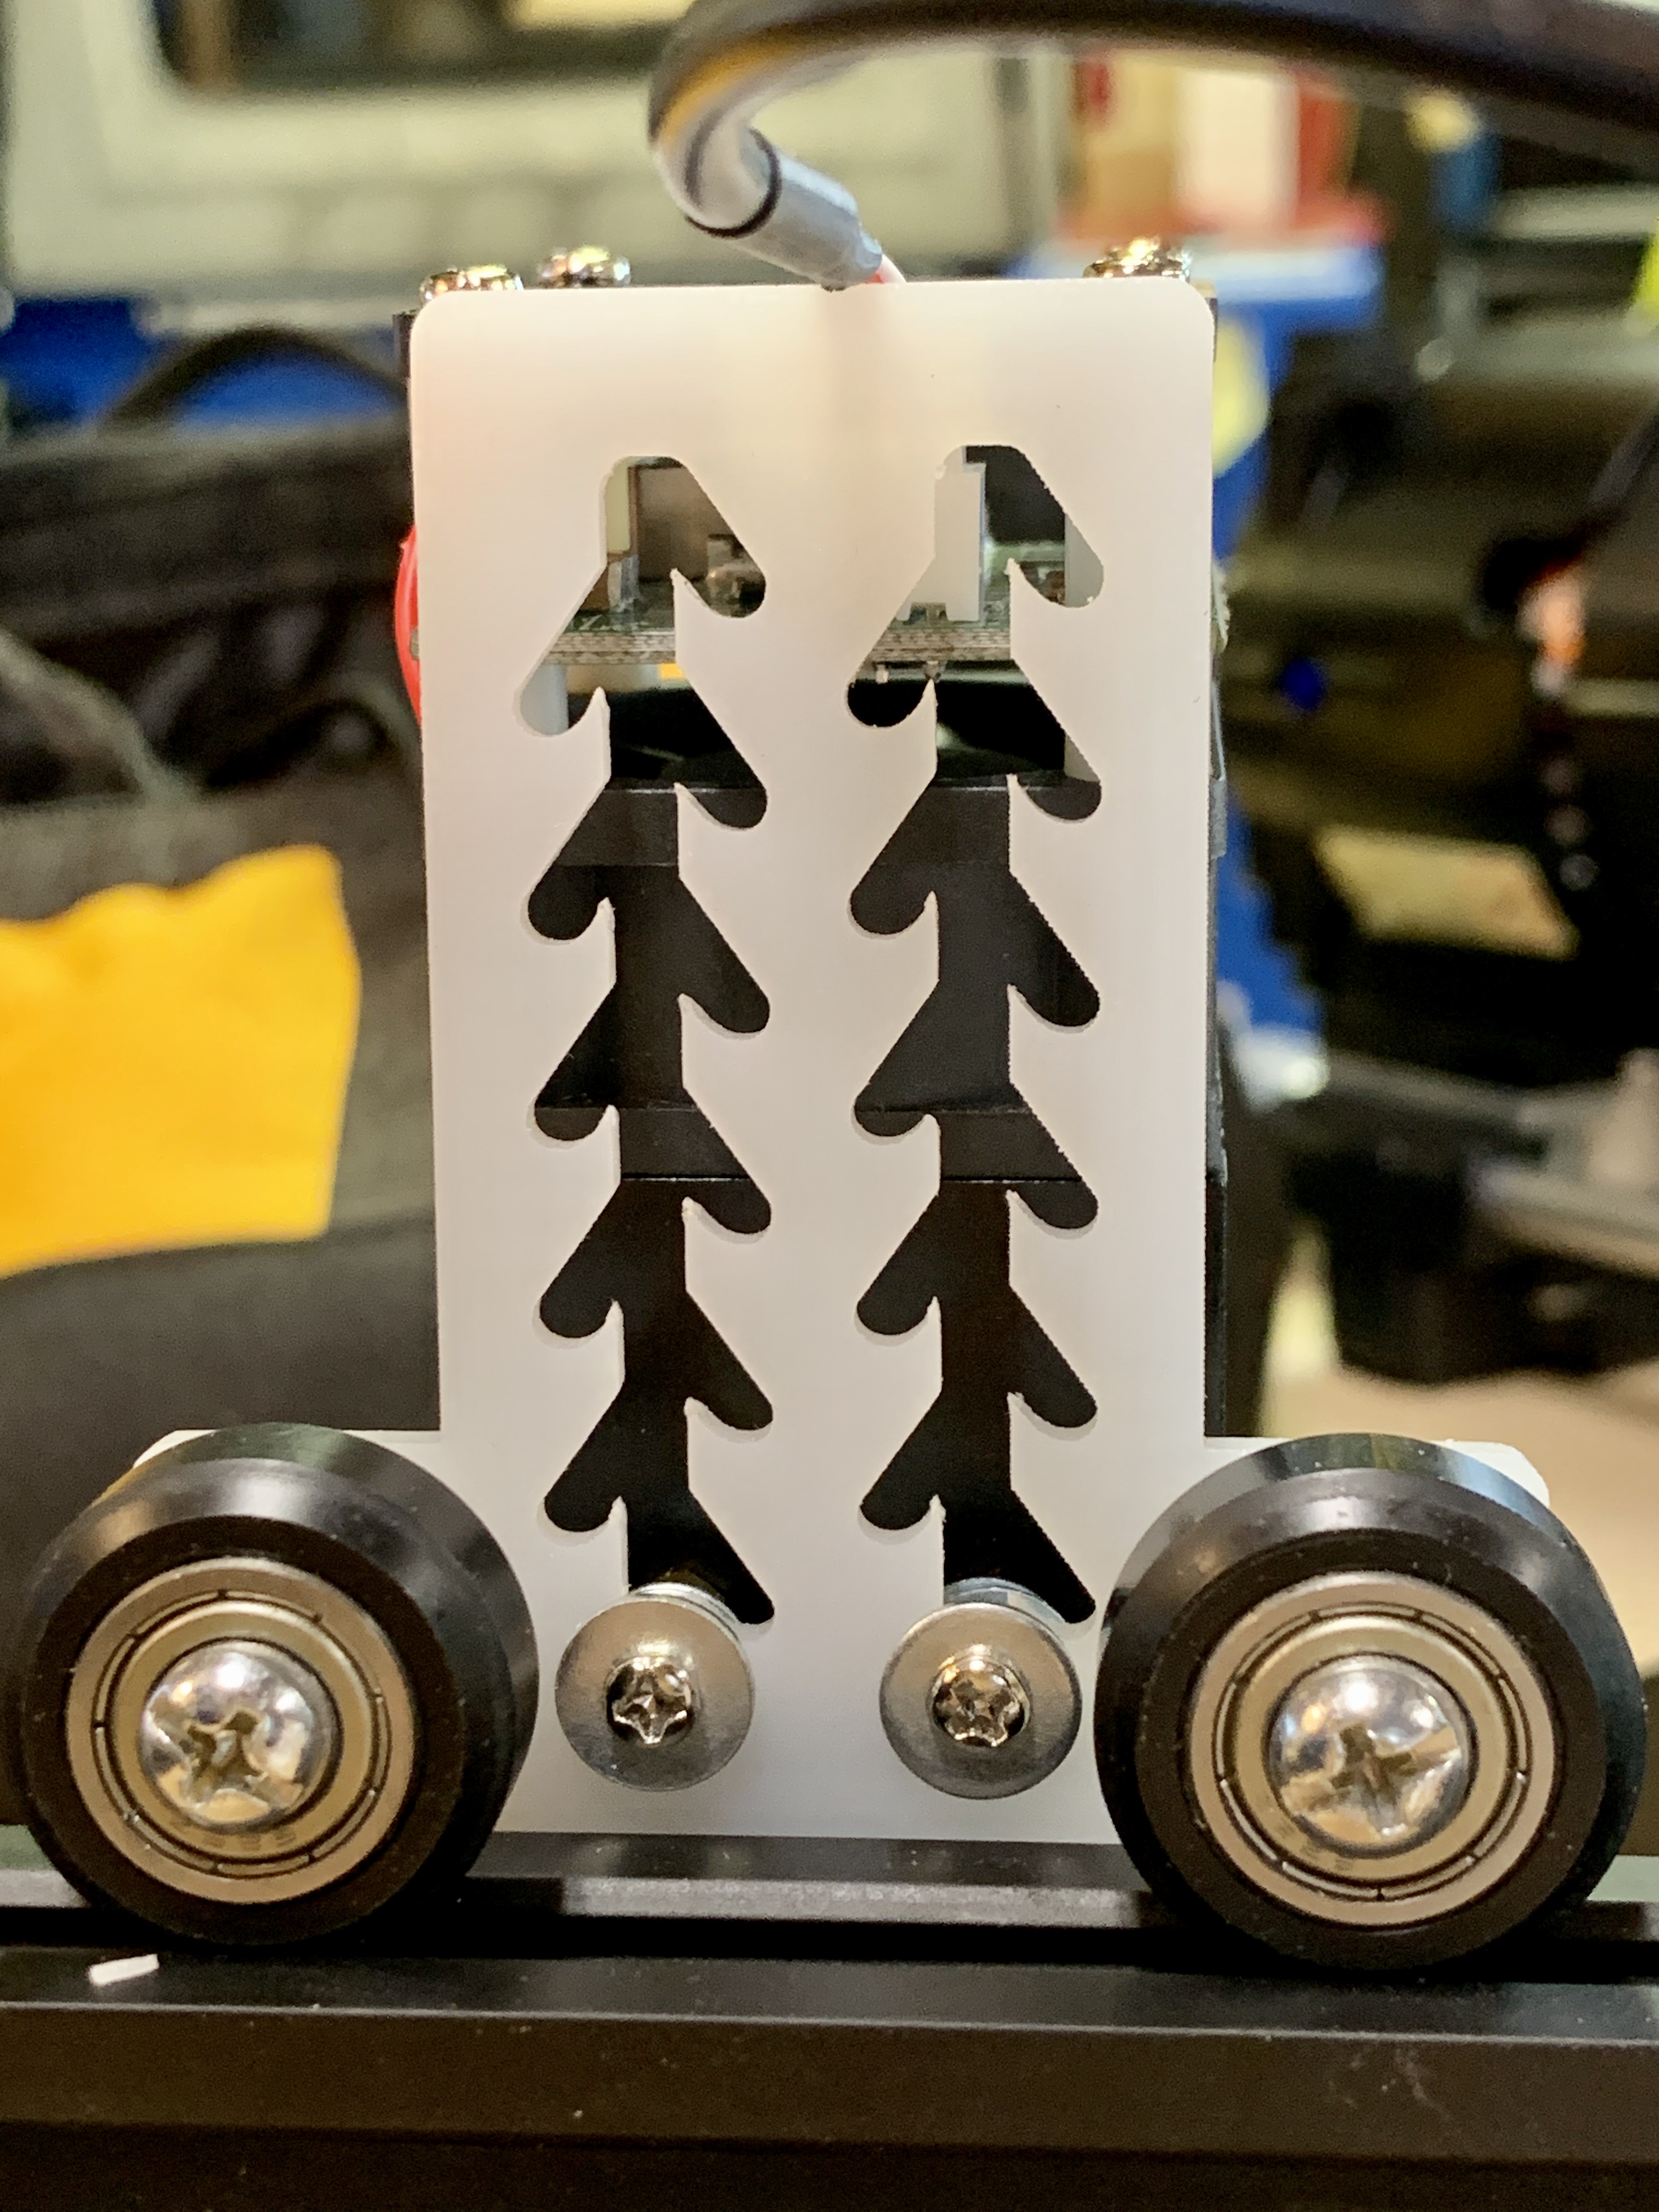
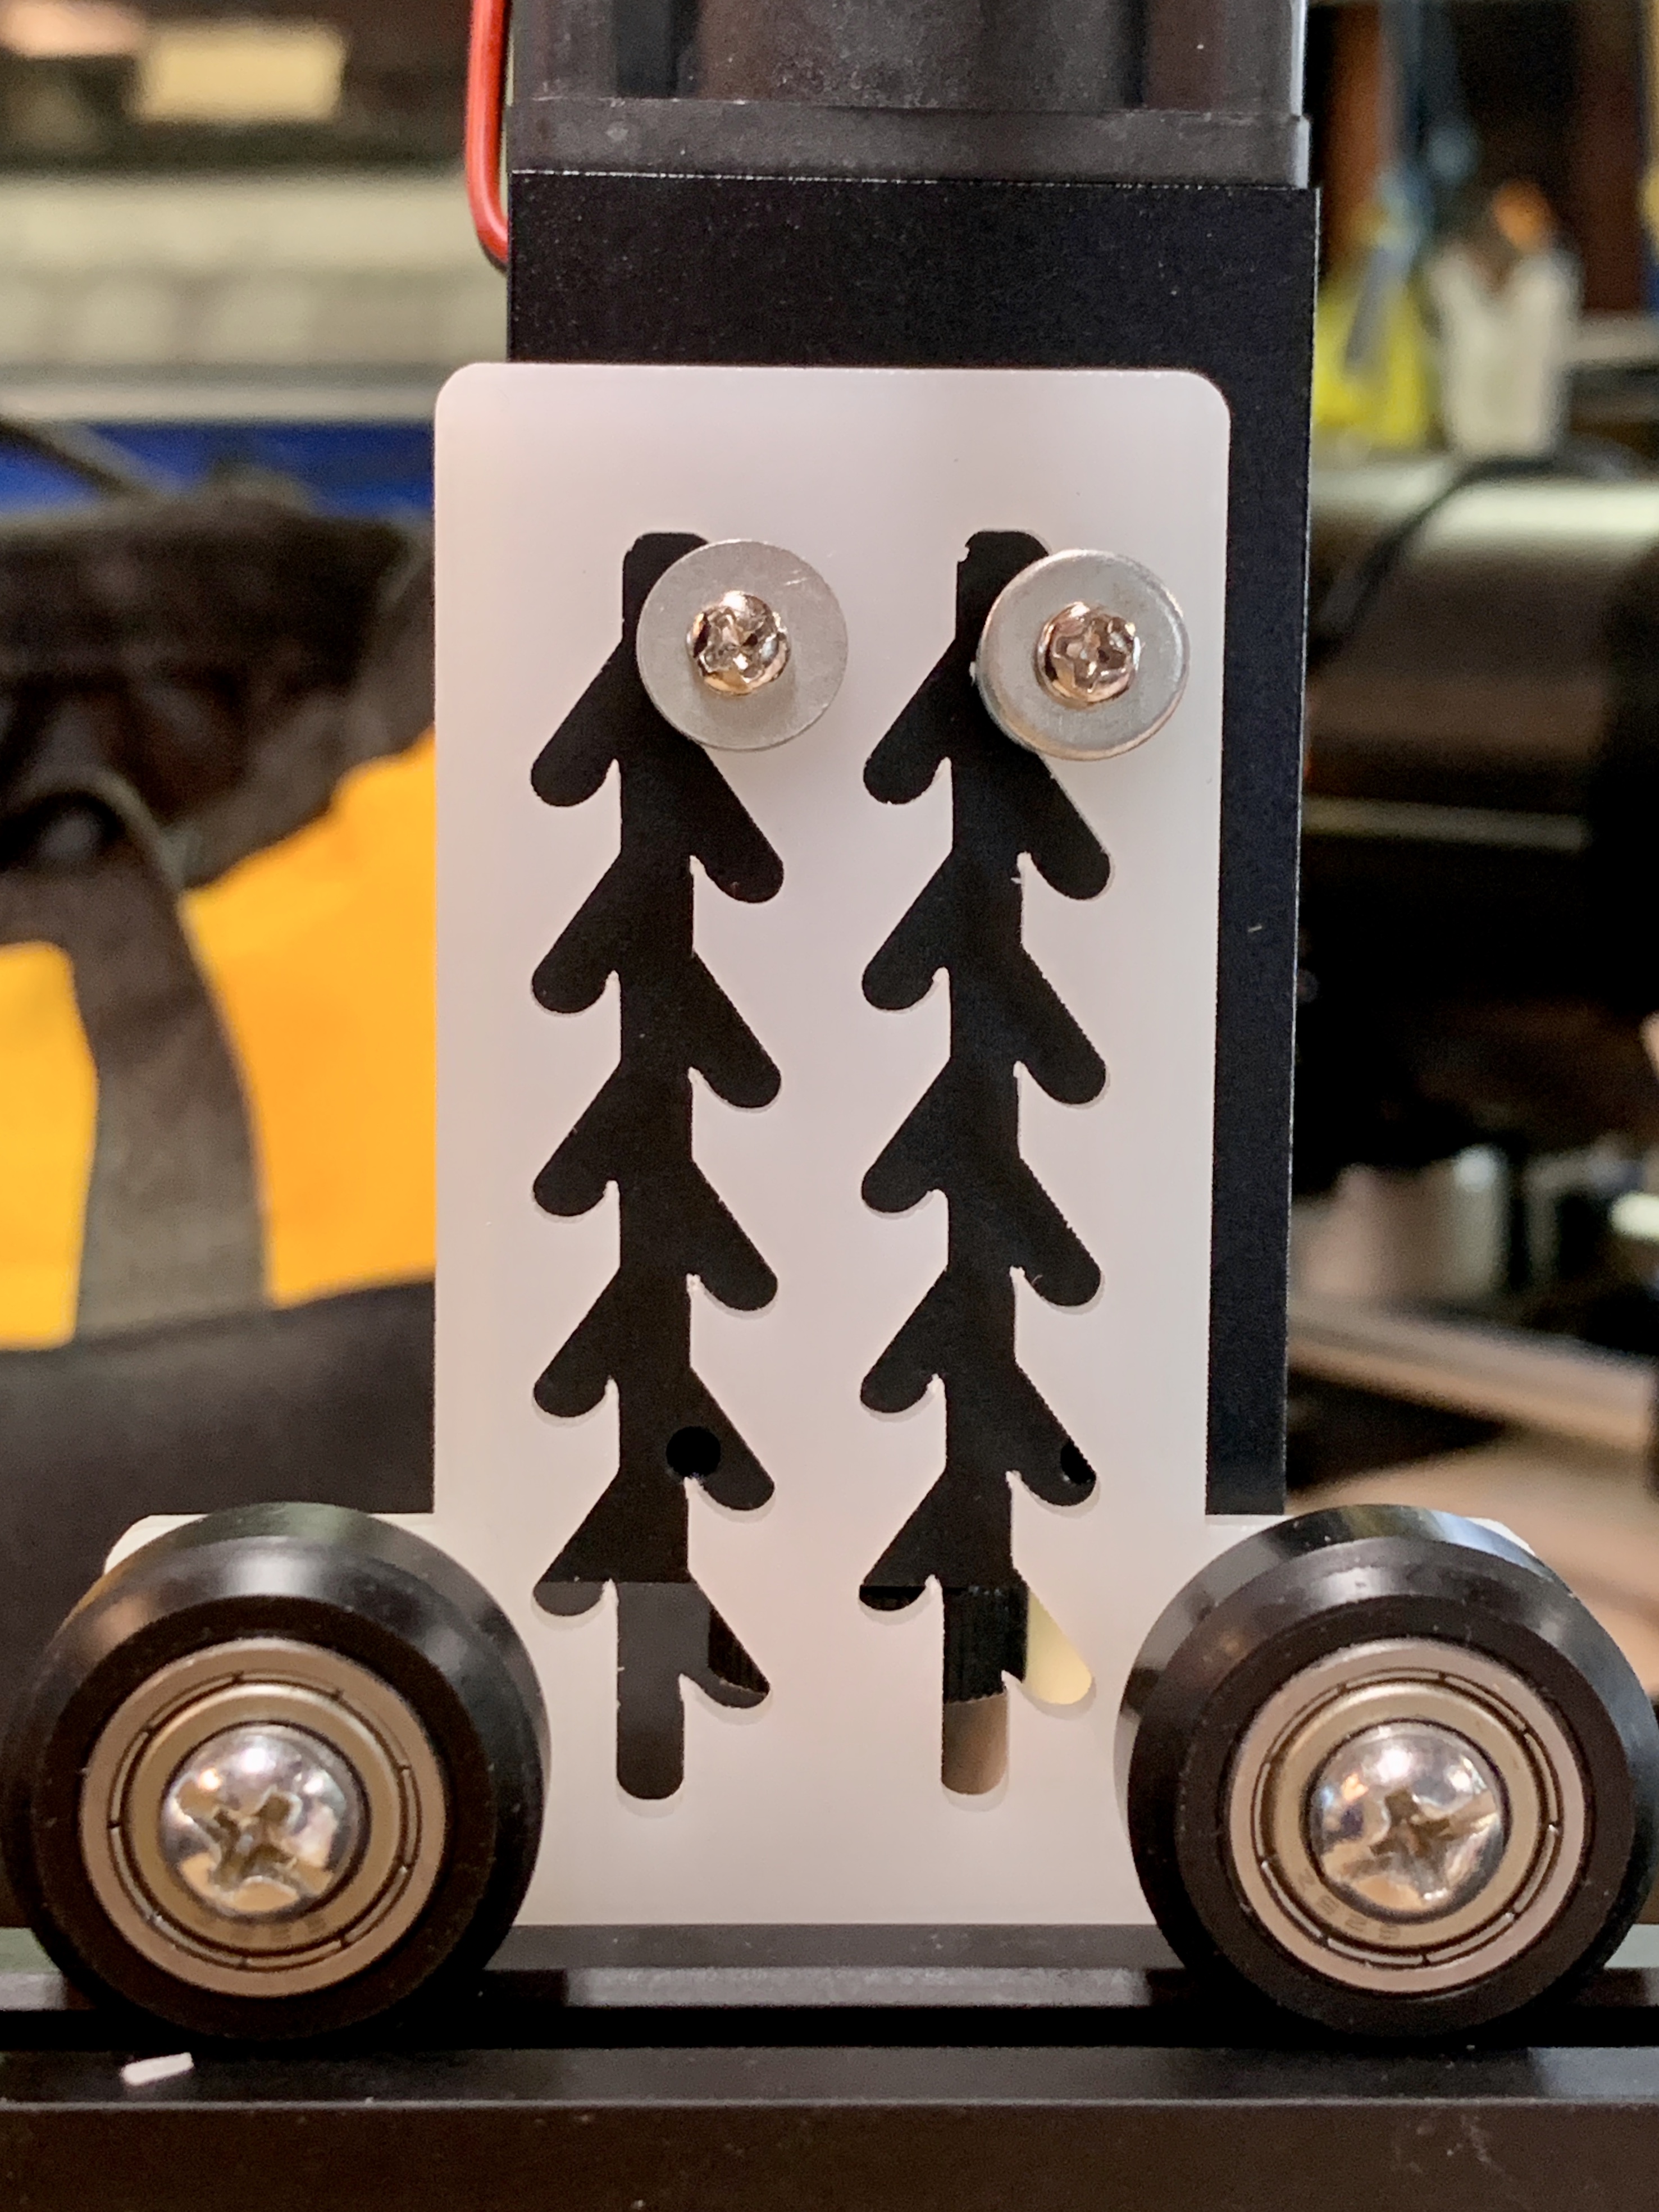
I took the idea above, did some prototyping and now have a replacement part.
With this piece the range for focus goes from .9" to 2.4" of range.
Below are pictures and at this link is the LightBurn file.
1 Like
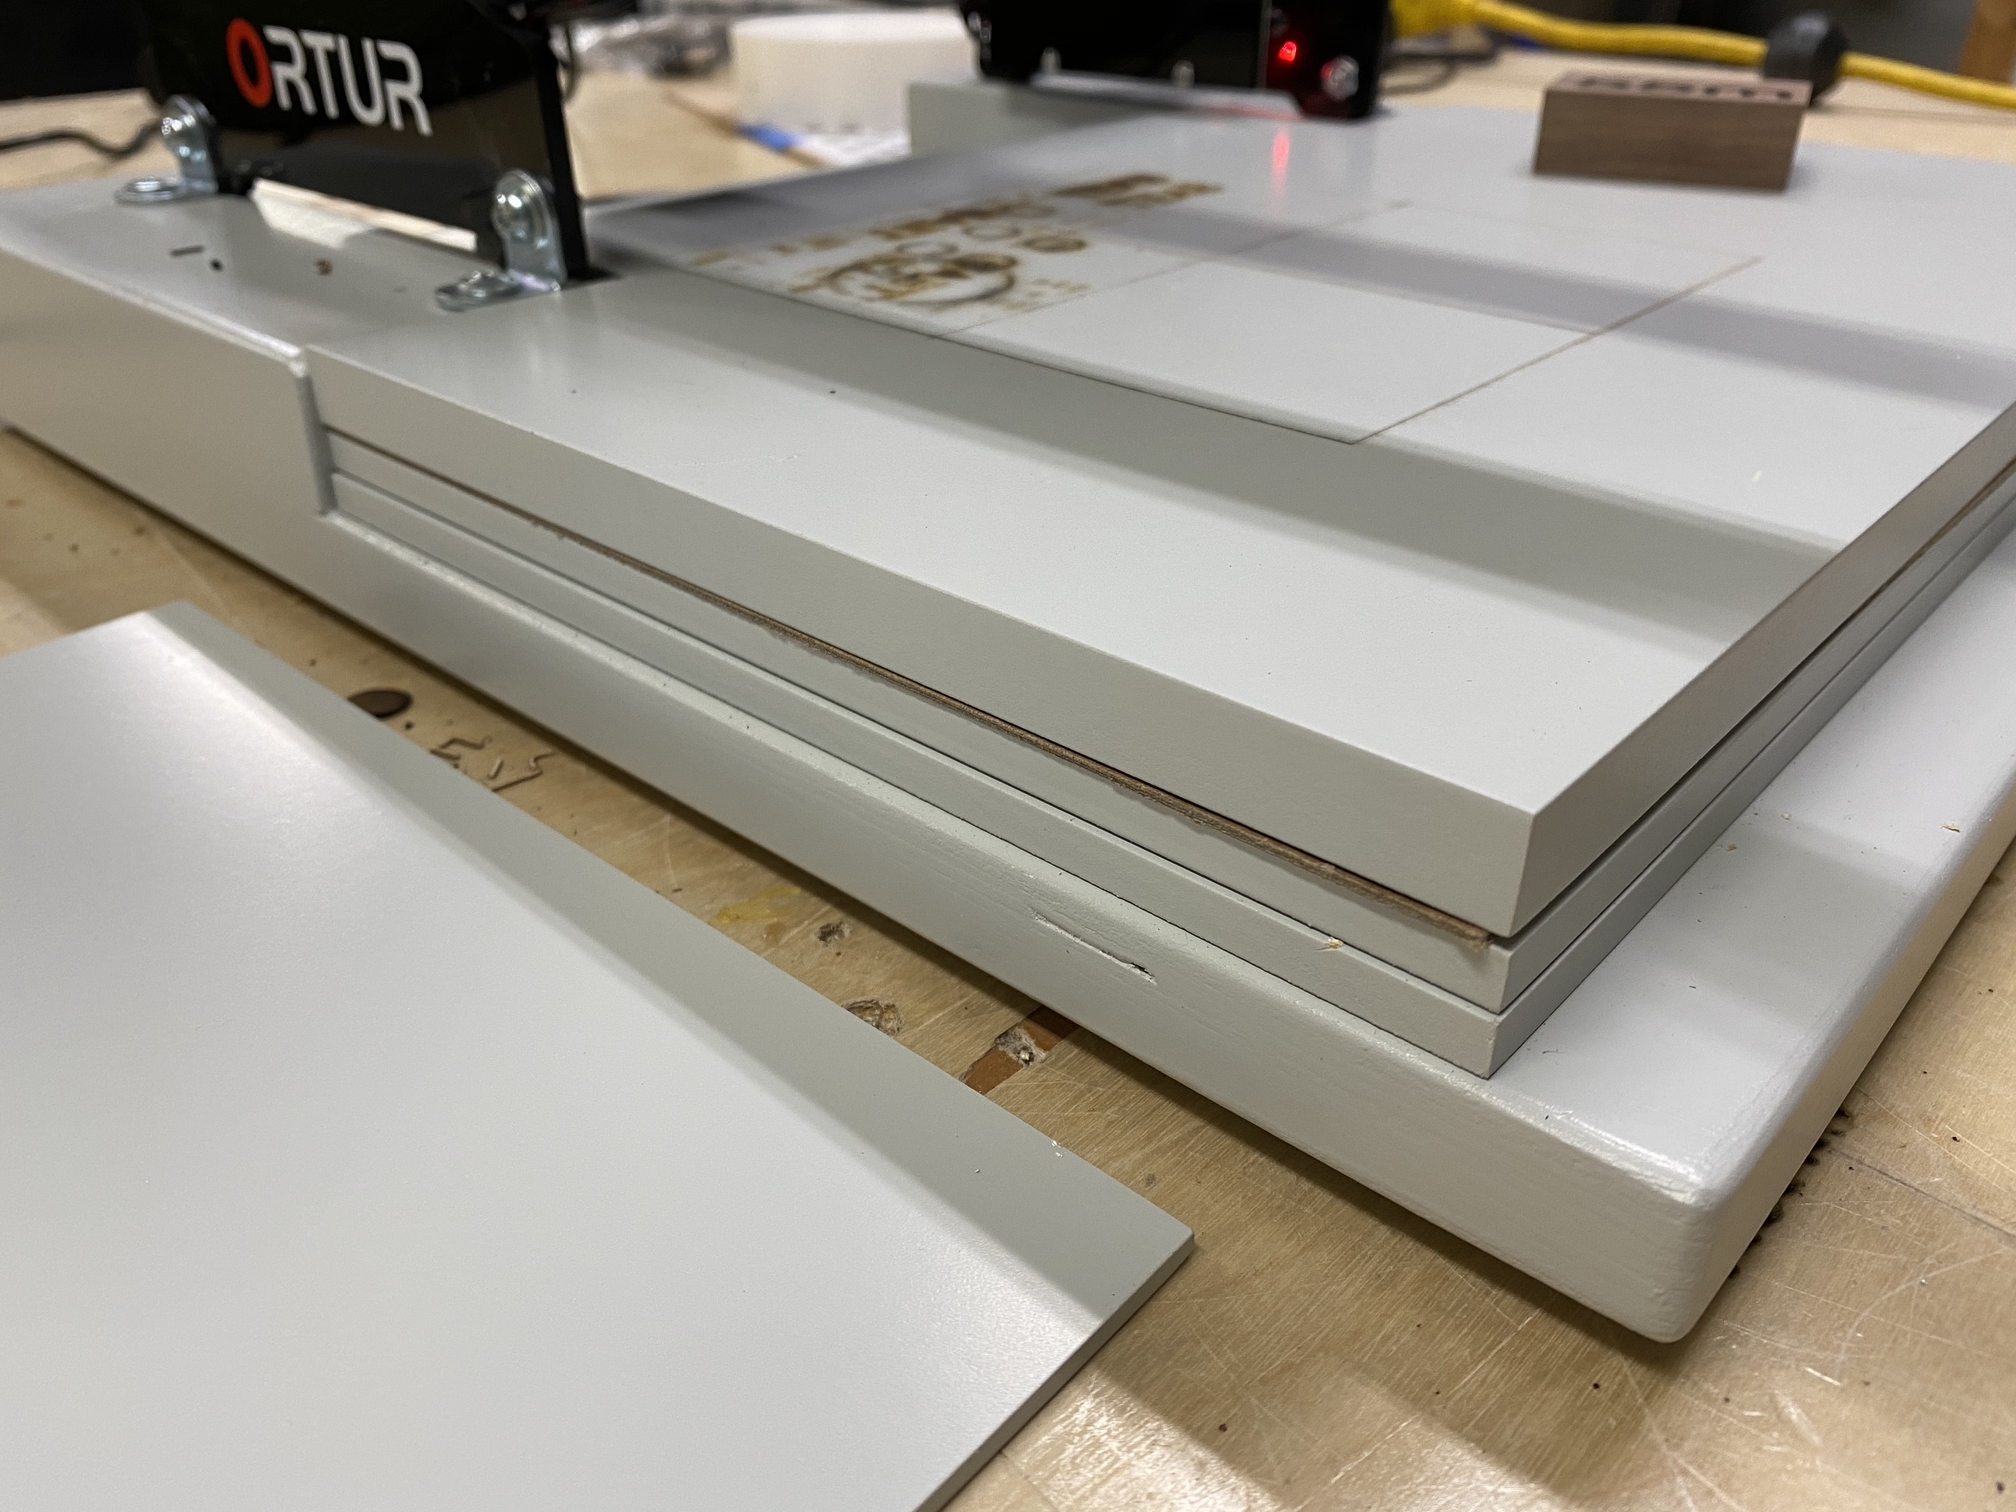
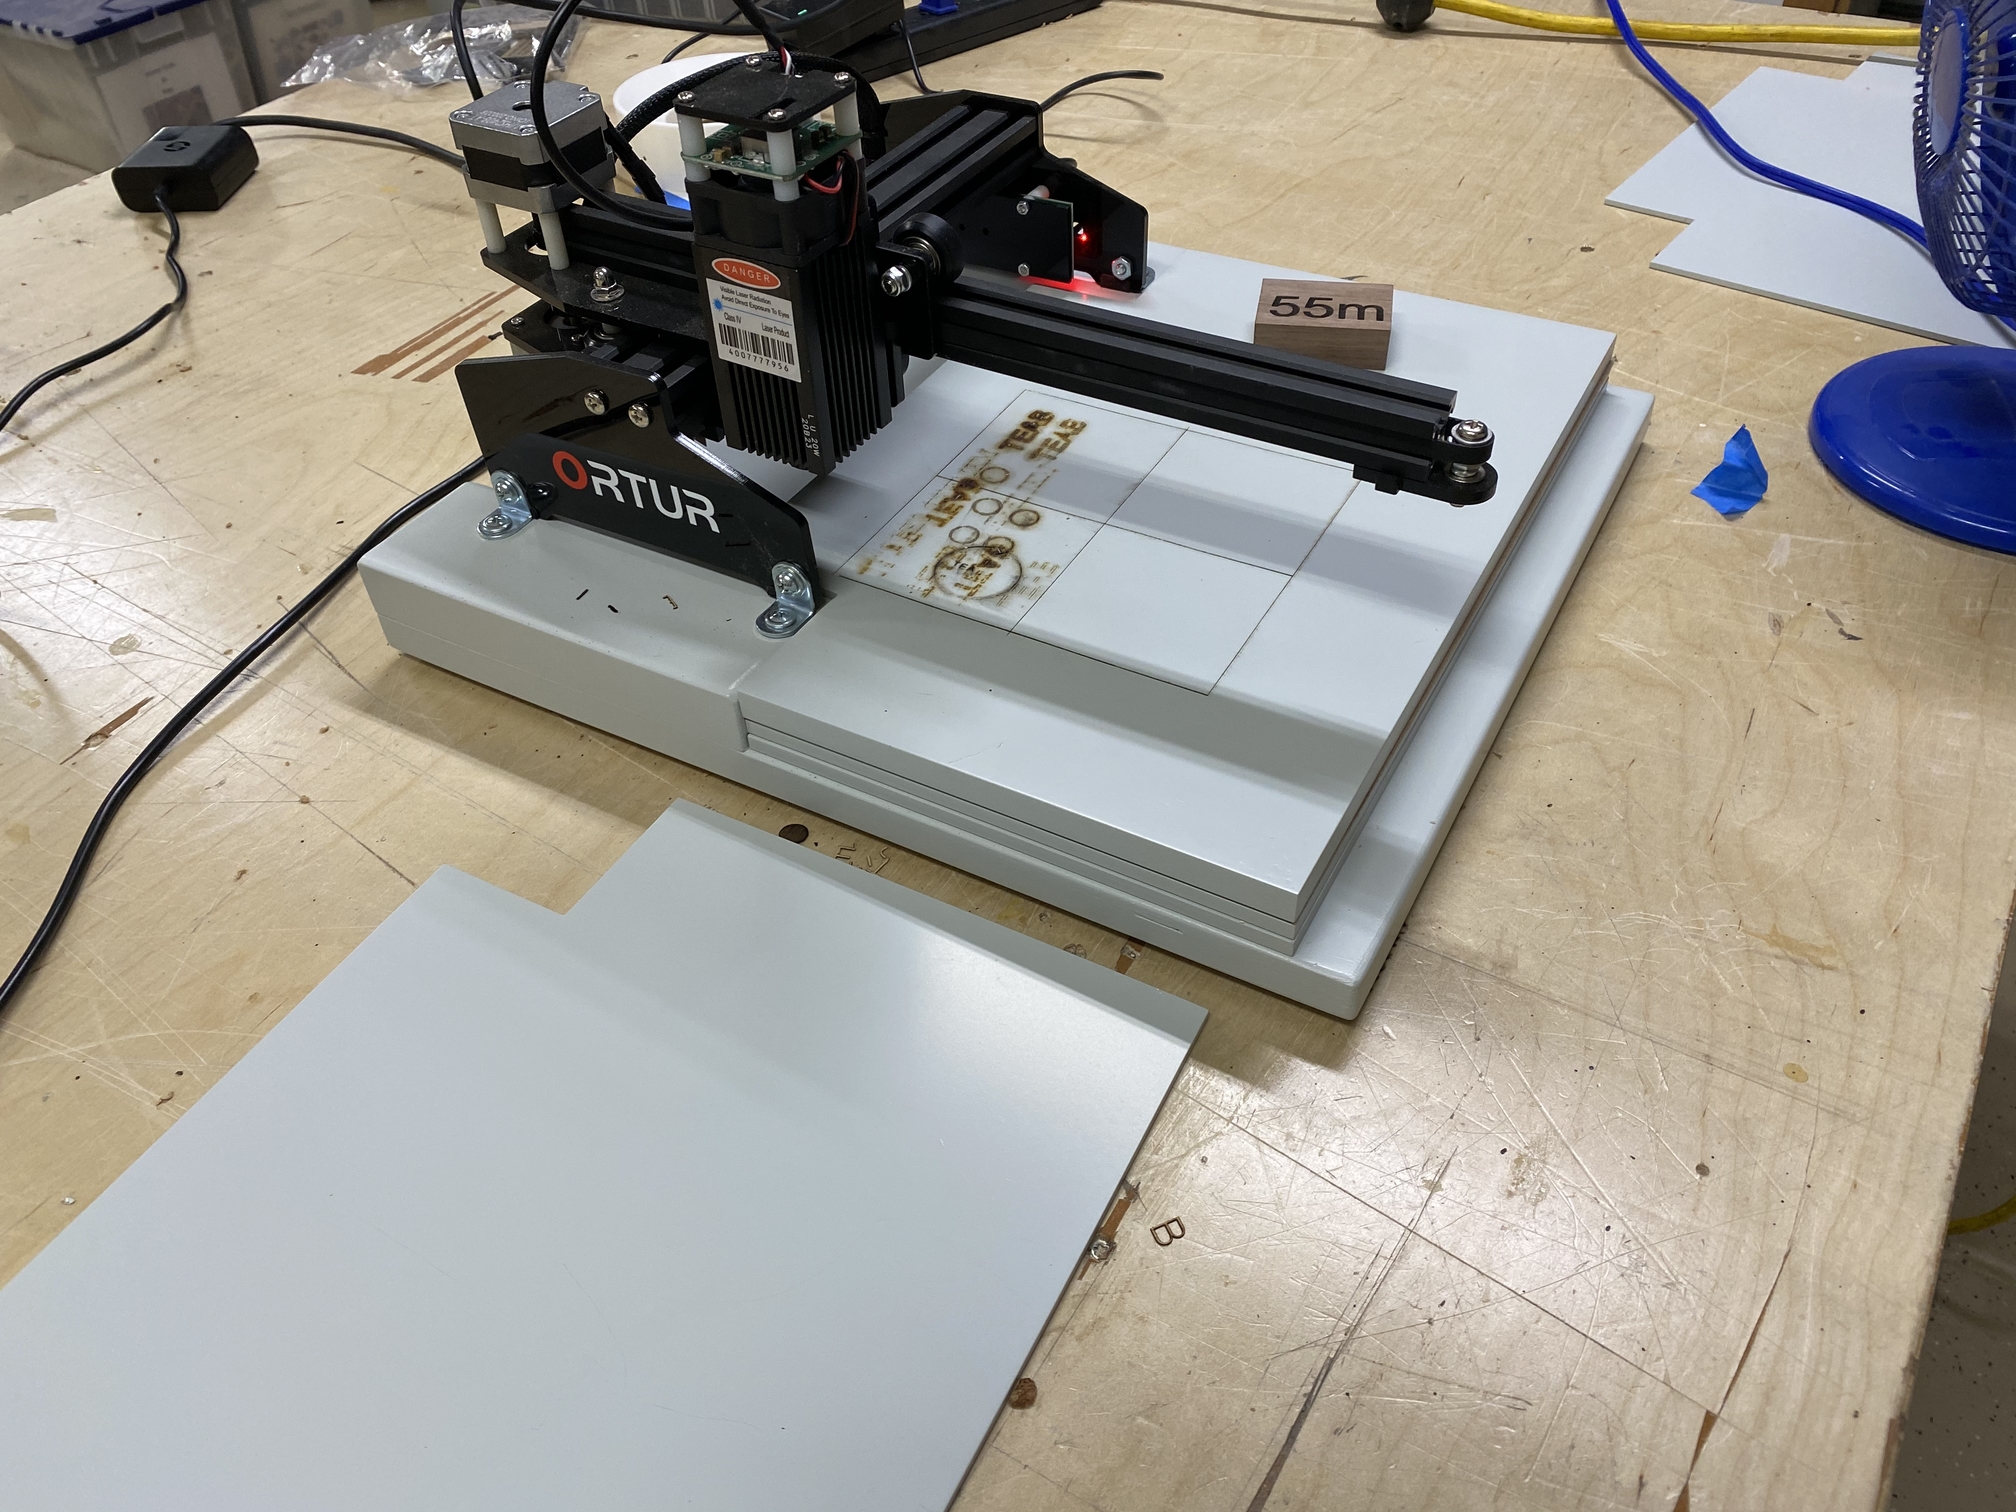
I built a stand for my machine that serves my purposes. It was constructed of MDF. The Ortur is raised an inch above the bed. I cut several spacers of a variety of thicknesses which allows me to consistently set the Z spacing to within 1mm of my ideal focus. The spacers are 12mm, 6mm, 3mm, and a hardboard spacer that is 1mm, The limitation is of course the the 1" max for the stock to be engraved.
1 Like
Did you determine the range of the lens focus? Seems that with the spacers alone you can dial it in pretty close but you may have found the twisting of the lens allows you to adjust focus within a certain number of mm. Also, did you find the 55 mm spacer works well for focus?
Isn’t it wonderful how when you’re done you simply unplug and put it on a shelf?
I had come up with a design very similar to yours. I used plywood and attached the bed with knobs. That way, if I want to etch something really big, I detach the bed and move it to the edge of the bench and put whatever I need to there to hold the piece.
You may be able to see the 45° angle on the foot of the jig. That is because I have French Cleats around the walls of my shop so I can hang things on the wall when I need them out of the way.
@SDFWA, I have found that if you are close to 55mm, the focus does not change all that much. I would be interested if anyone else judged differently.
-e
1 Like
French cleats for wall hanging, nice!
That helps me understand the choice of handles.
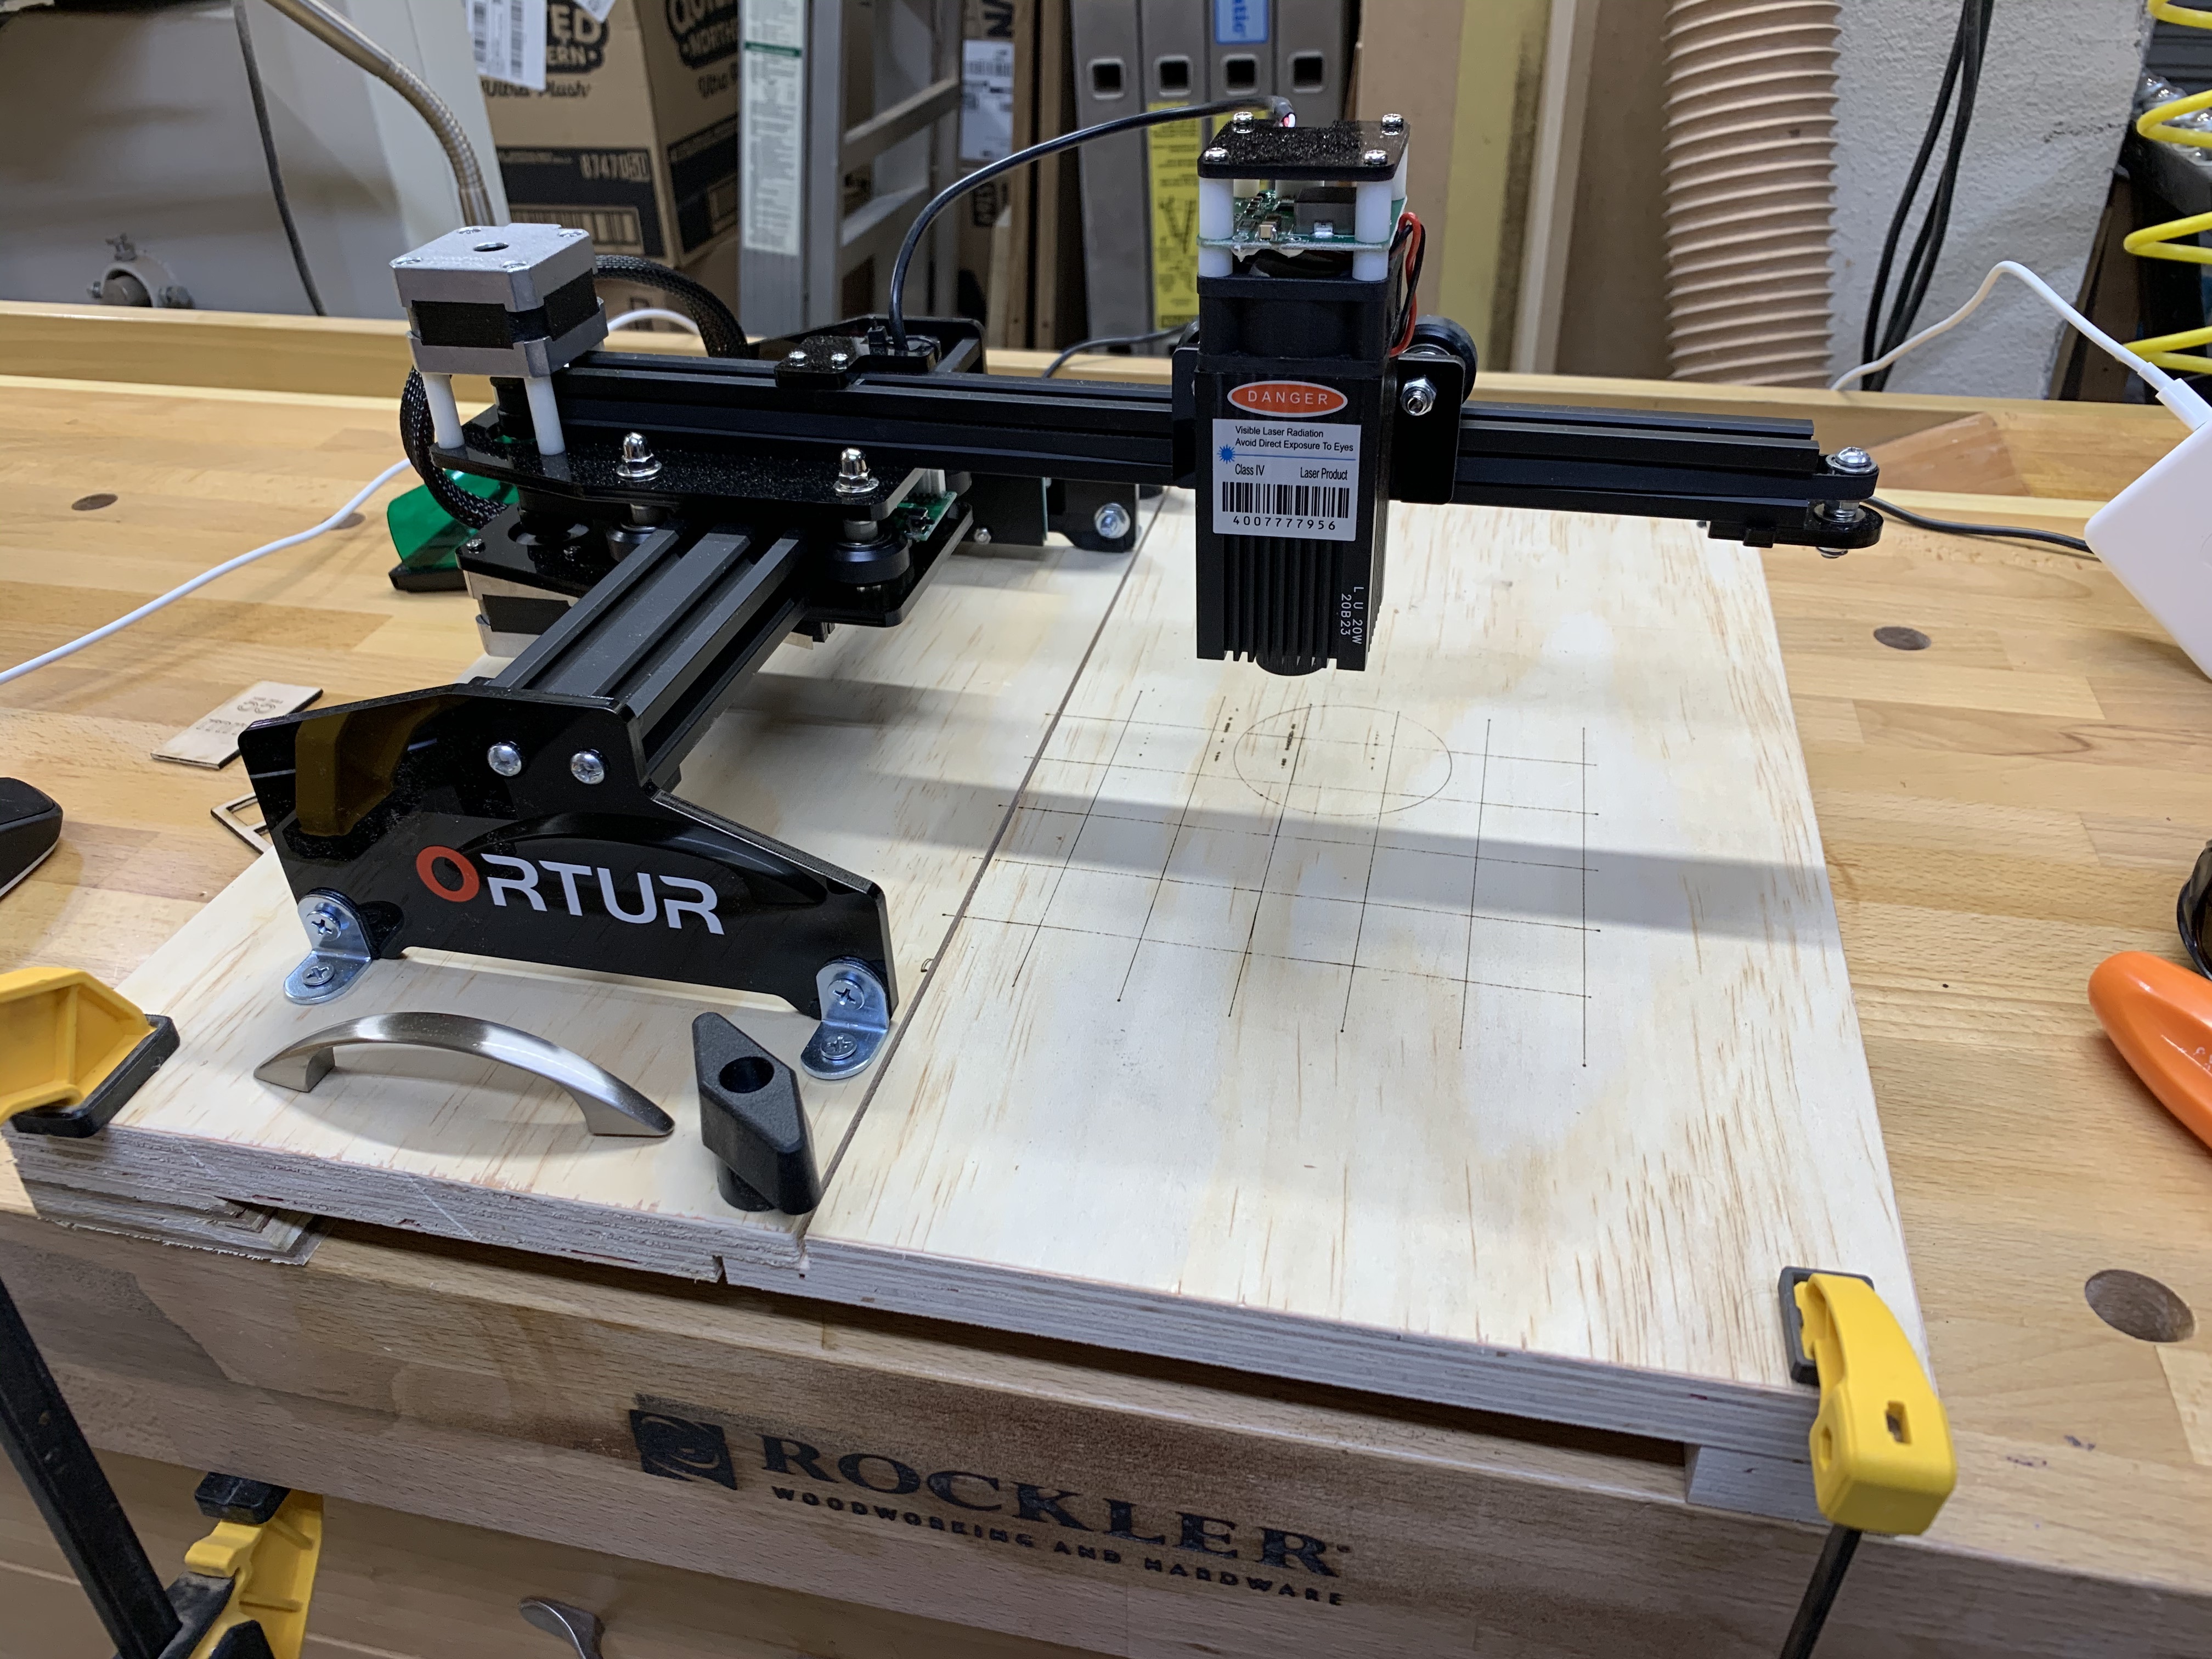
Looks like it’s even oriented so 0,0 is in the bottom left! 
Ventilation hack.
This is the 7W Neje master diode laser doing a test engraving while sitting inside my other laser to use it’s ventilation. Would have worked great if the fan hadn’t blown the vent tube off.
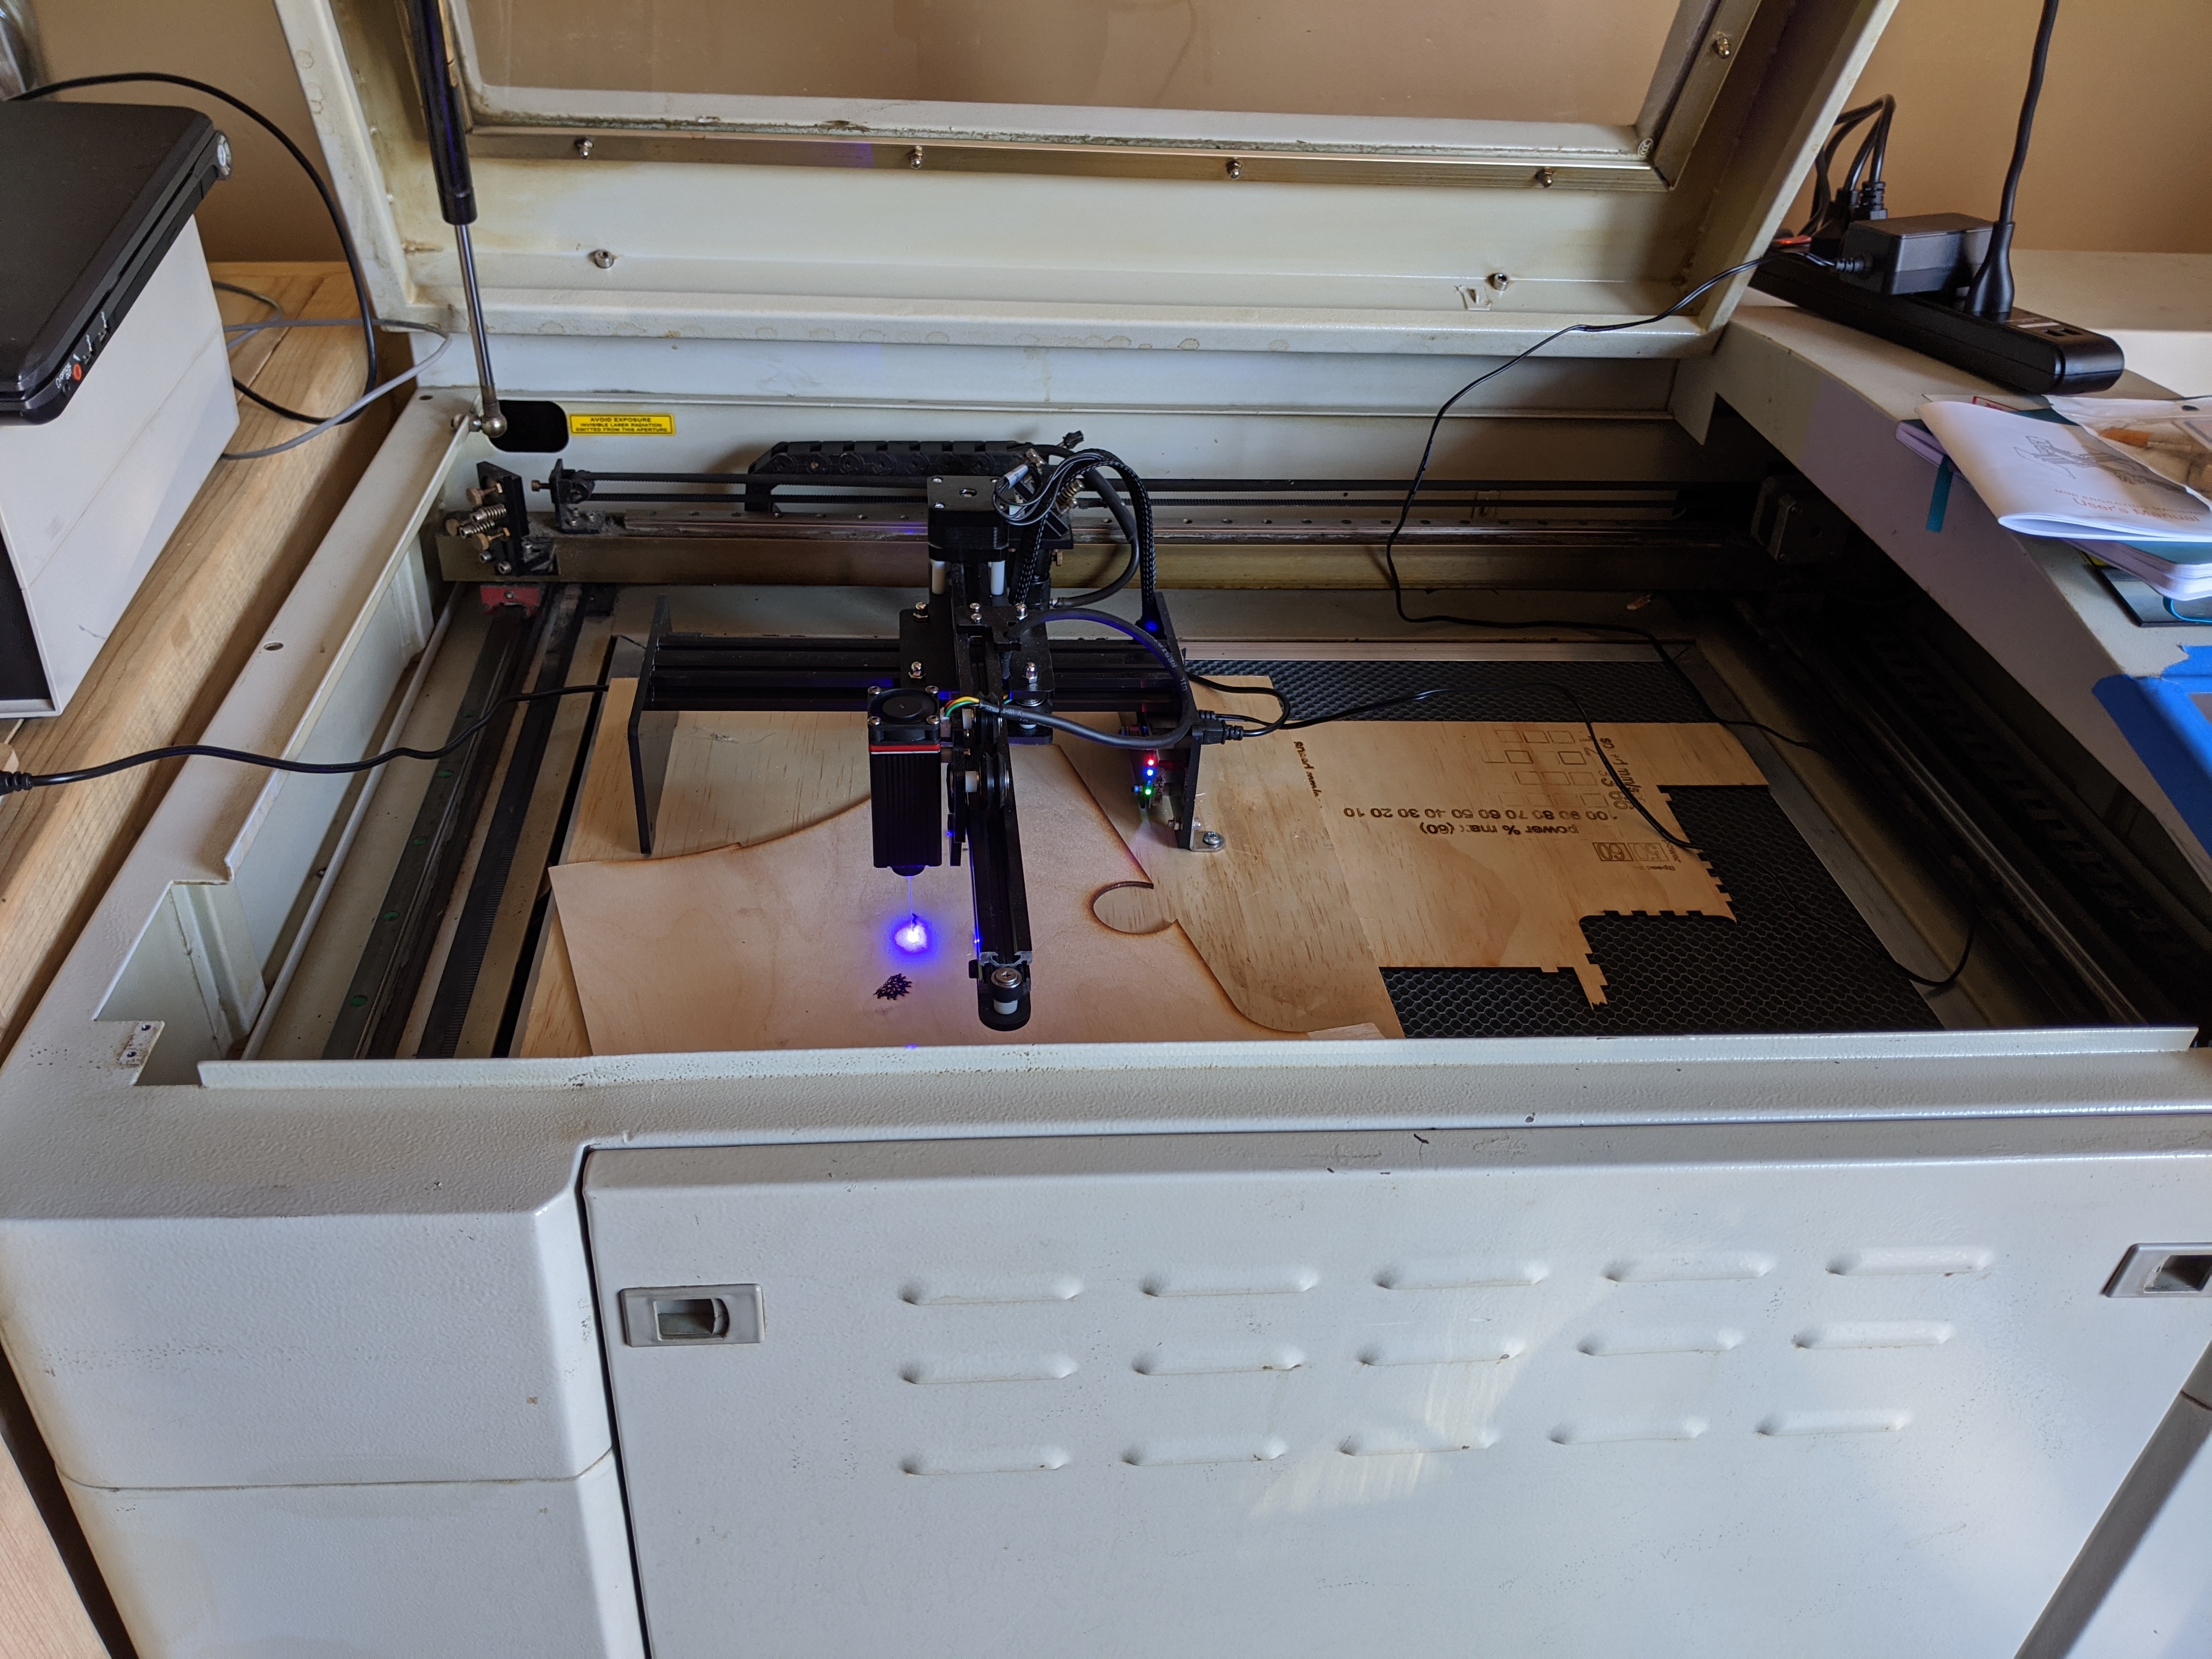

Also a working laser in my shop!!! Thanks Alan & Travis for the pick me up.
Susan
1 Like
In case people don’t get what they’re looking at,
that’s a diode laser etching inside a CO2 laser for ventilation.
Susan has invented a hack never before seen in the history of humankind!
It’s a true, tiny shop hack. With a few improvements this may actually be the way I have to use the diode laser.  It was mostly to make myself laugh… but it may turn out to be practical.