
We have started to receive our Ortur lasers.
People will unpack and assemble and start playing.
As folks test and learn new things we can share results here.
1 Like
[Copied from elsewhere.]
Ian,
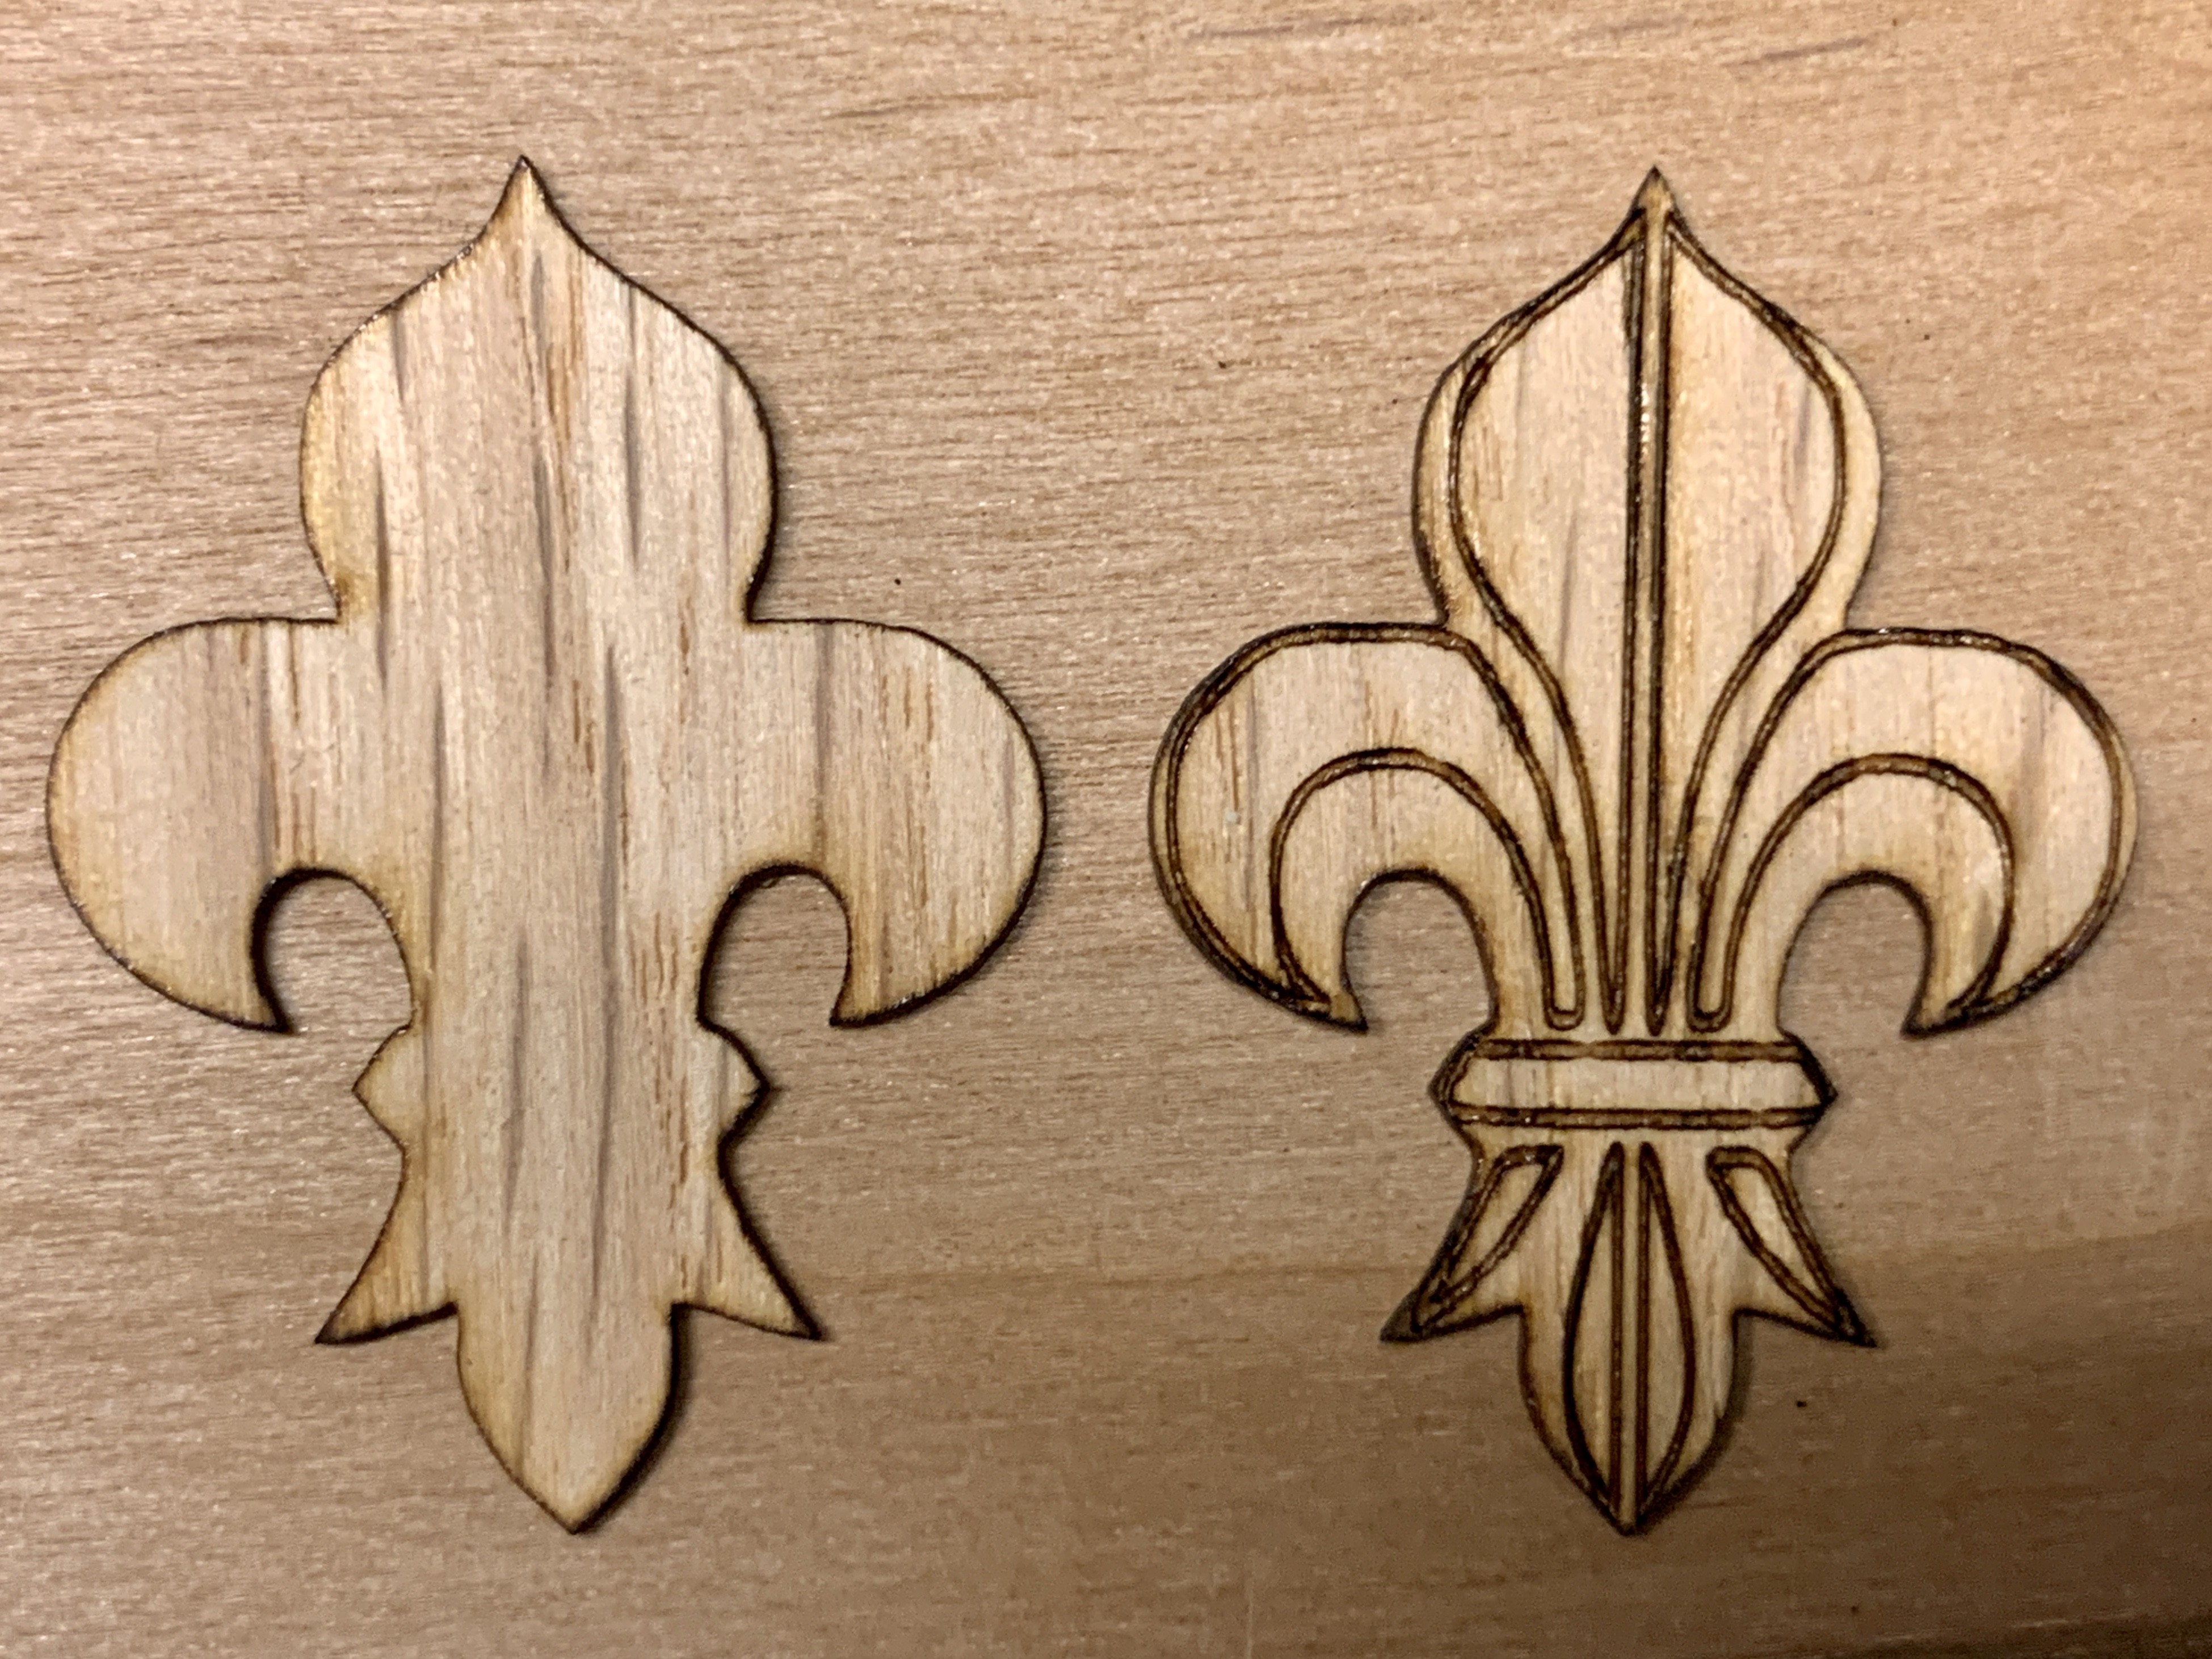
Each of these was done without backing; each of different thickness.
Each of these is around one inch tall using a trace of your fleure de lis.
I hope this helps to answer your question…Can it do veneer? Yes it can !
Veneer 3/128" (or 1/40") - Etch 5/85 x2 and Cut 4/100 x3
Veneer 1/64 " - Etch 5/85 x1 and Cut 5/100 x2

Veneer 1/128" - Etch 5/85 x1 and Cut 5/100 x1
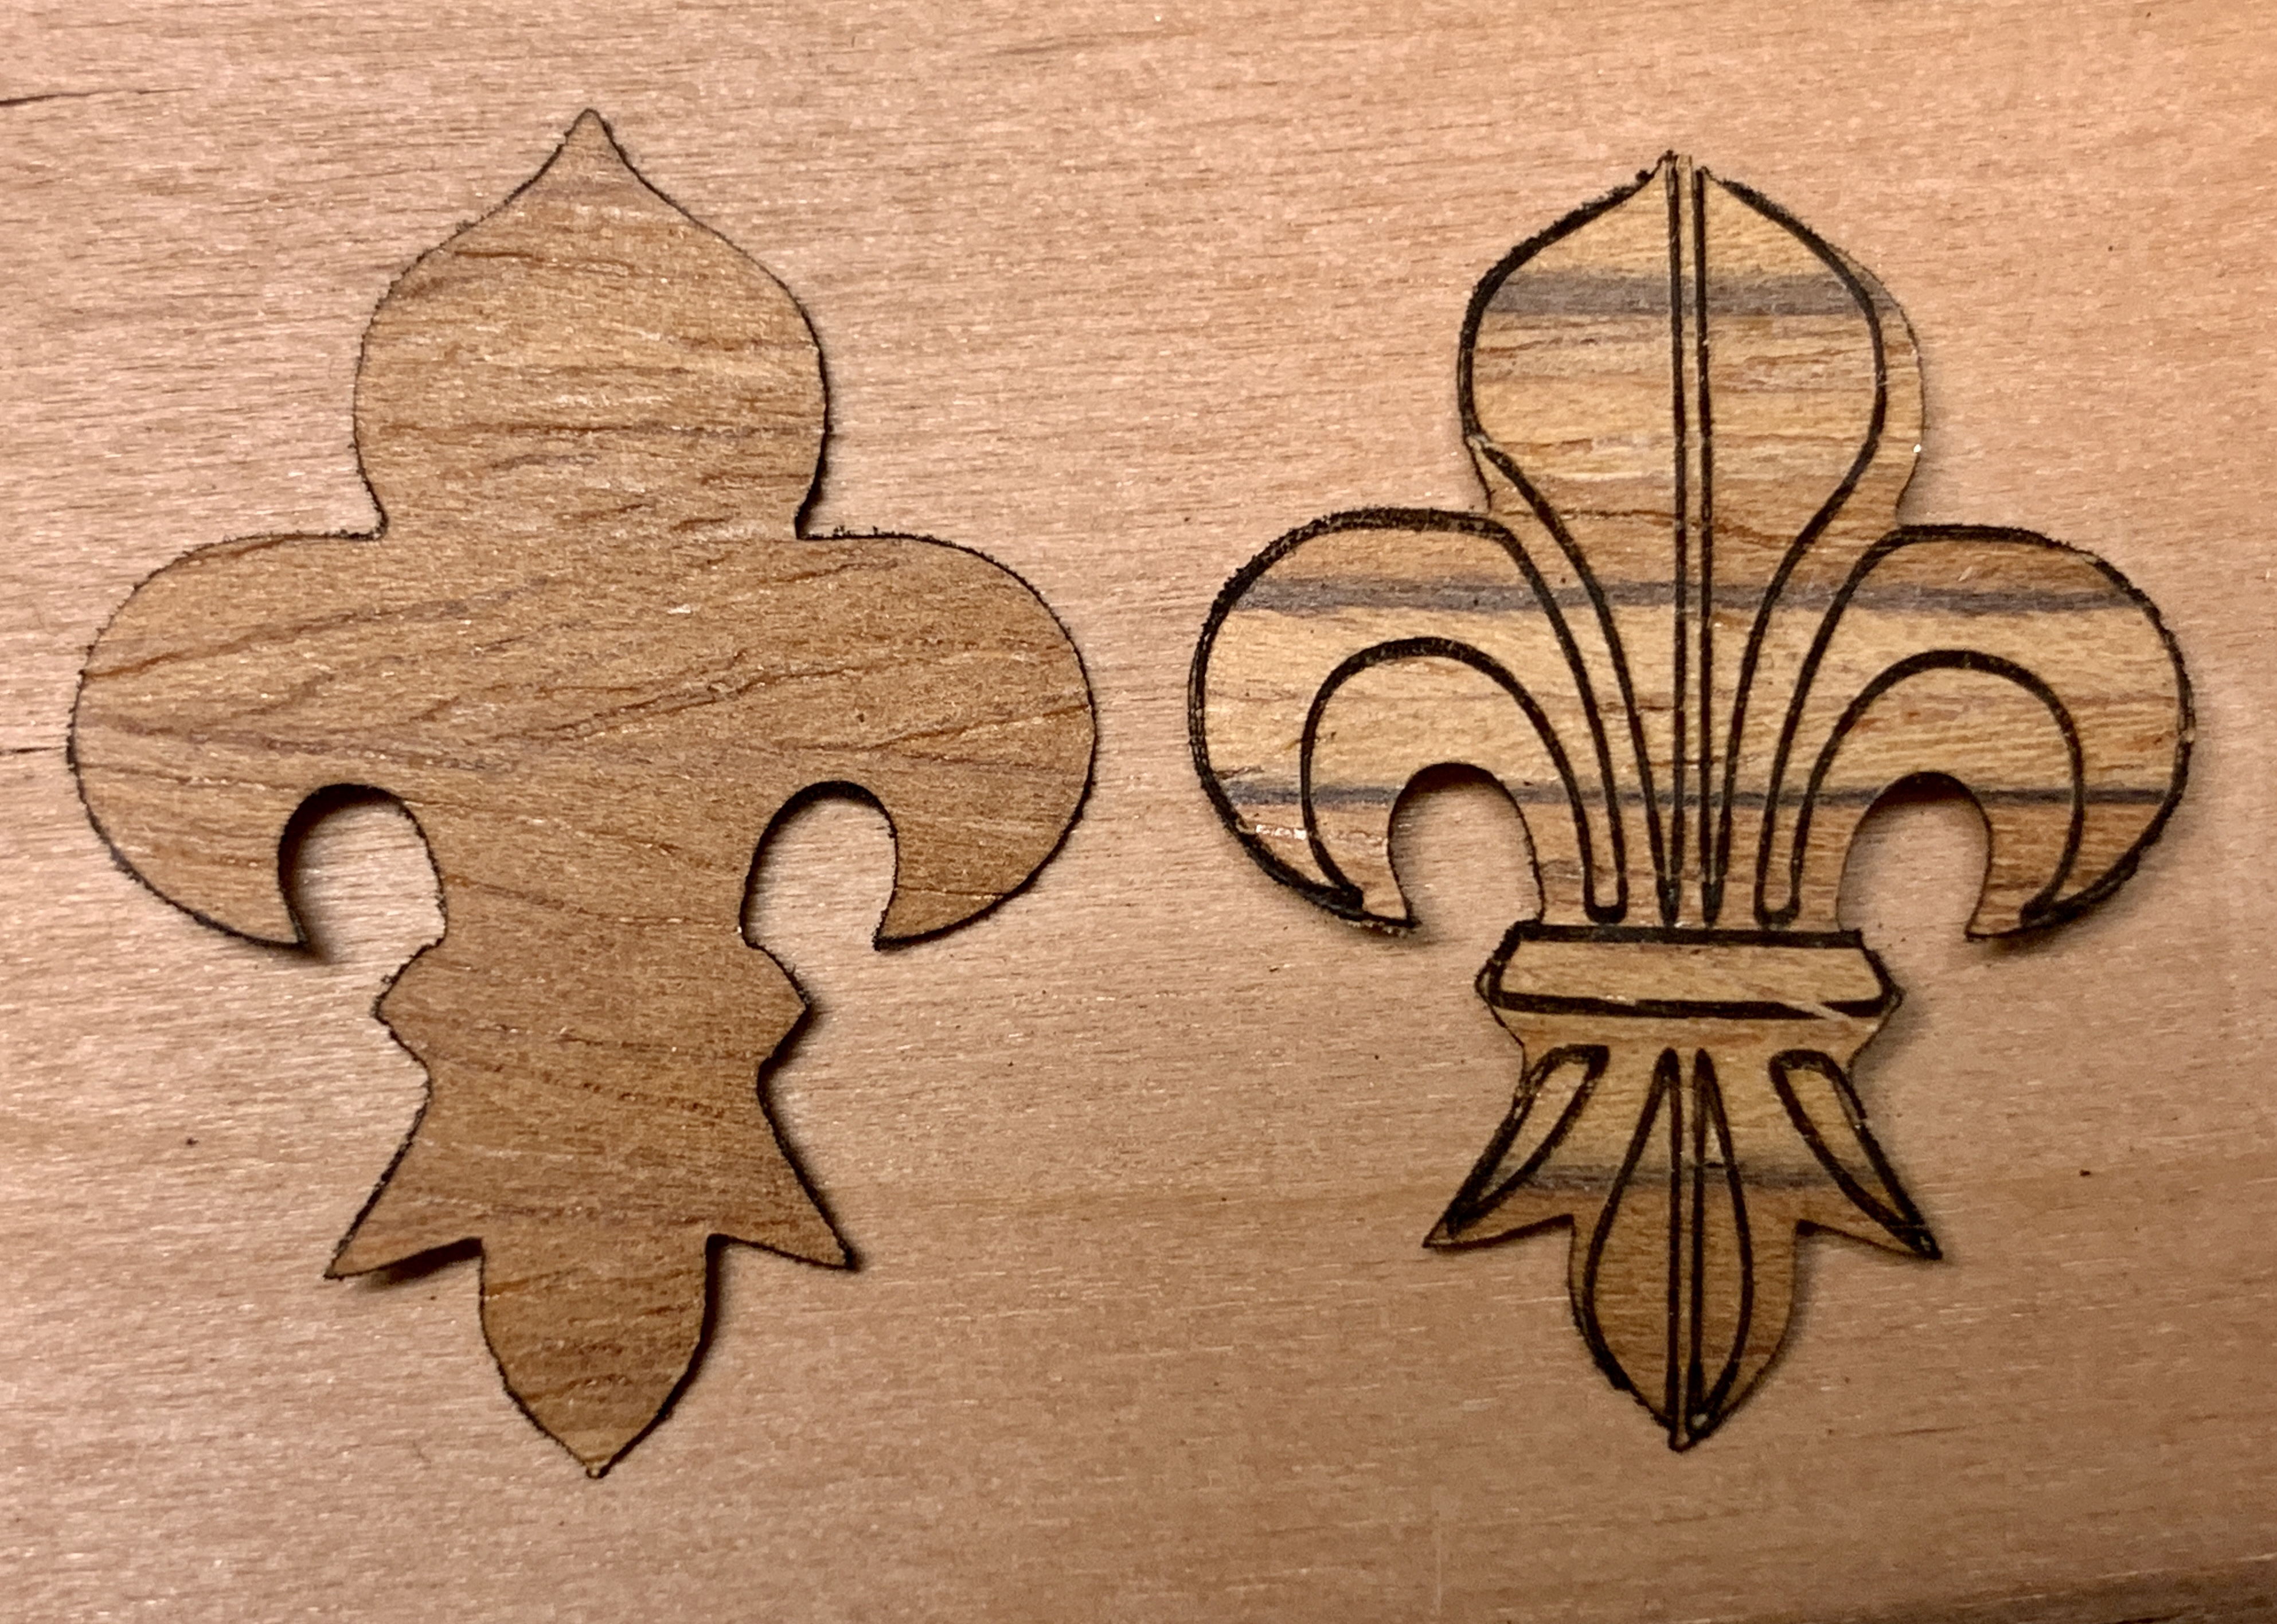
The symphony of veneer …
1 Like
I would be interested in the group’s thoughts about how to systematically test the capabilities of the soon-to-arrive laser engraver kit.
I’ve seen test samples using different powers and feeds, are there any that exist that could be shared.
Rich Kremsdorf
The internet is full of testing images for laser cutters.
One example I found and customized for LightBurn was this one:
But since we are ALL purchasing the same make, model and power we should be able to find what contrast levels are needed for good grayscale
and hit on what’s the best kerf we can get along with speeds powers. That is as long as the vendor doesn’t swap out a power supply or laser diode so we end up with a mixture of parts and capacilities.
Doug LaRue
David C, did a series of tests to benchmark Blue & Green, he may still have those.
Ian Martin
If I can it get to run, i’lll use that template. i’m thinking run it with the focus aimed high, low, and the middle of the focusing range. Wonder how deep that range is?
Rich
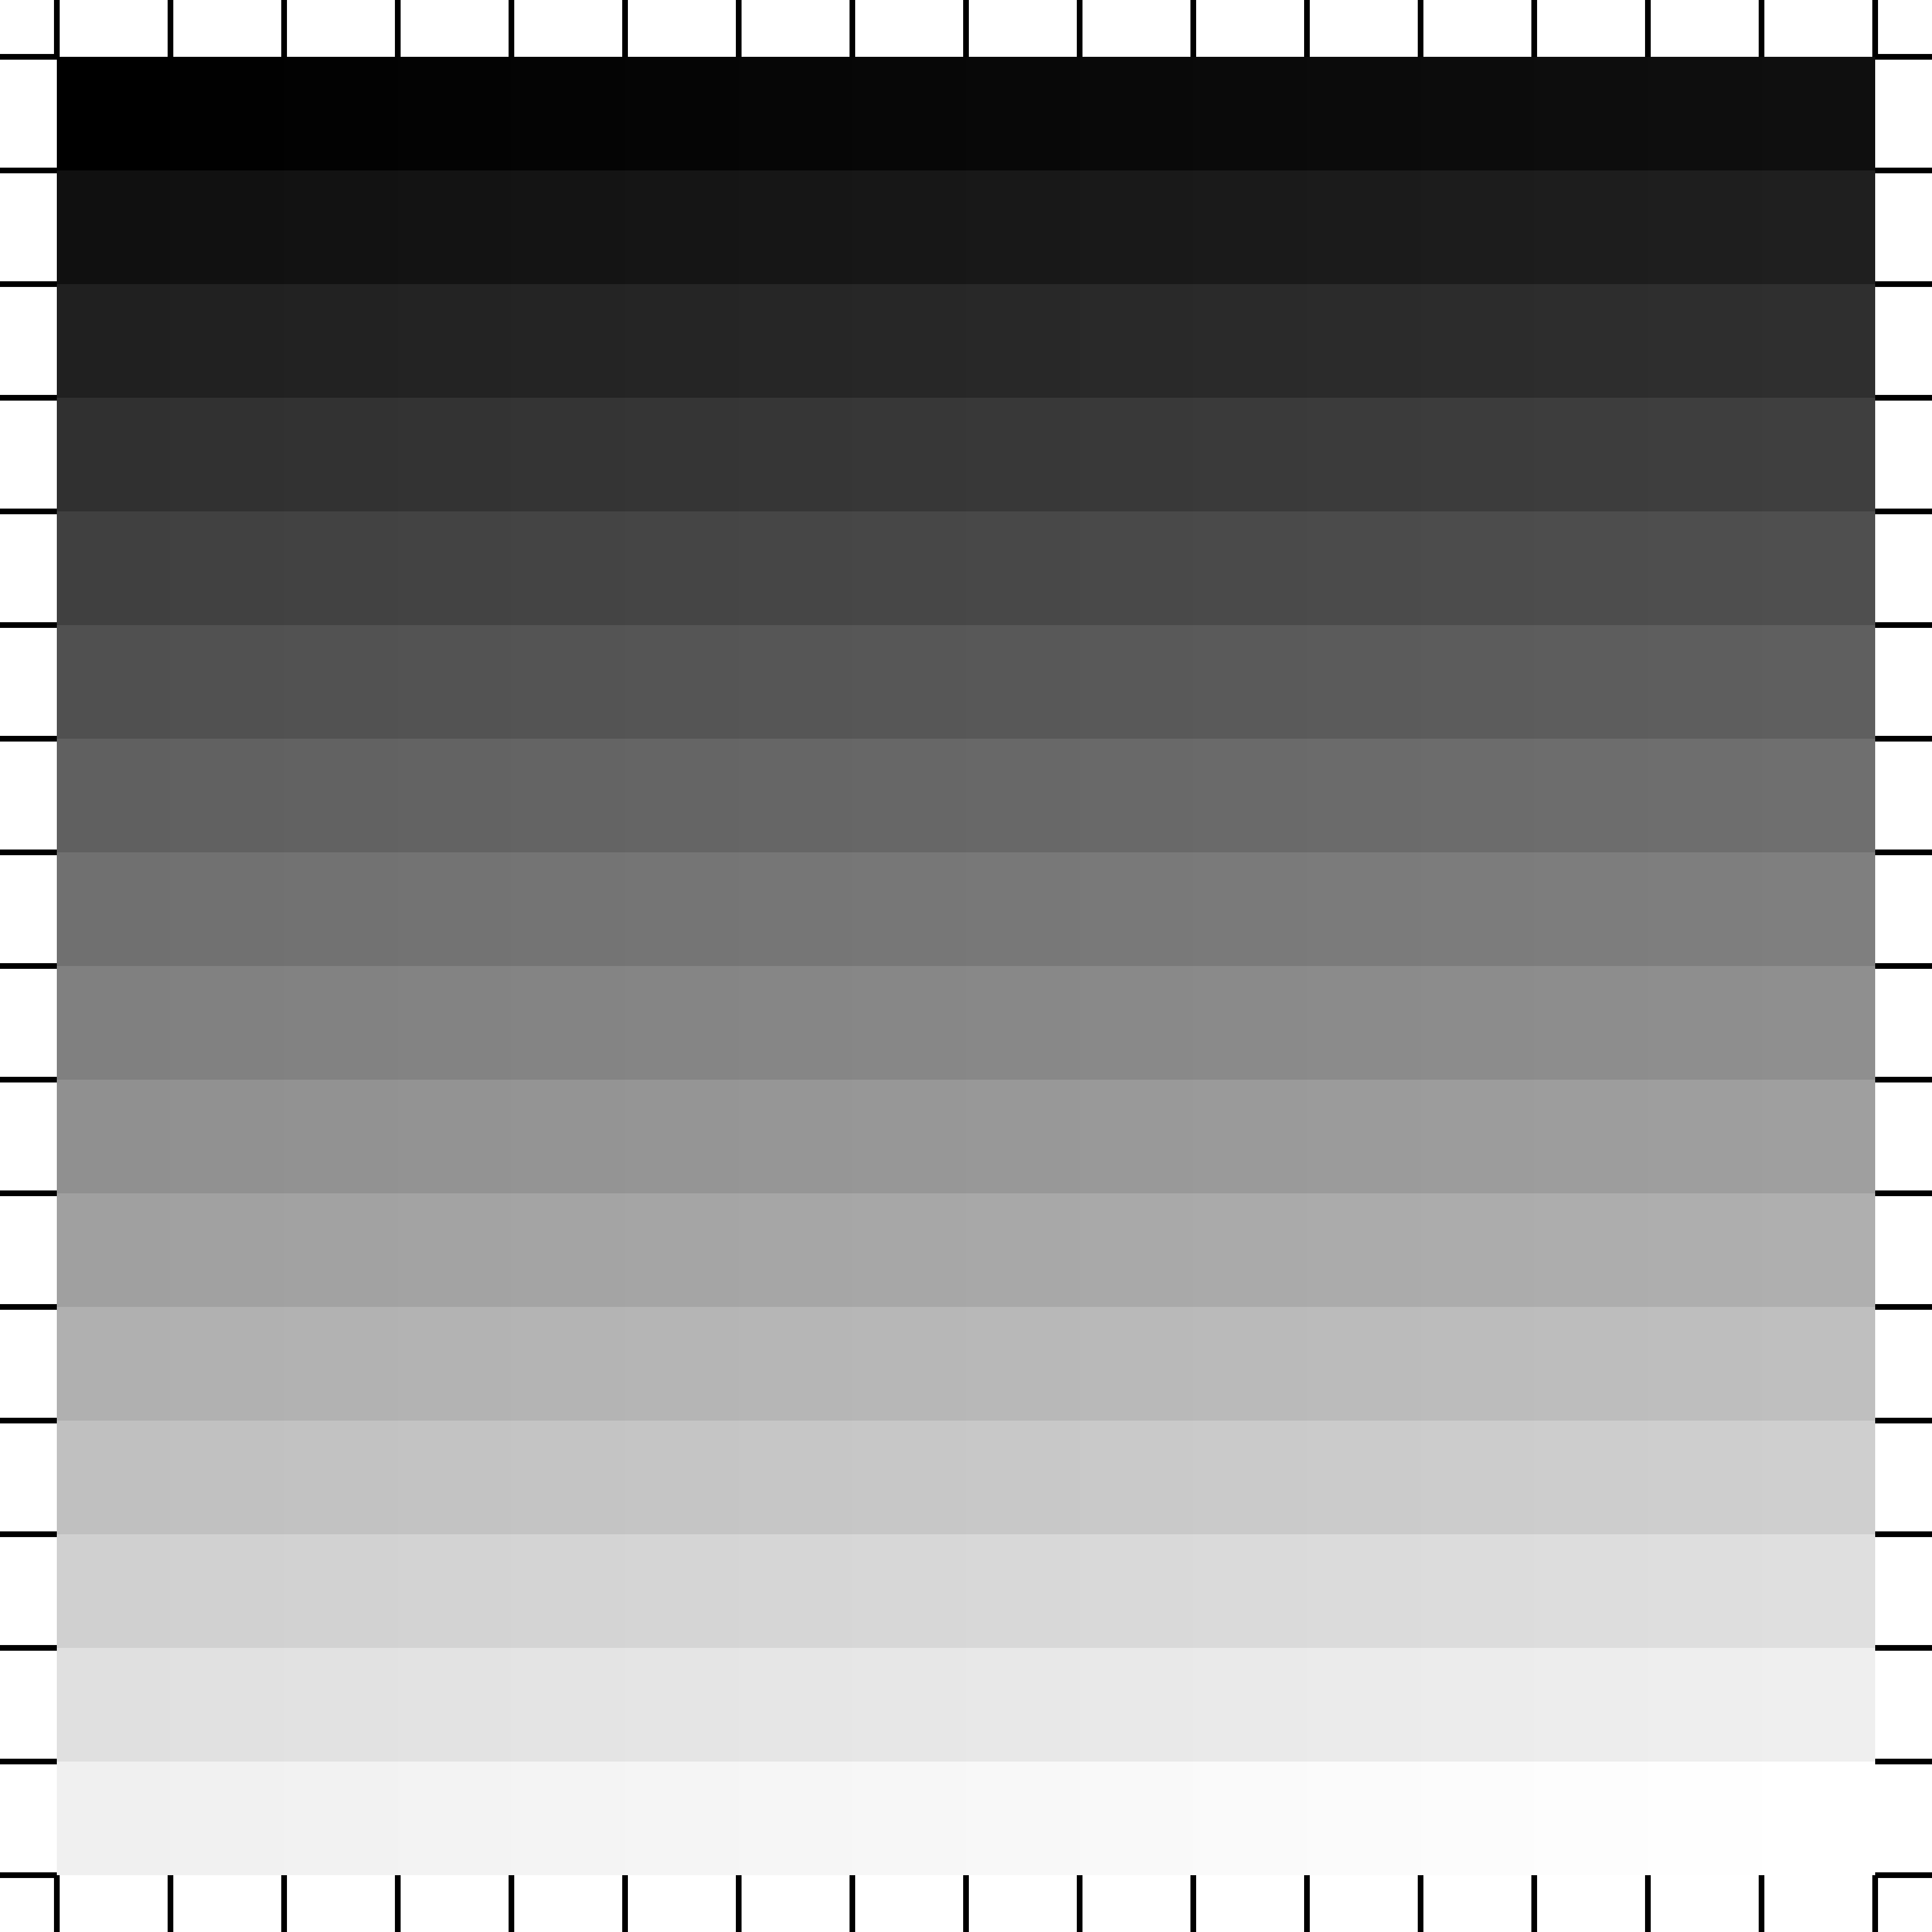
Hello Rich,
Please see attached for a grayscale test pattern which has each shade of gray. When burning it, I’d recommend setting Gamma = 0.5 (instead for the default 1.0). This property shows up in the Shape Properties tab after clicking on the image in LightBurn.
Take care,
David
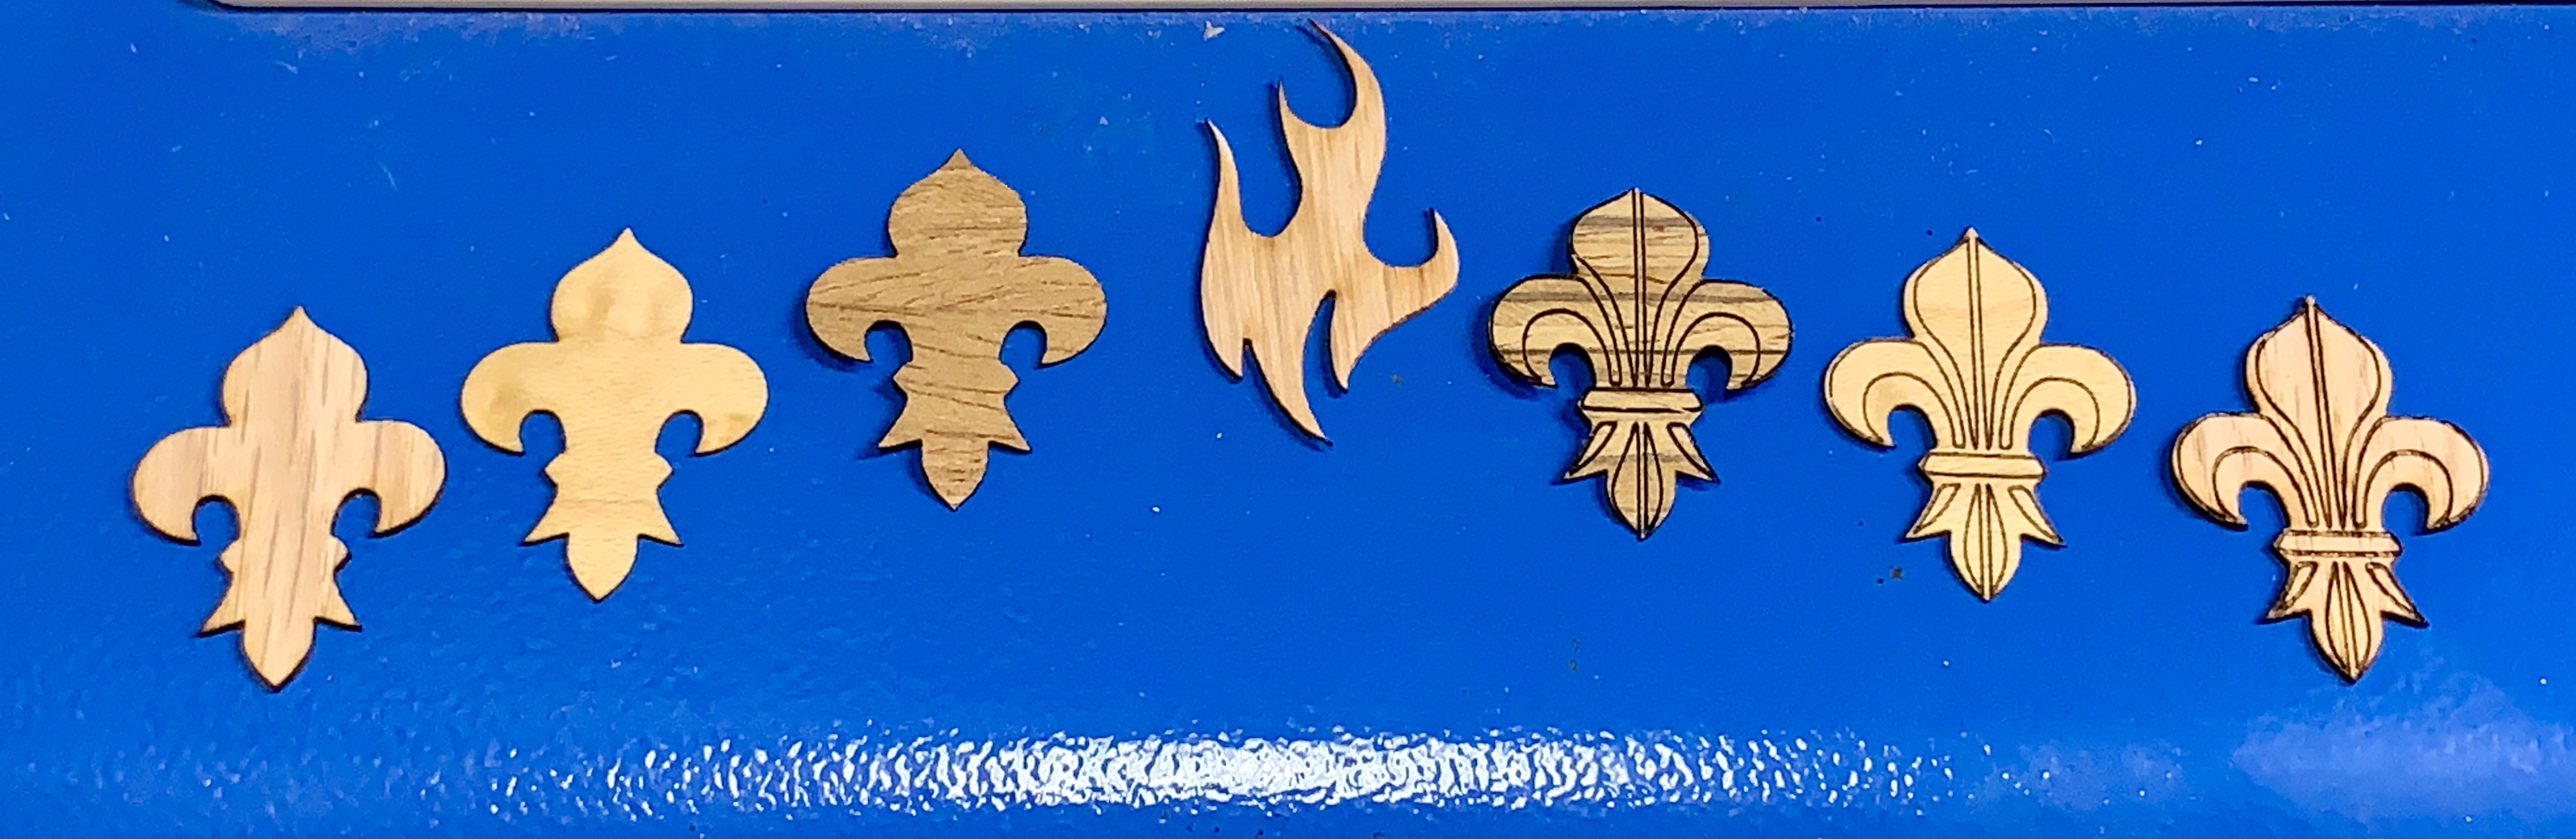
I know people are thinking about veneer inlays so I did a little test …
Below is an array at 100% power at eight different single-pass speeds. The slowest speeds were counterproductive due to char. The same results should have come from multiple passes at lower power. The wood is Baltic Birch, speeds are under each star, and the depth of etch is to the right (of those worth measuring).
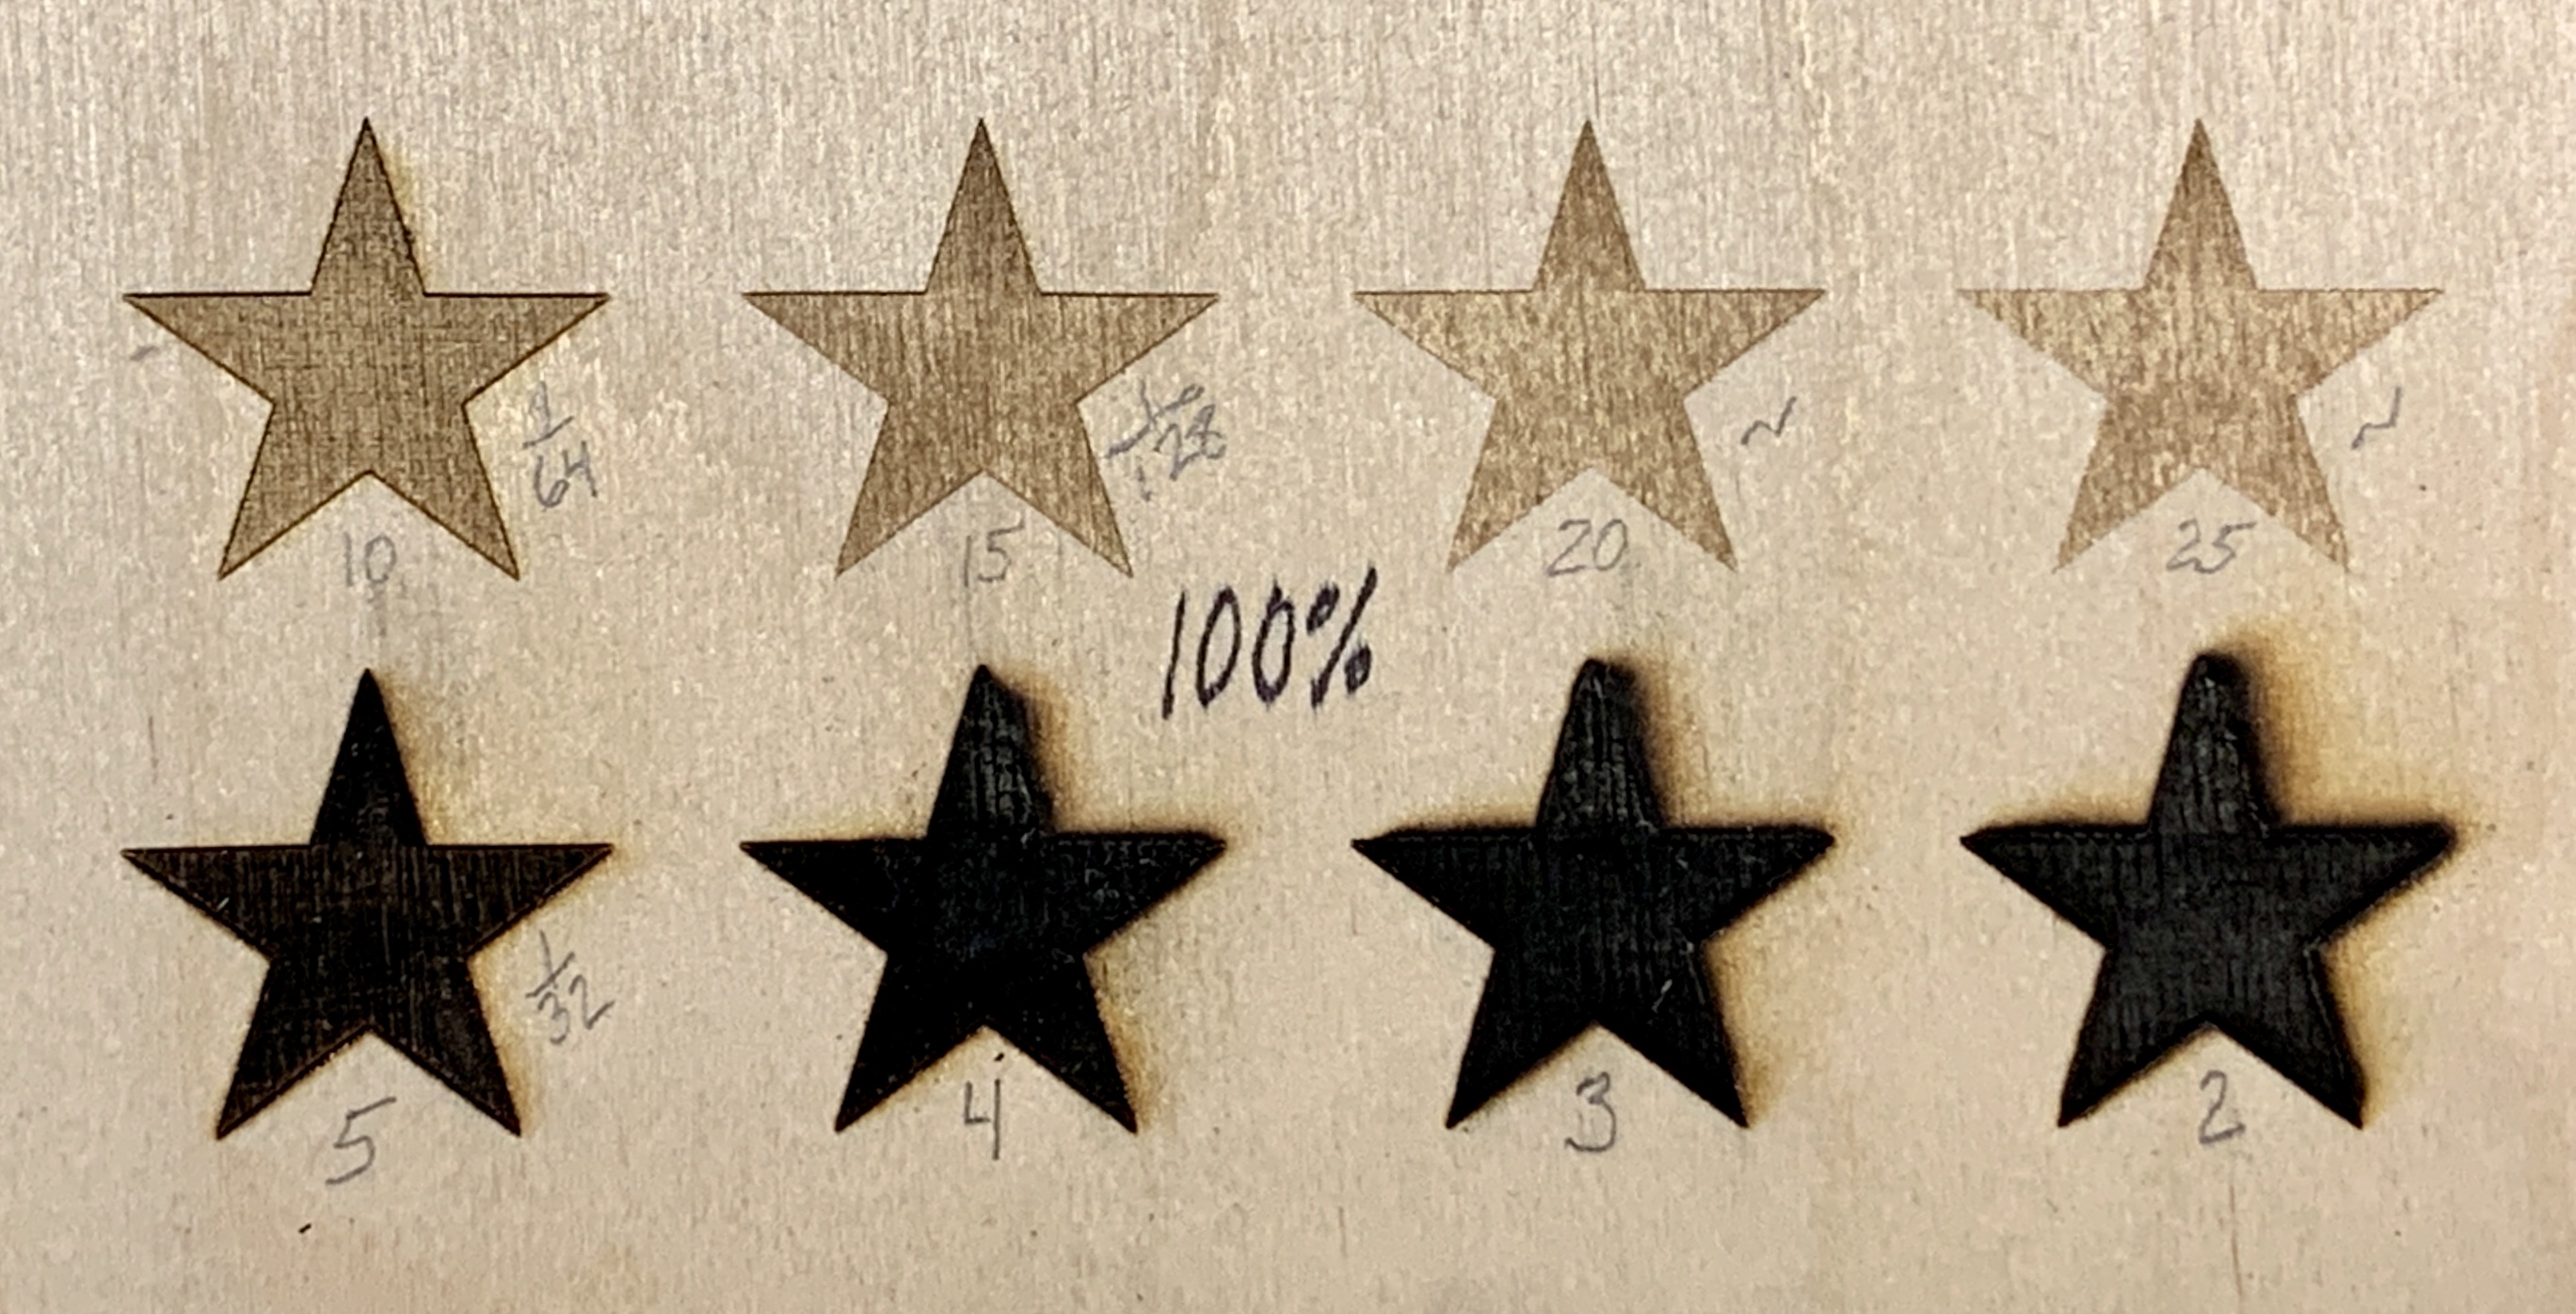
I then cut veneer of three thicknesses: 3/128" and 1/64" and 1/128". No attempt was made to compensate for kerf. I wanted to measure depth of etch and strive for a flush inset. The results were pretty good: two perfectly flush and one ever-so-slightly proud.
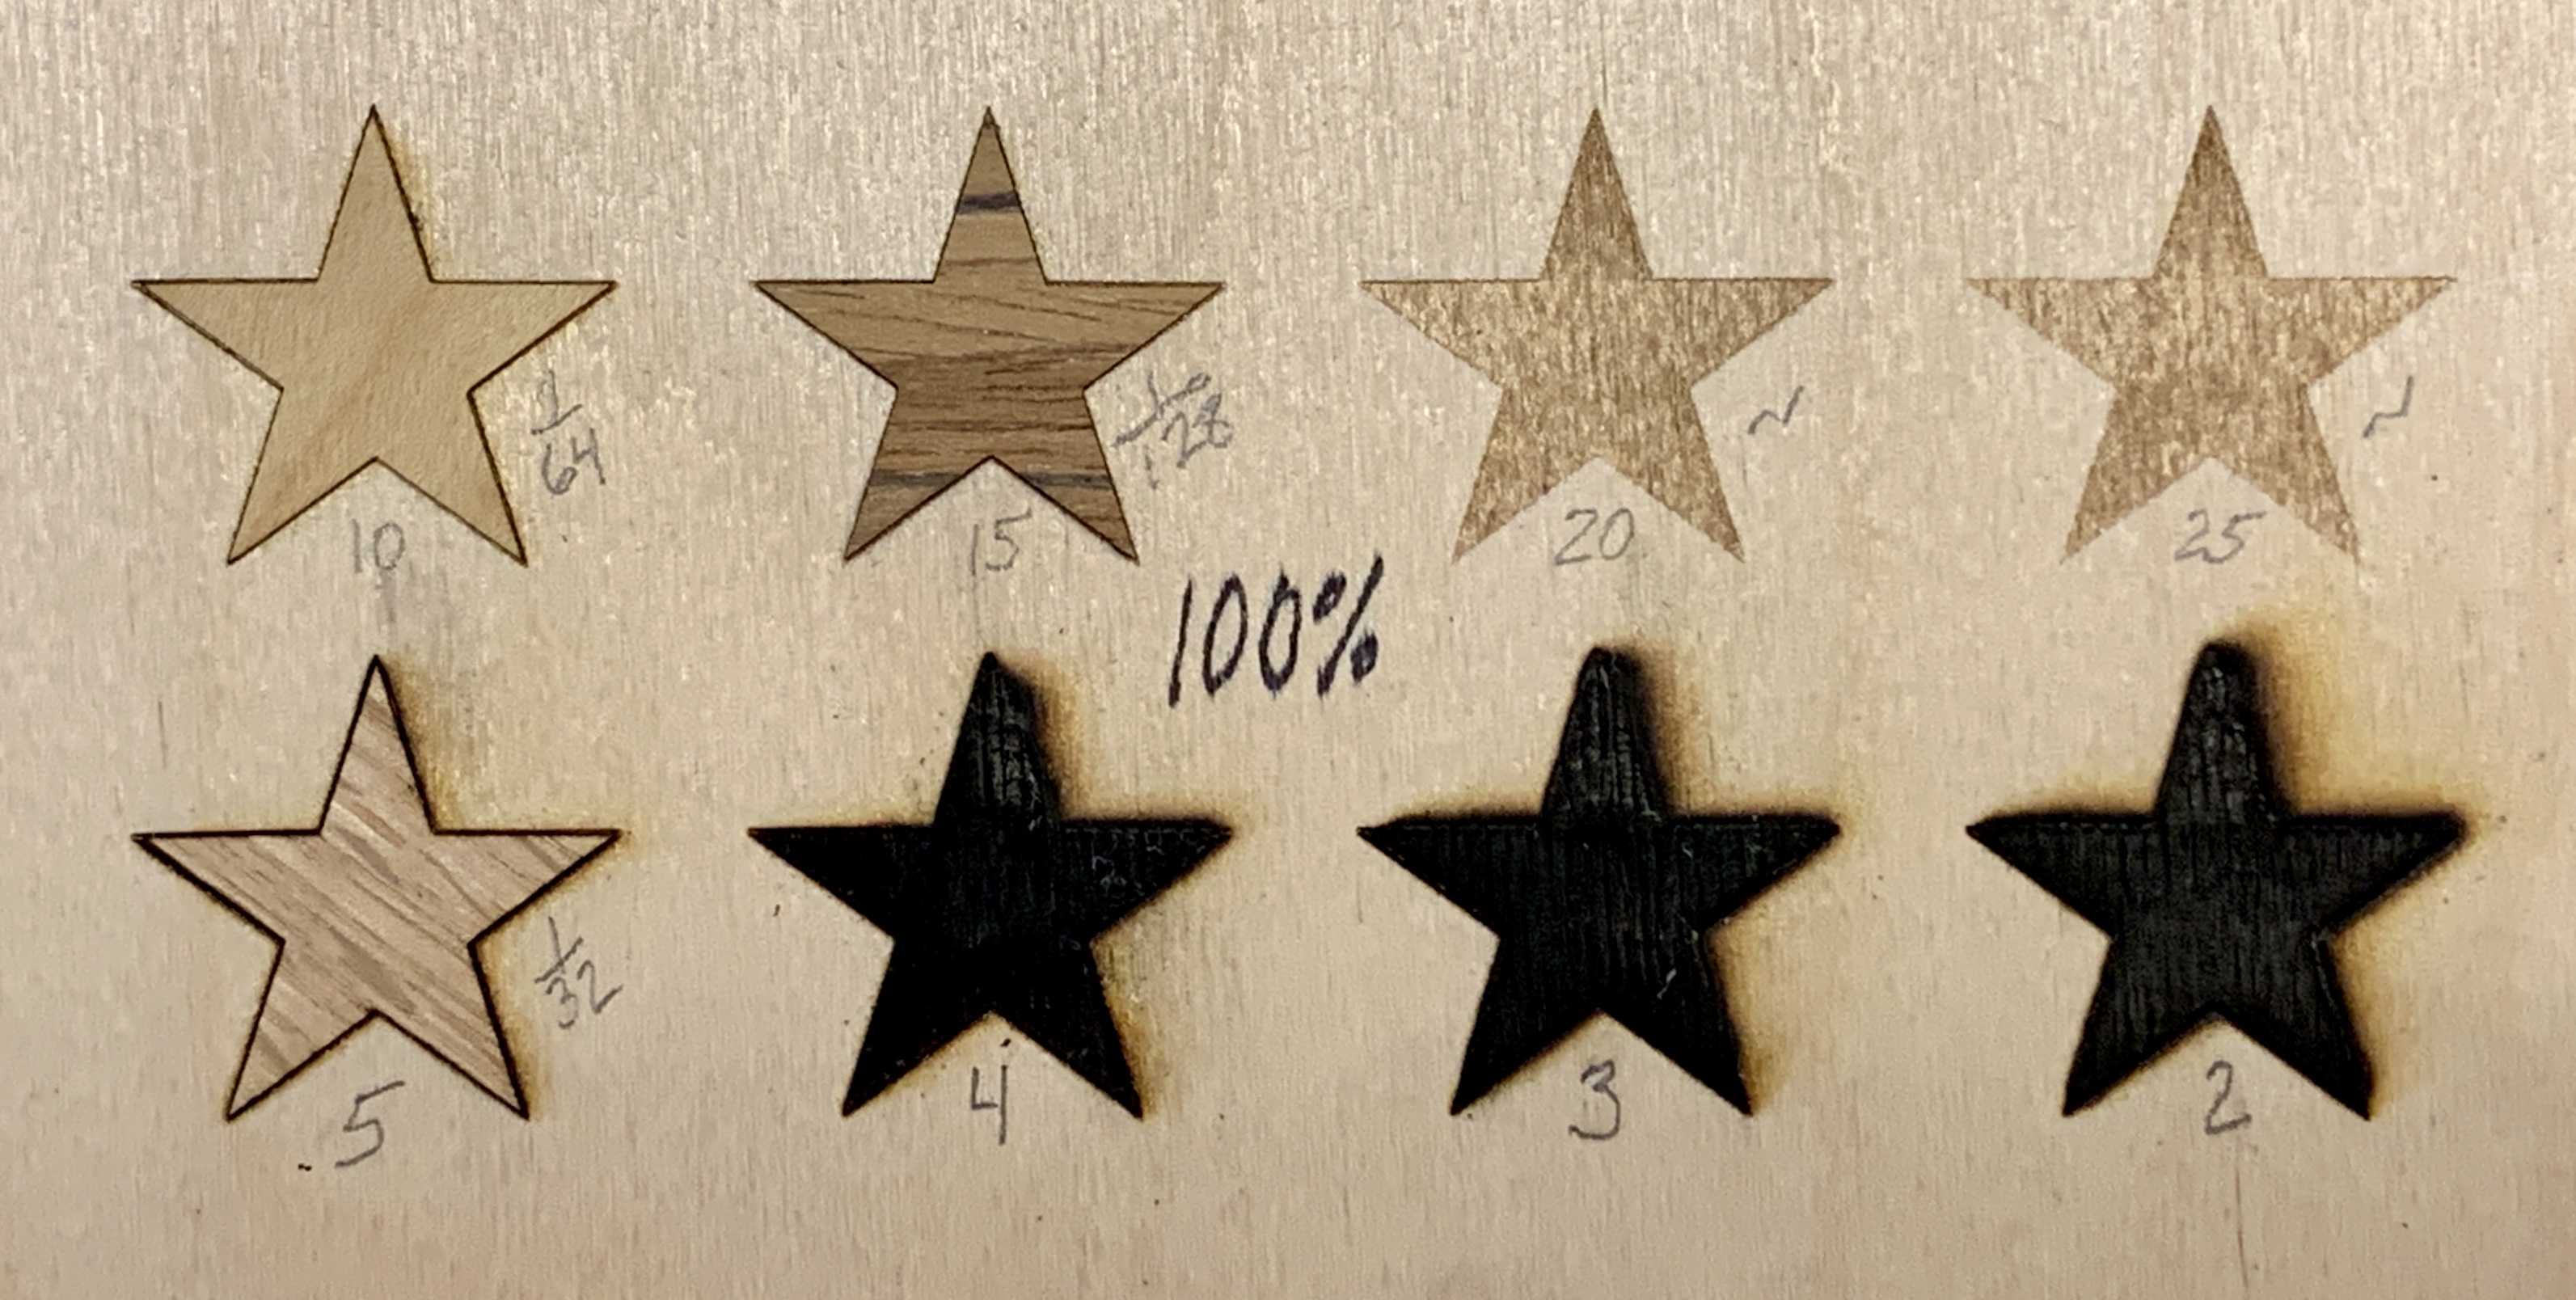
With most of my veneer being in the 1/32"-1/40" range I guess I’d like to get cleaner results at that depth. A simple next test could be two passes at the 10 mm/sec as the one pass was so clean and produced a depth-of-etch of 1/64".
Conclusion?
I think these lasers will serve us well for veneer inlays.
I suggest that you make a copy of the gcode settings that come with the machine because when you change them they stay changed. You can go into lightburn and go to console and enter the command $$ and you get a list of gcode settings. Select everything back to the $$ and copy it and then paste it in a text file and you will have copy of the gcode settings. then if you change the gcode setting you will have a copy of the original setting to go back to if needed.
Looks good, we’re going to release the more powerful one, better for cutting.
1 Like
@kremsdorf
The latest user manual of Ortur Laser Master, download link is: https://www.dropbox.com/s/w1yu3hpw6e5rxs2/Manual.zip?dl=0
1 Like
Connectivity between Lightburn and the laser has been very sporadic today so problem definitely not fully solved. It would be helpful to know the significance of the colored lights on the laser. At the moment the blue light is solid and the red light is flashing. I shouldn’t have to decode the messages by experimentation. It could be provided in the manual.
I also would love to know how to which G codes are most significant so that I can input them nothing else seems to be working. If anyone has a good link for this please share it.
I also had to reinstall LaserGRBL to running again although “travel exceeded “ error messages continued. Would love to know to fix that by simply sending Gcodes.
Currently working, will upload samples later
Here are 2 samples from the Ortur 20W laser. The first is lines only, the second is line and fill. Note absence of smoke stain.
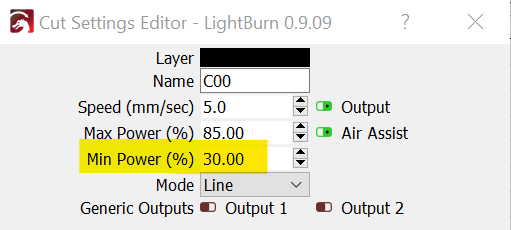
The etch looks great! The scoring suffers from those burn points whenever it had to turn a corner. Try playing with the Min Power in LightBurn. That’s what it will decrease to as it slows to turn. Get it right and those burn points will disappear.
Let us know of any conclusions come to.
2 Likes
some GRBL g-code links:
Enabling or disabling Grbl’s laser mode is easy. Just alter the $32 Grbl setting.{but beware the power setting of the laser! not sure how to do that with the g-codes
-
To Enable : Send Grbl a
$32=1command. -
To Disable: Send Grbl a
$32=0command.
I programmed a macro button in LB to turn on the laser at low power, for purposes of focusing.
I copied the code in LaserGRBL for that function.:
S20
$J=G91Z0.0001F2000
$32=1
Any button that repositions the laser around shuts off the light. Unfortunately that means it’s not on when framing.
I tried applying the suggestion from an earlier posting about enabling the “Fire Button” in LB. I don’t see the option in the Move section to adjust power, so that doesn’t work out for me. Yet.
There was something about holding the Shift key down while doing moves related to the fire button enabling… I would figure out why the fire button isn’t showing up as it is supposed to work and was created for Diode Laser machines/users.
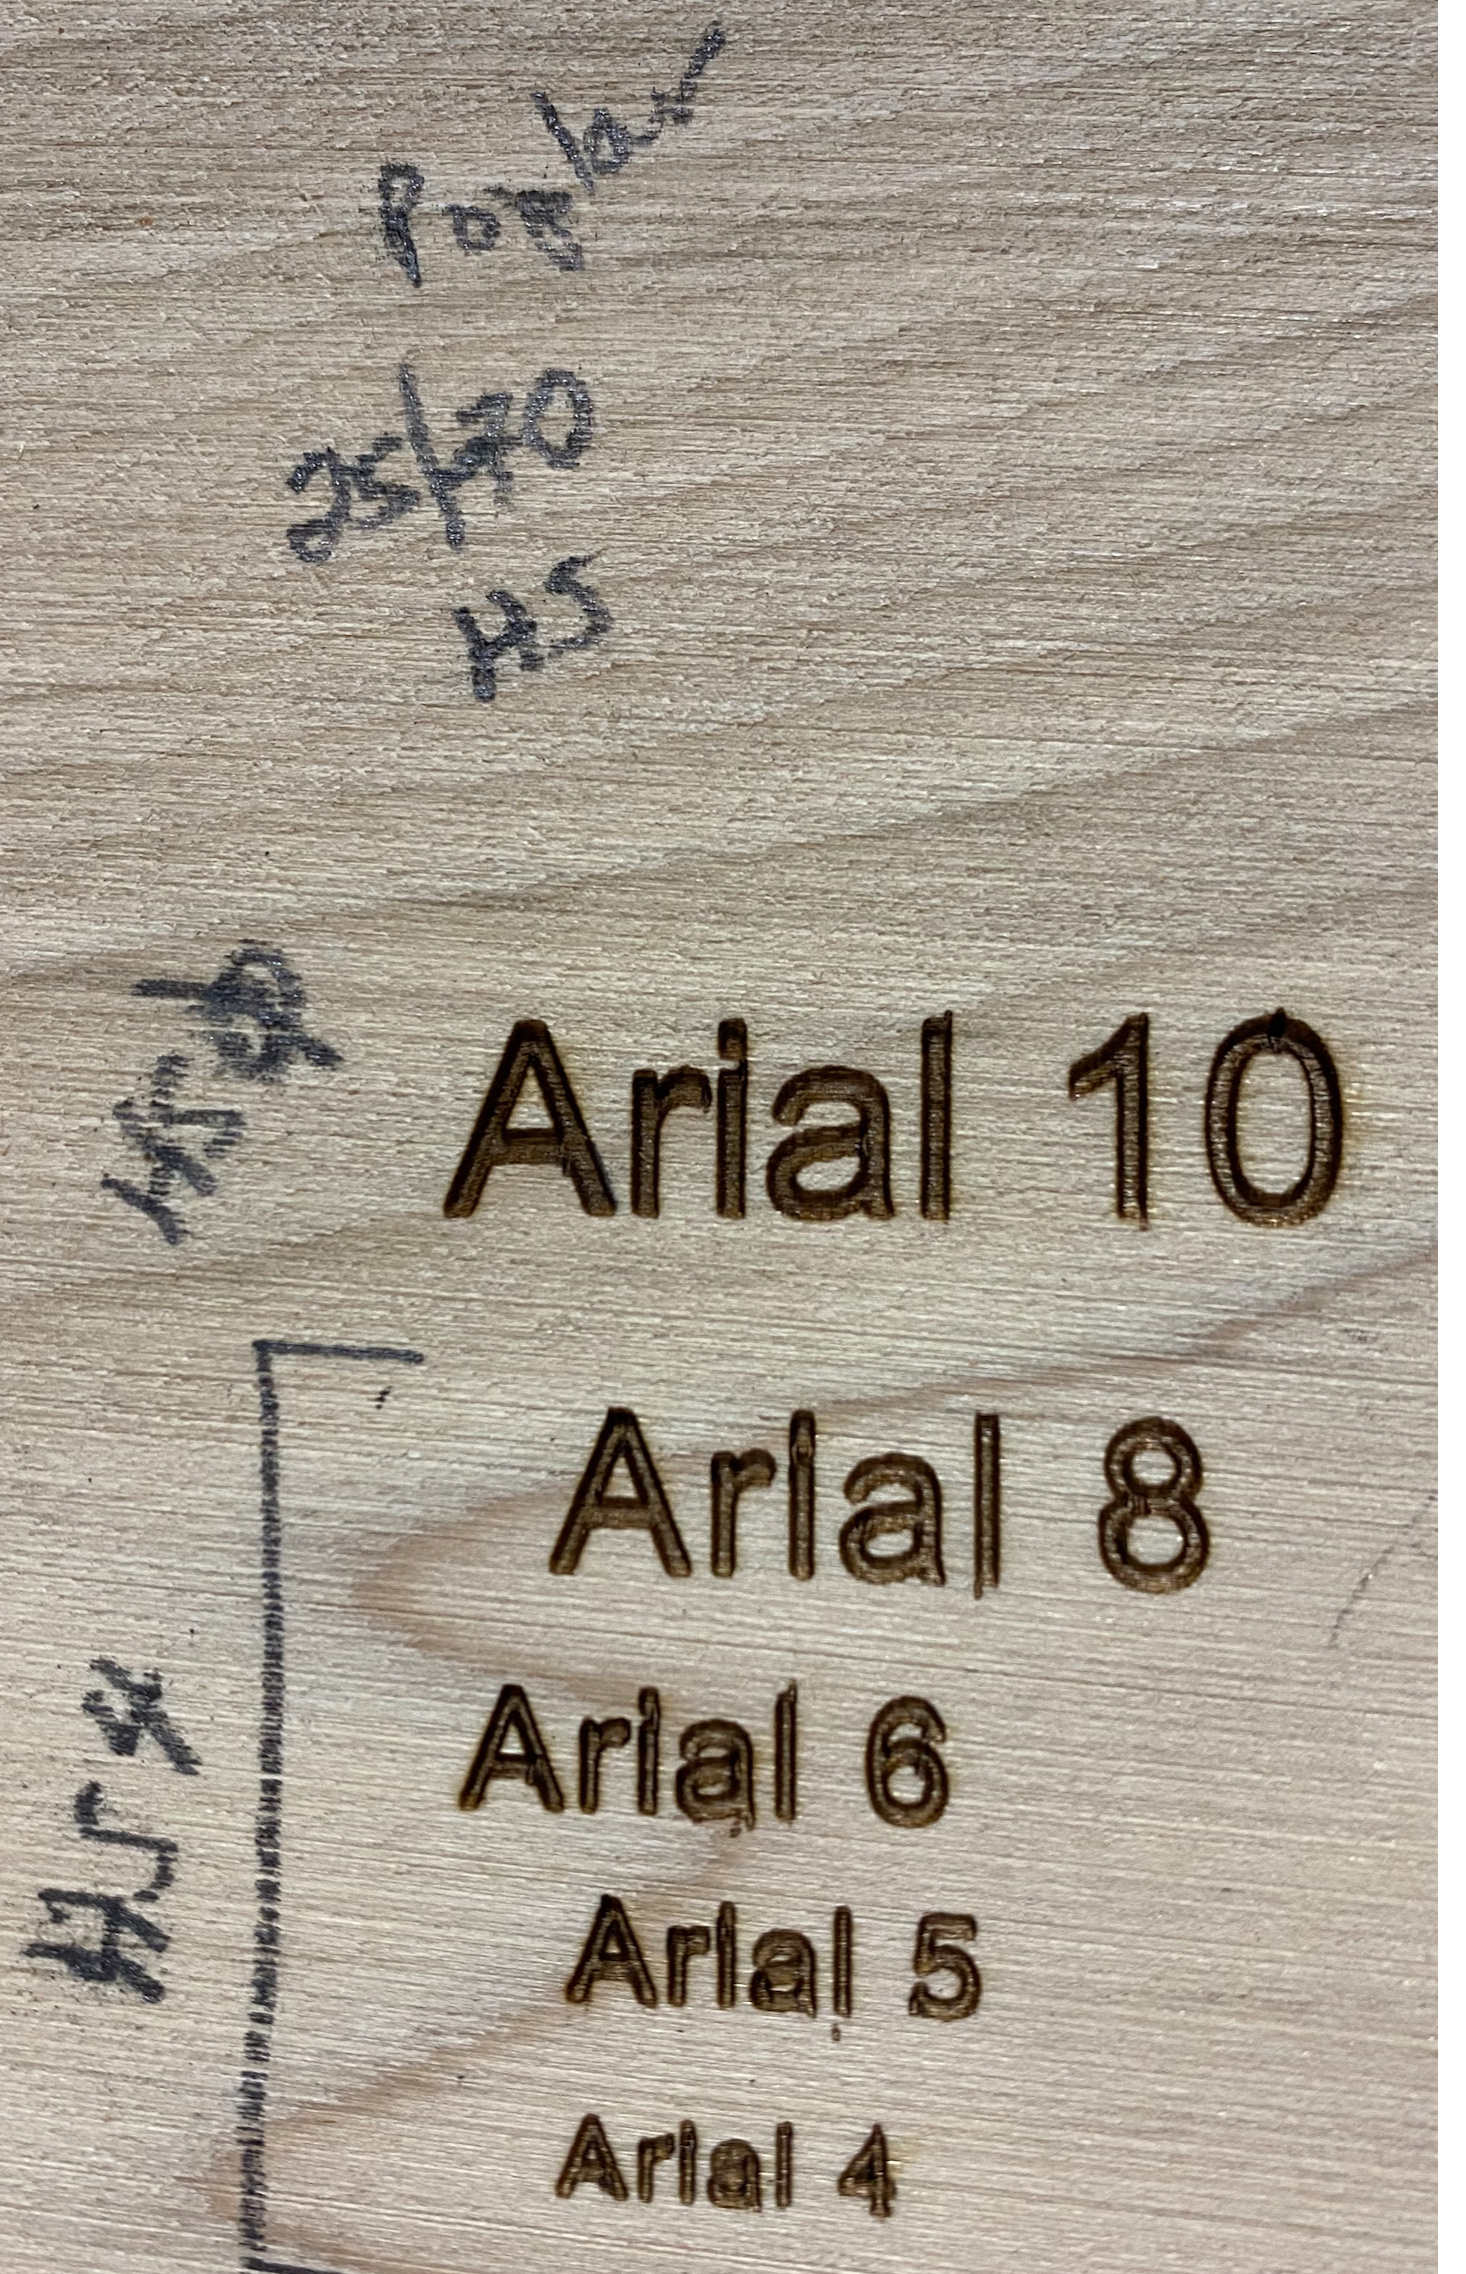
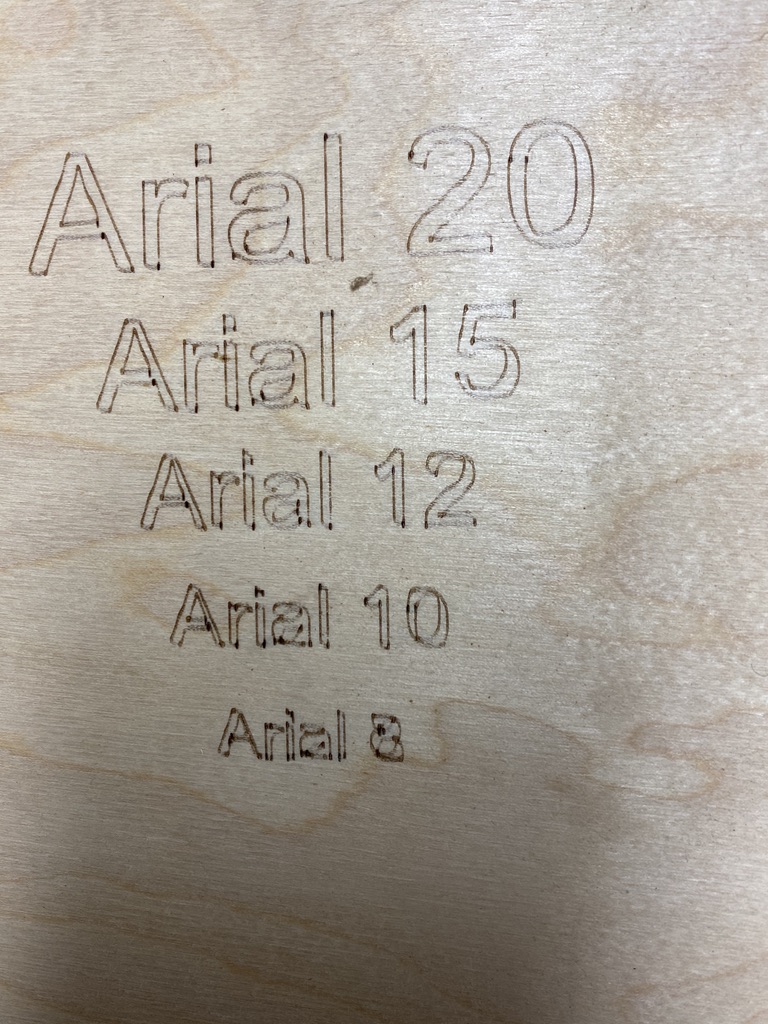
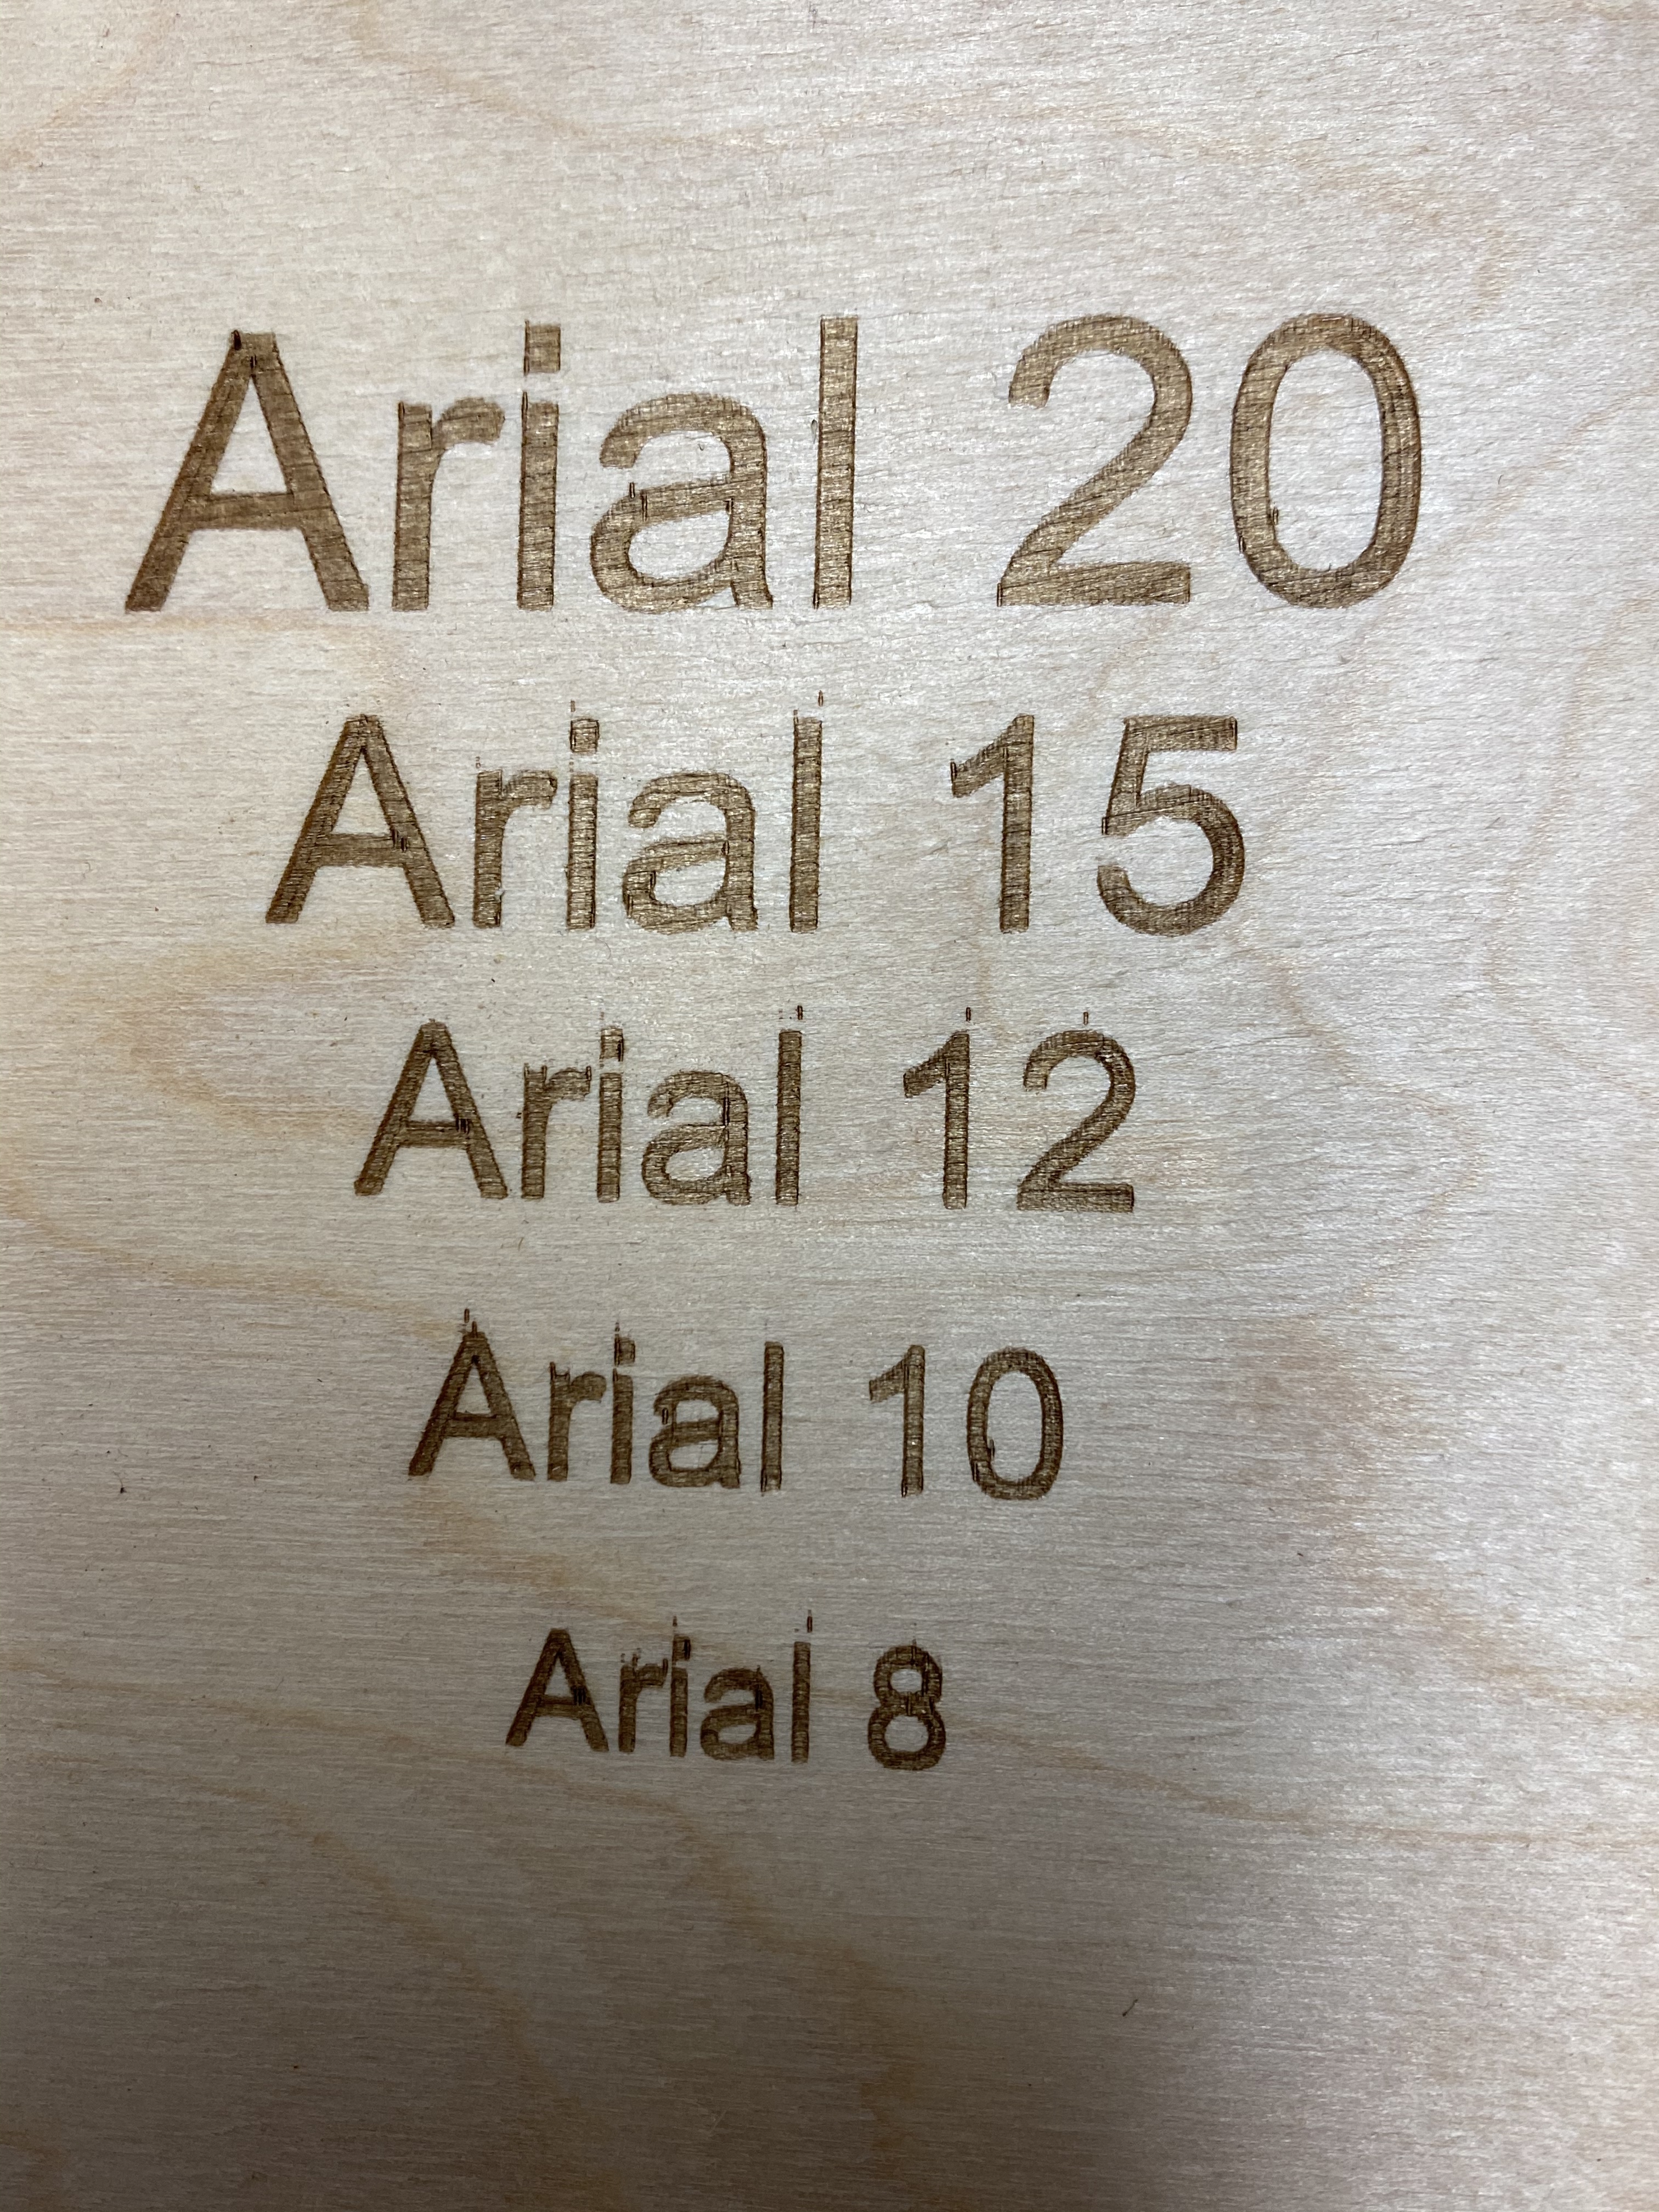
Here are some smaller fonts. The letters ran into each other until I increased horizontal spacing up to 4 for the small fonts.
This is on poplar with the noted speed/power settings. It definitely burns off a layer of wood…
Enabling the Fire button is done in the LB menu option for Device Settings, it’s a toggle. But then I don’t see anything change elsewhere. Hitting Frame with shift depressed makes no difference, not surprisingly since I don’t see where the power can be adjusted.
Arial 4 looks pretty useless; not impressed with the mush.
That said, your other etches look good, especially the larger fonts.
Were these Fill mode or were they Fill and Line?