
I get a kick out of the fact that with our little Ortur lasers we have to worry about “over burning”. 
@tim.peachey no matter if it’s the rubber on the bearing or the bearing itself, I would drop Ortur support and email( ortur@ortur3dprinter.com ) for 2 or 3 replacement wheels.
Tim,
Could you describe how it doesn’t “track true”?
I don’t have my Ortur (it’s out on loan) but if a bearing is bad then give me the dimensions of your bearings and I’ll see if I have a replacement. If it’s not a bearing that’s the problem then maybe it’s placement? Can you tweak it? Lastly, I suppose it could be the acrylic that it’s mounted on that’s not cut right, which we can also fix.
Help us to better understand the problem.
I’ll capture some video soon to demonstrate. But it is like a wobble in the “tire” of the wheel, from side to side as it goes around. As though it is partly misaligned on the “rim”.
Here is a link to the video I took to illustrate the issue. The problem isn’t the bearing itself, it’s the wheel, which appears to be made of a high durometer elastomer. I took the bad ones off, and tried to true them up. One of them could be moved a bit, I could feel it “click”, but I’m not sure if it stayed true. The other one I can’t even get that.
If you look at the edge of the chamfer on the wheel, you will see it wobble. Whenever it does this, the whole laser does a little wiggle. I’ll contact Ortur for some replacements. If they are off the shelf items, I’d be inclined to get some spares for eventual wear.
Still a cool tool at this price :). Can’t expect a perfect robot for cheap.
1 Like
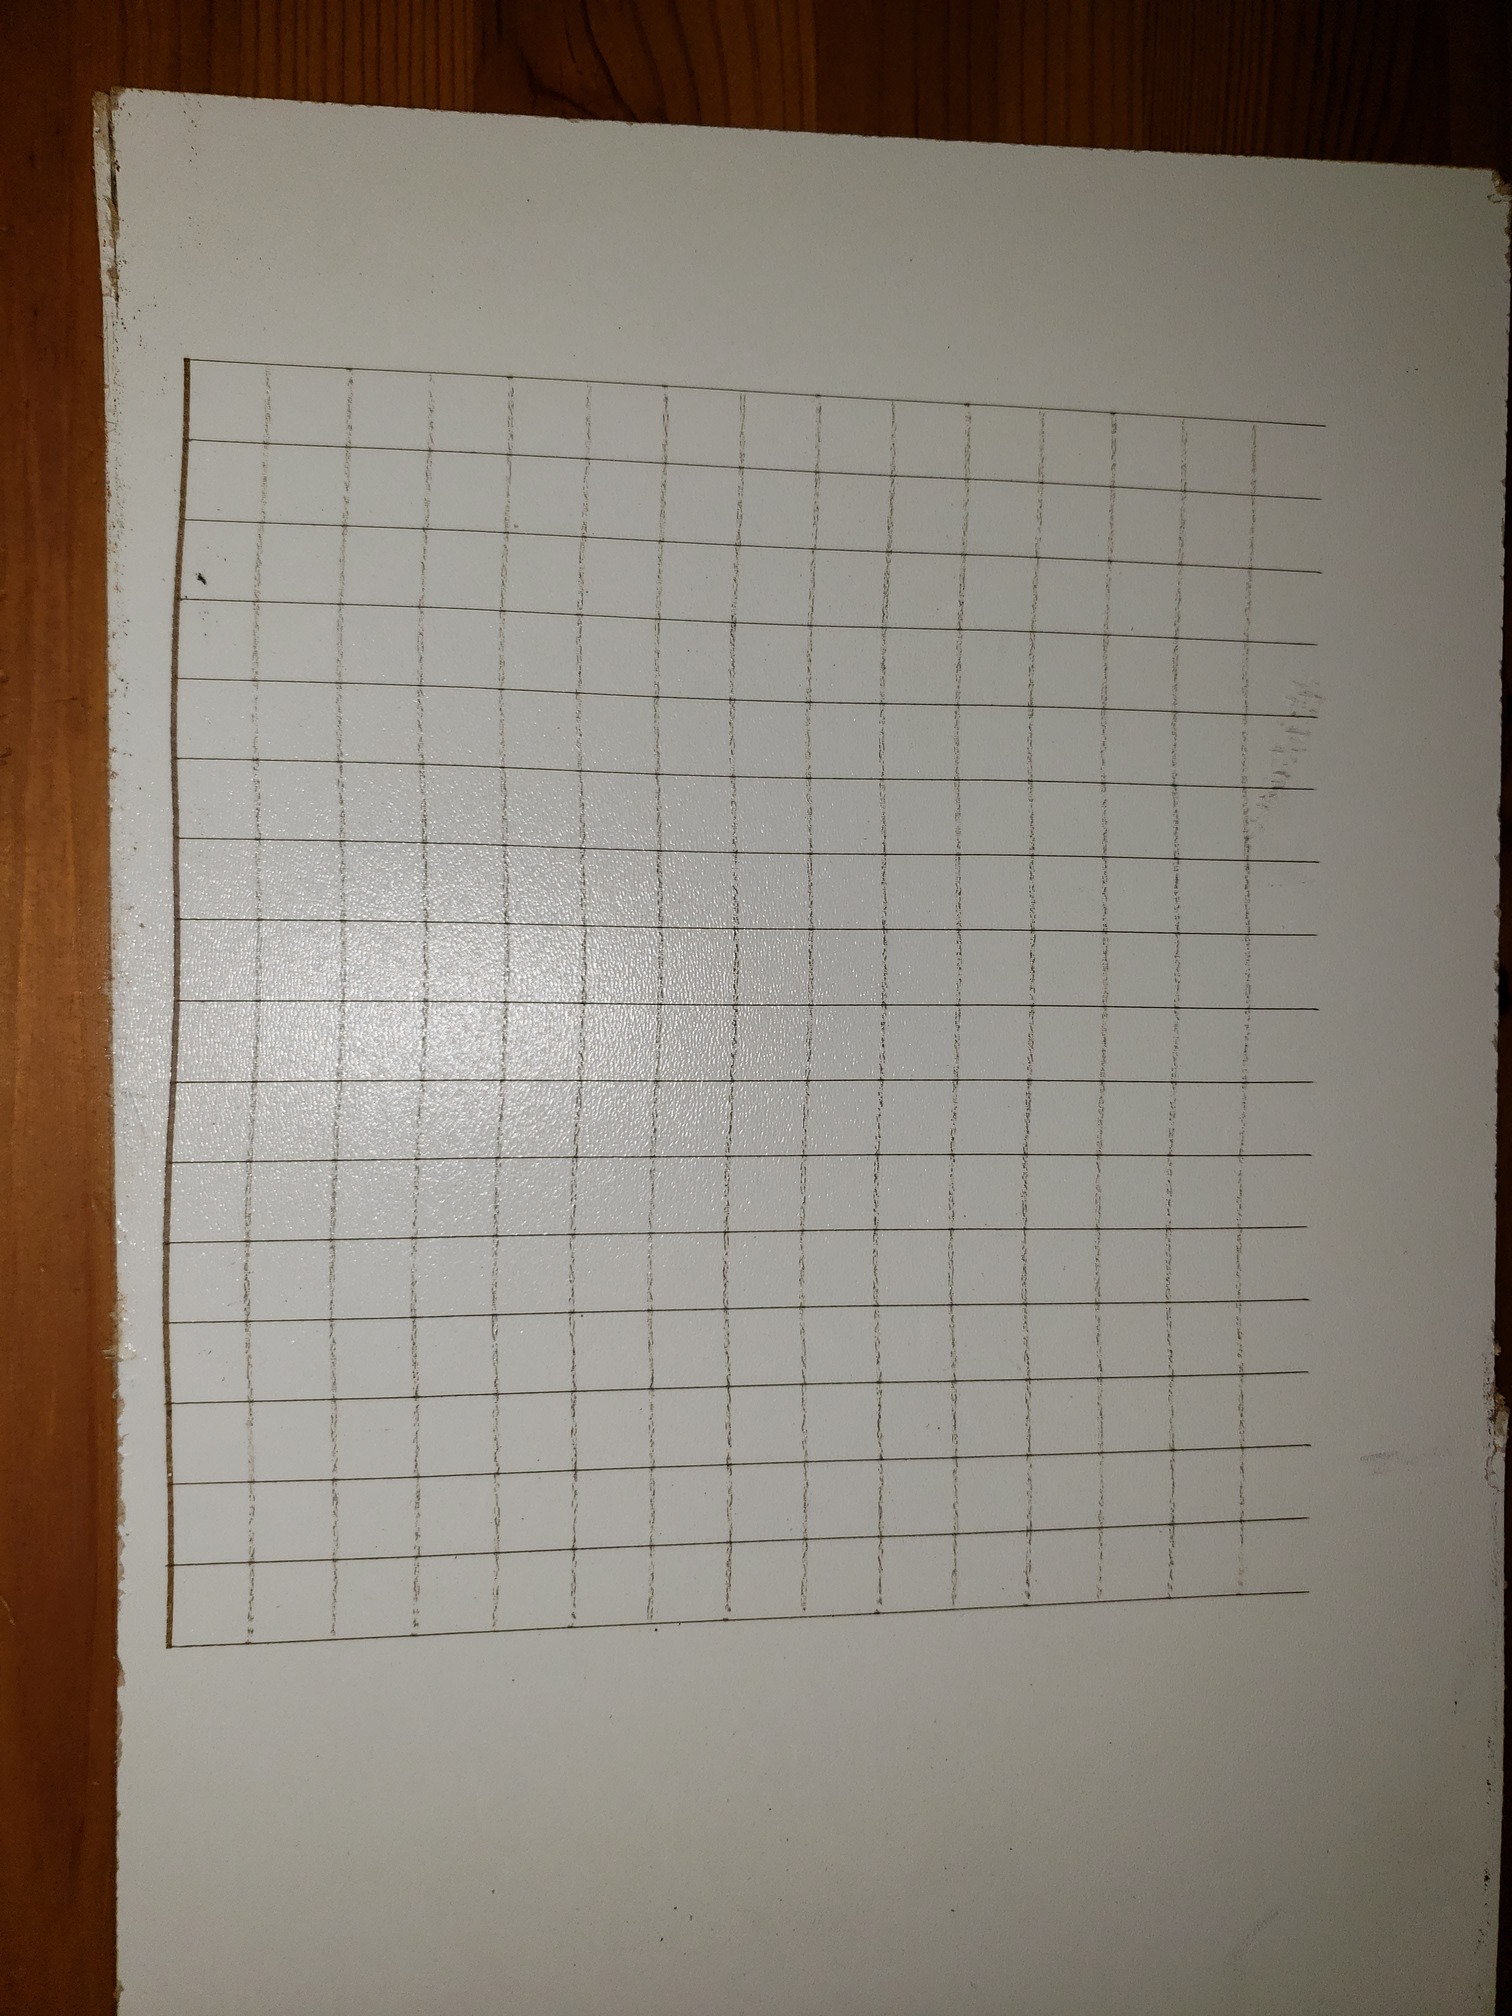
This is what a grid looks like. 55mm focus distance. Note the effects of focusing to a line instead of a dot, and the effect of the wobble wheel on the vertical lines.
I think you are in luck since I don’t see the bearing housing moving so it looks like it’s just the pressed on soft wheel part. I would take the thing off, find a hard flat surface and then try to straighten it on the bearing.
Maybe in F360:
- make cm thick block with a slight recess for the bearing(notice it’s slightly proud of the rubber on both sides ). Maybe 1mm deep. Also create a 5mm hole through the center.
- 3d print this and put the bearing/wheel in it and using the screw and nut tighten it so it moves the rubber flush with the bearing on one side.
- now flip it over and do it again but now just move it so the bearing is slightly proud of the rubber on both sides.
Should be straight at this point.
1 Like
Thanks for the suggestion. Now I just need to order and receive a 3D printer to do this with. 
Your suggestion is sound. Maybe I can make something using wood and my driller-miller, or even aluminum.
In the meantime, I’ve continued to characterize the behavior of the laser itself. I find that if I take focus slightly off of the sharp line, I get more of a dot burnt into the target. However the kerf is pretty wide at that point. Useful for many applications. As others have pointed out, distance from the lens is only a minor factor. I did a bunch of ramp testing and found that my best results were at about 20 or 30 mm. I also had better results for nice circles if I focused first to the sharp short line, then went off focus by twisting the lens about 20 or 30 degrees.
ya, you really just need something to put a 5mm hole in and then a 1mm shallow round recess. Just gotta be harder than rubber and perpendicular to the 5mm hole. I can print something if you’d like.
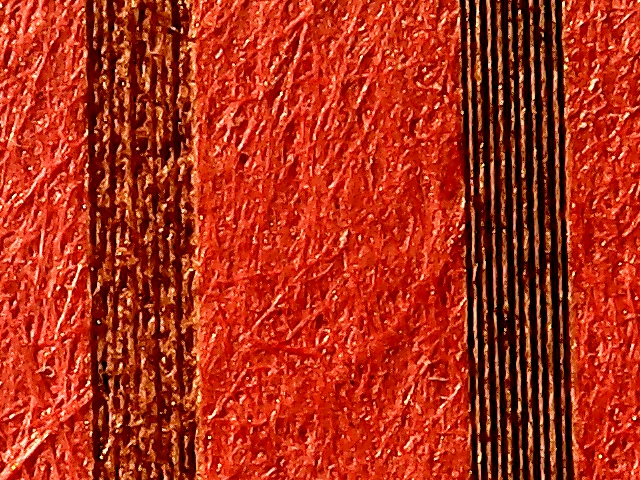
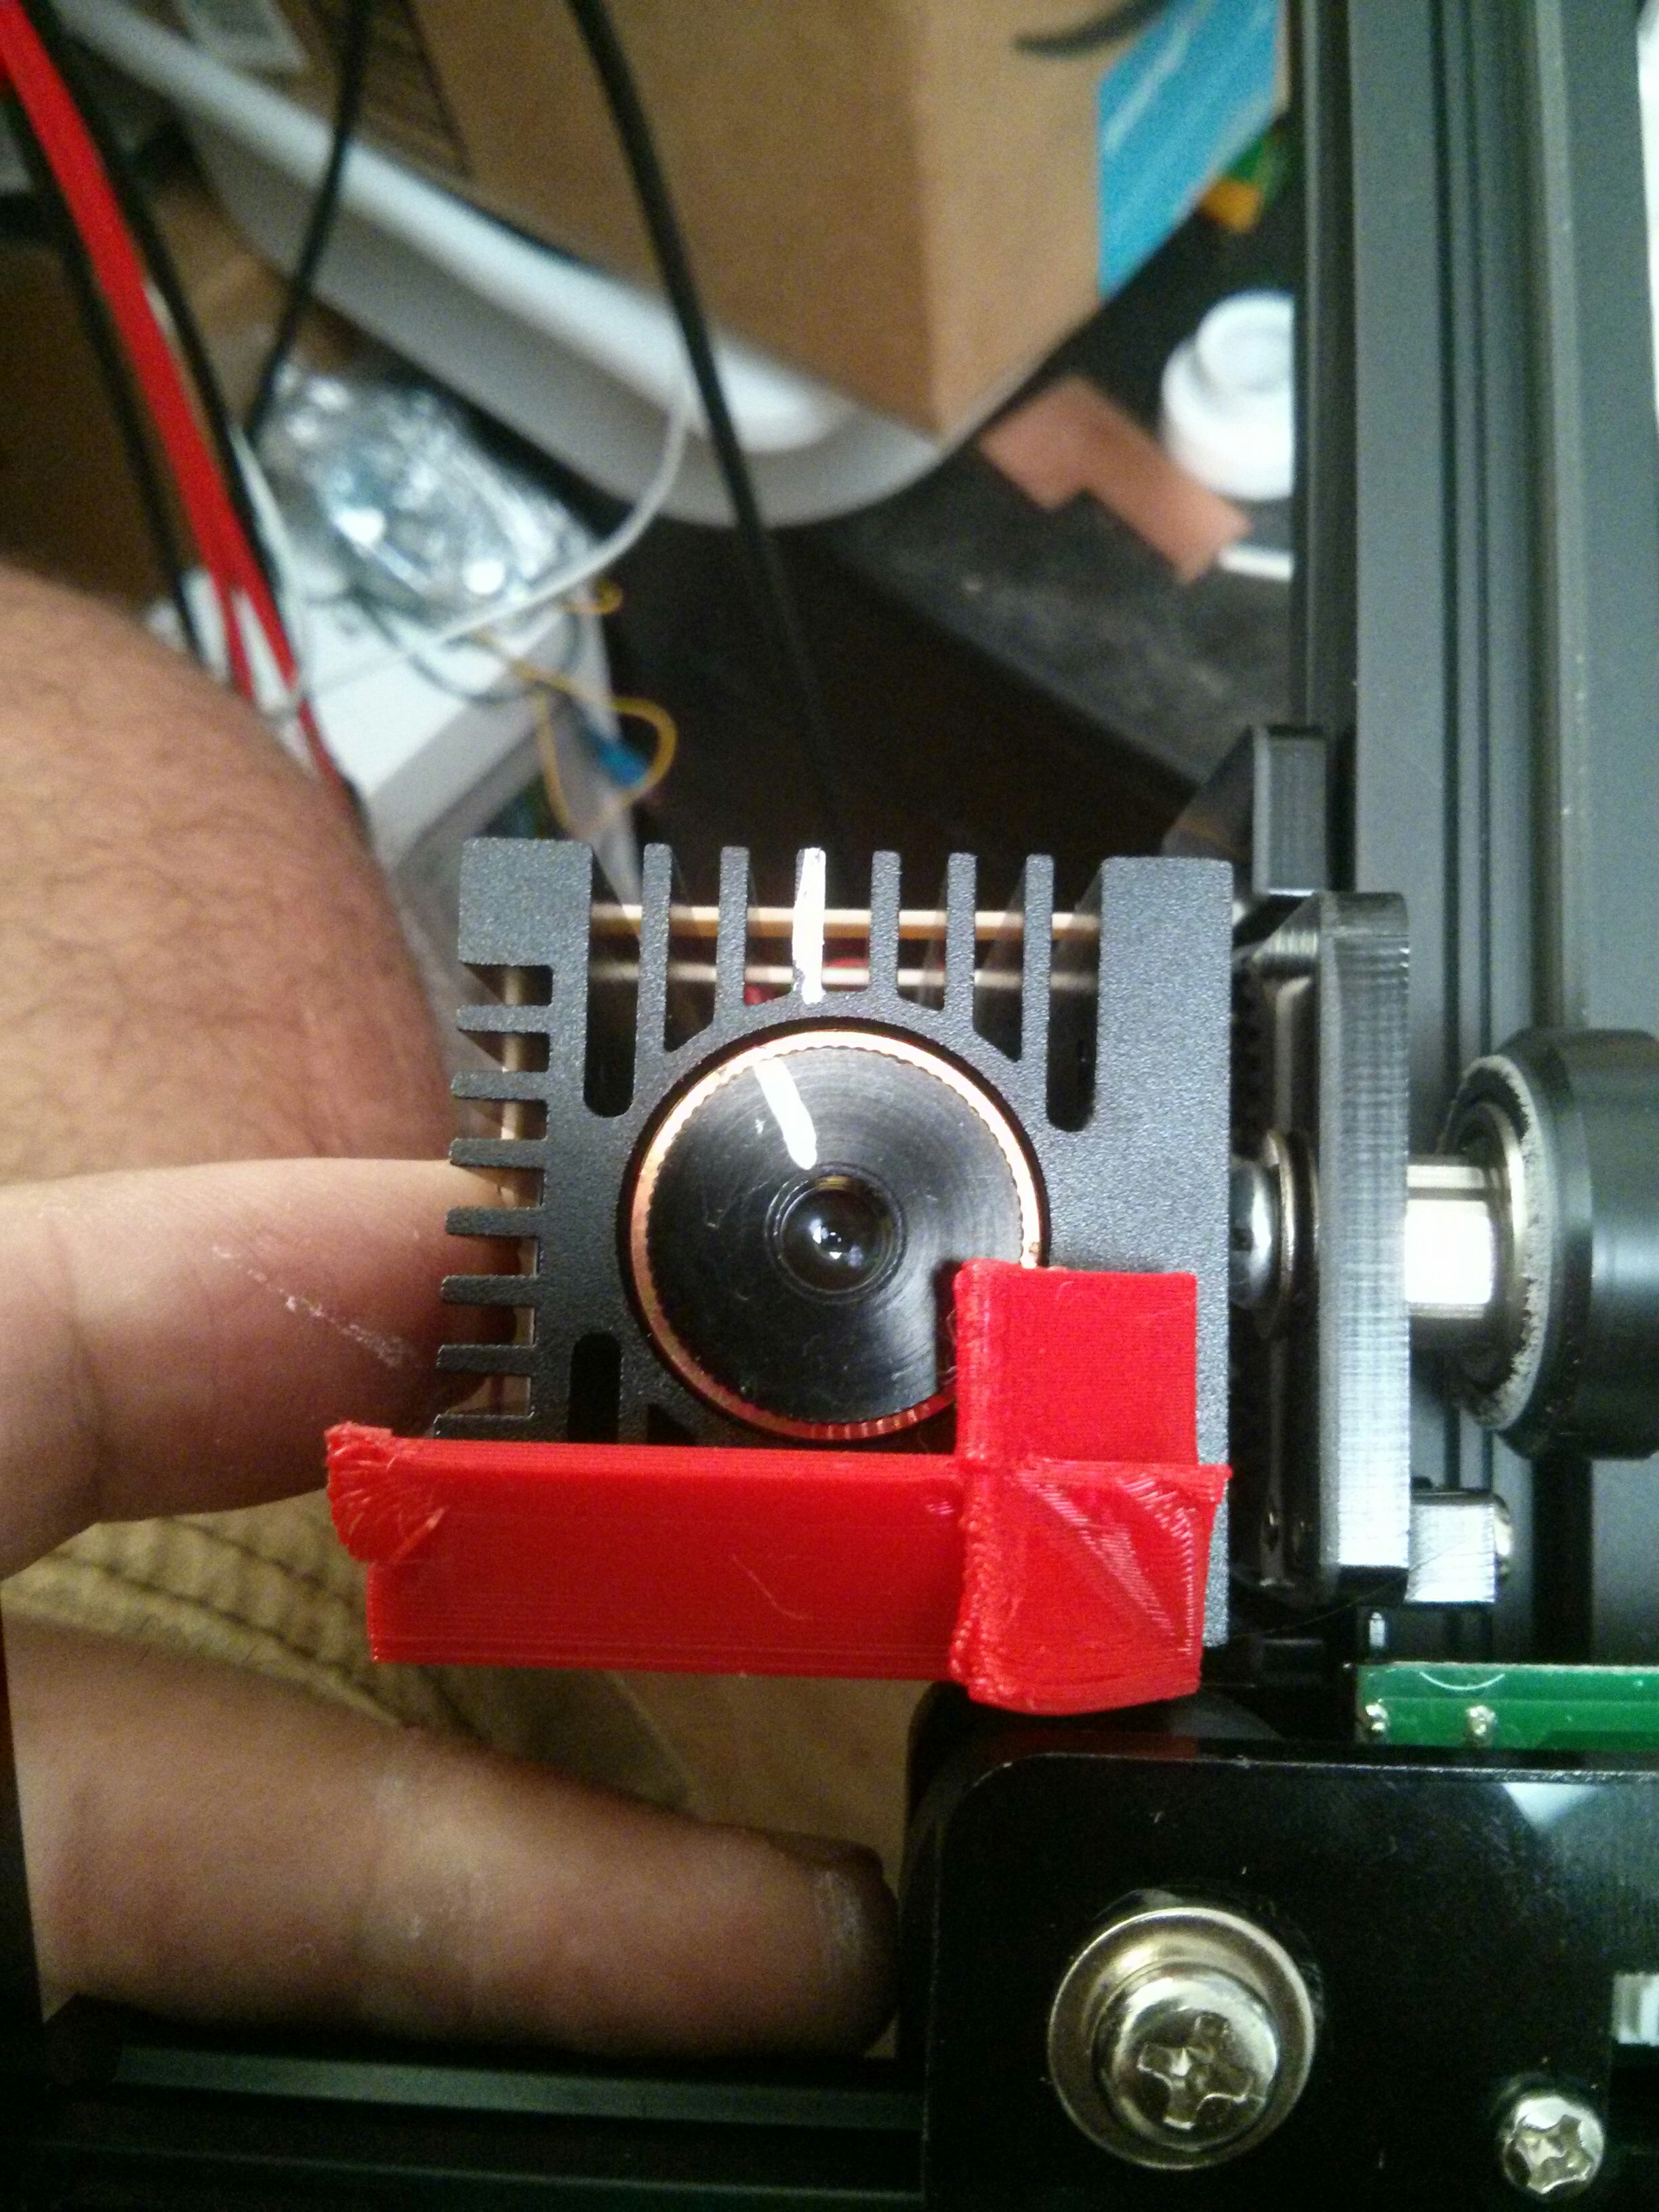
Regarding the laser spot, on my low power ramp test I get a .15mm line but at the higher power used to make the arial letter size test I saw a .45mm burn line width but I know I was not exactly on focus. I lowered my whole X axis by moving the nut from above the bearings on the Y axis carriage to above the mounting plate. I’d like to get the focus to the floor since at that point I can adjust up by most material thicknesses. I want to be able to etch something much larger that 160x150.
It was a great idea, Doug. I used a bunch of washers of various sizes. I haven’t had time to test the results in detail yet, but hope to later today.
Meanwhile, I contacted Ortur and Justin agreed to send me 10 wheels. So if anyone else is in need of these wheels, please let me know. I must say I am pleased with Ortur support in this case.
1 Like
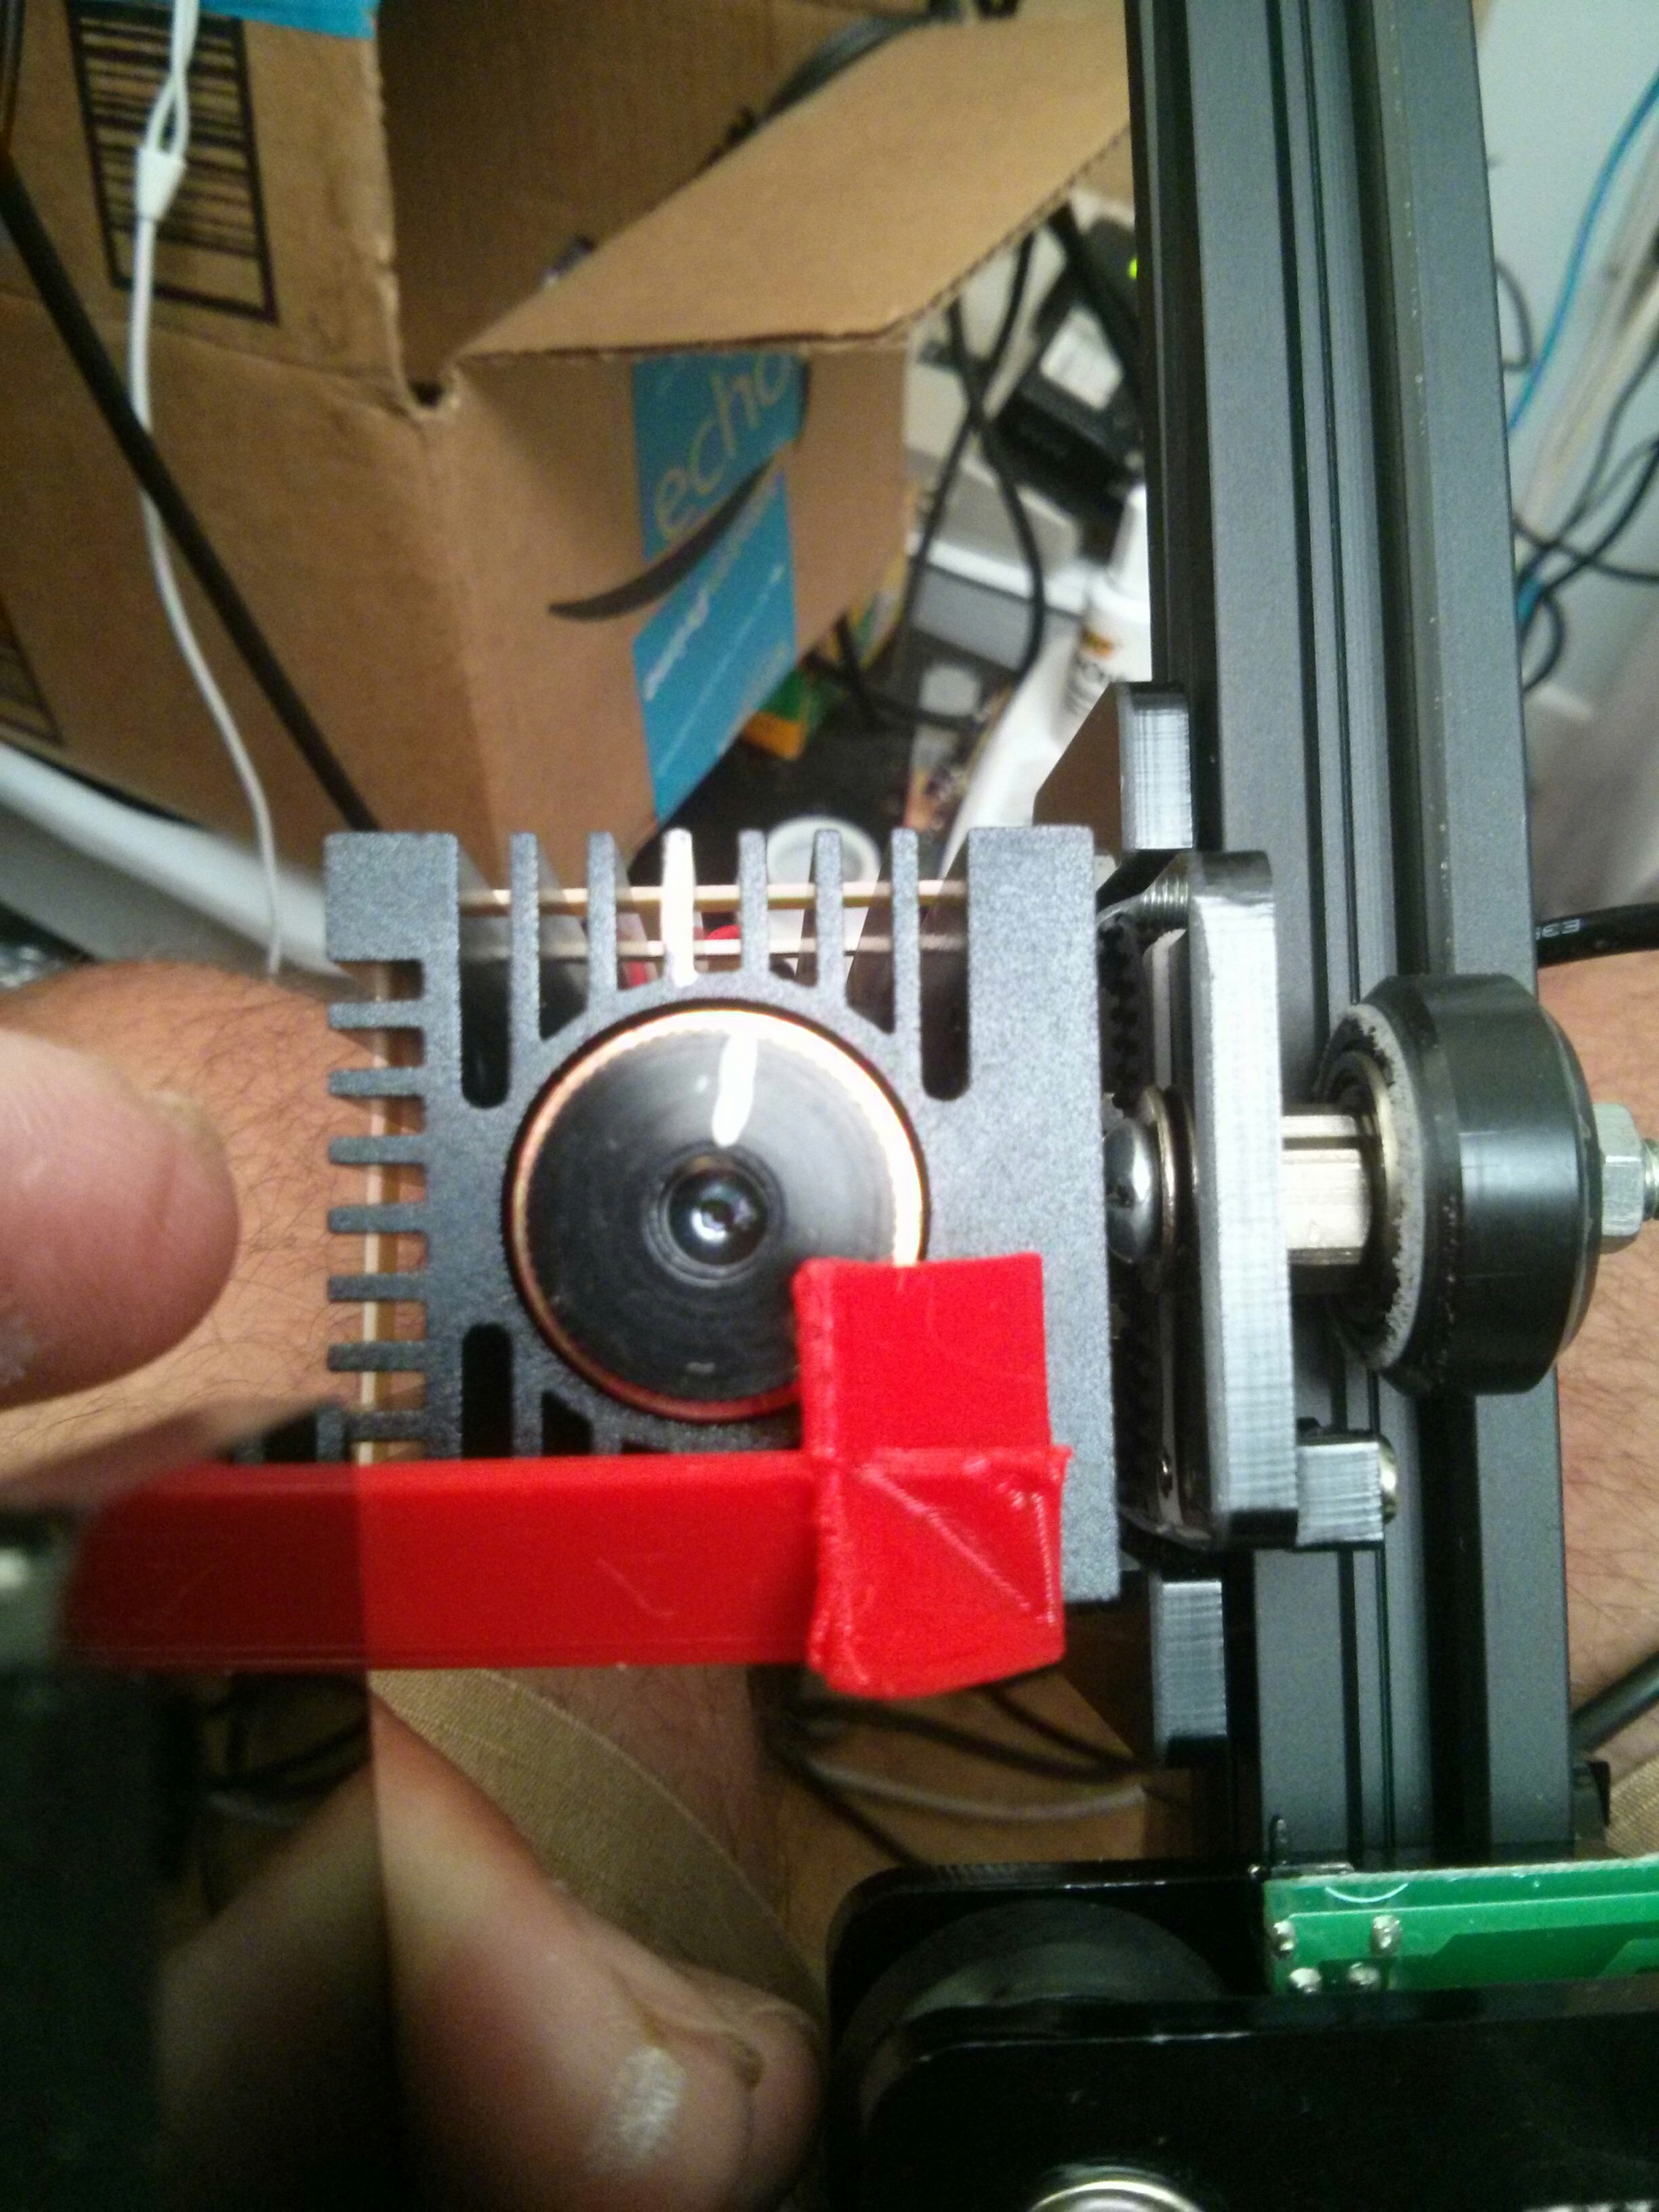
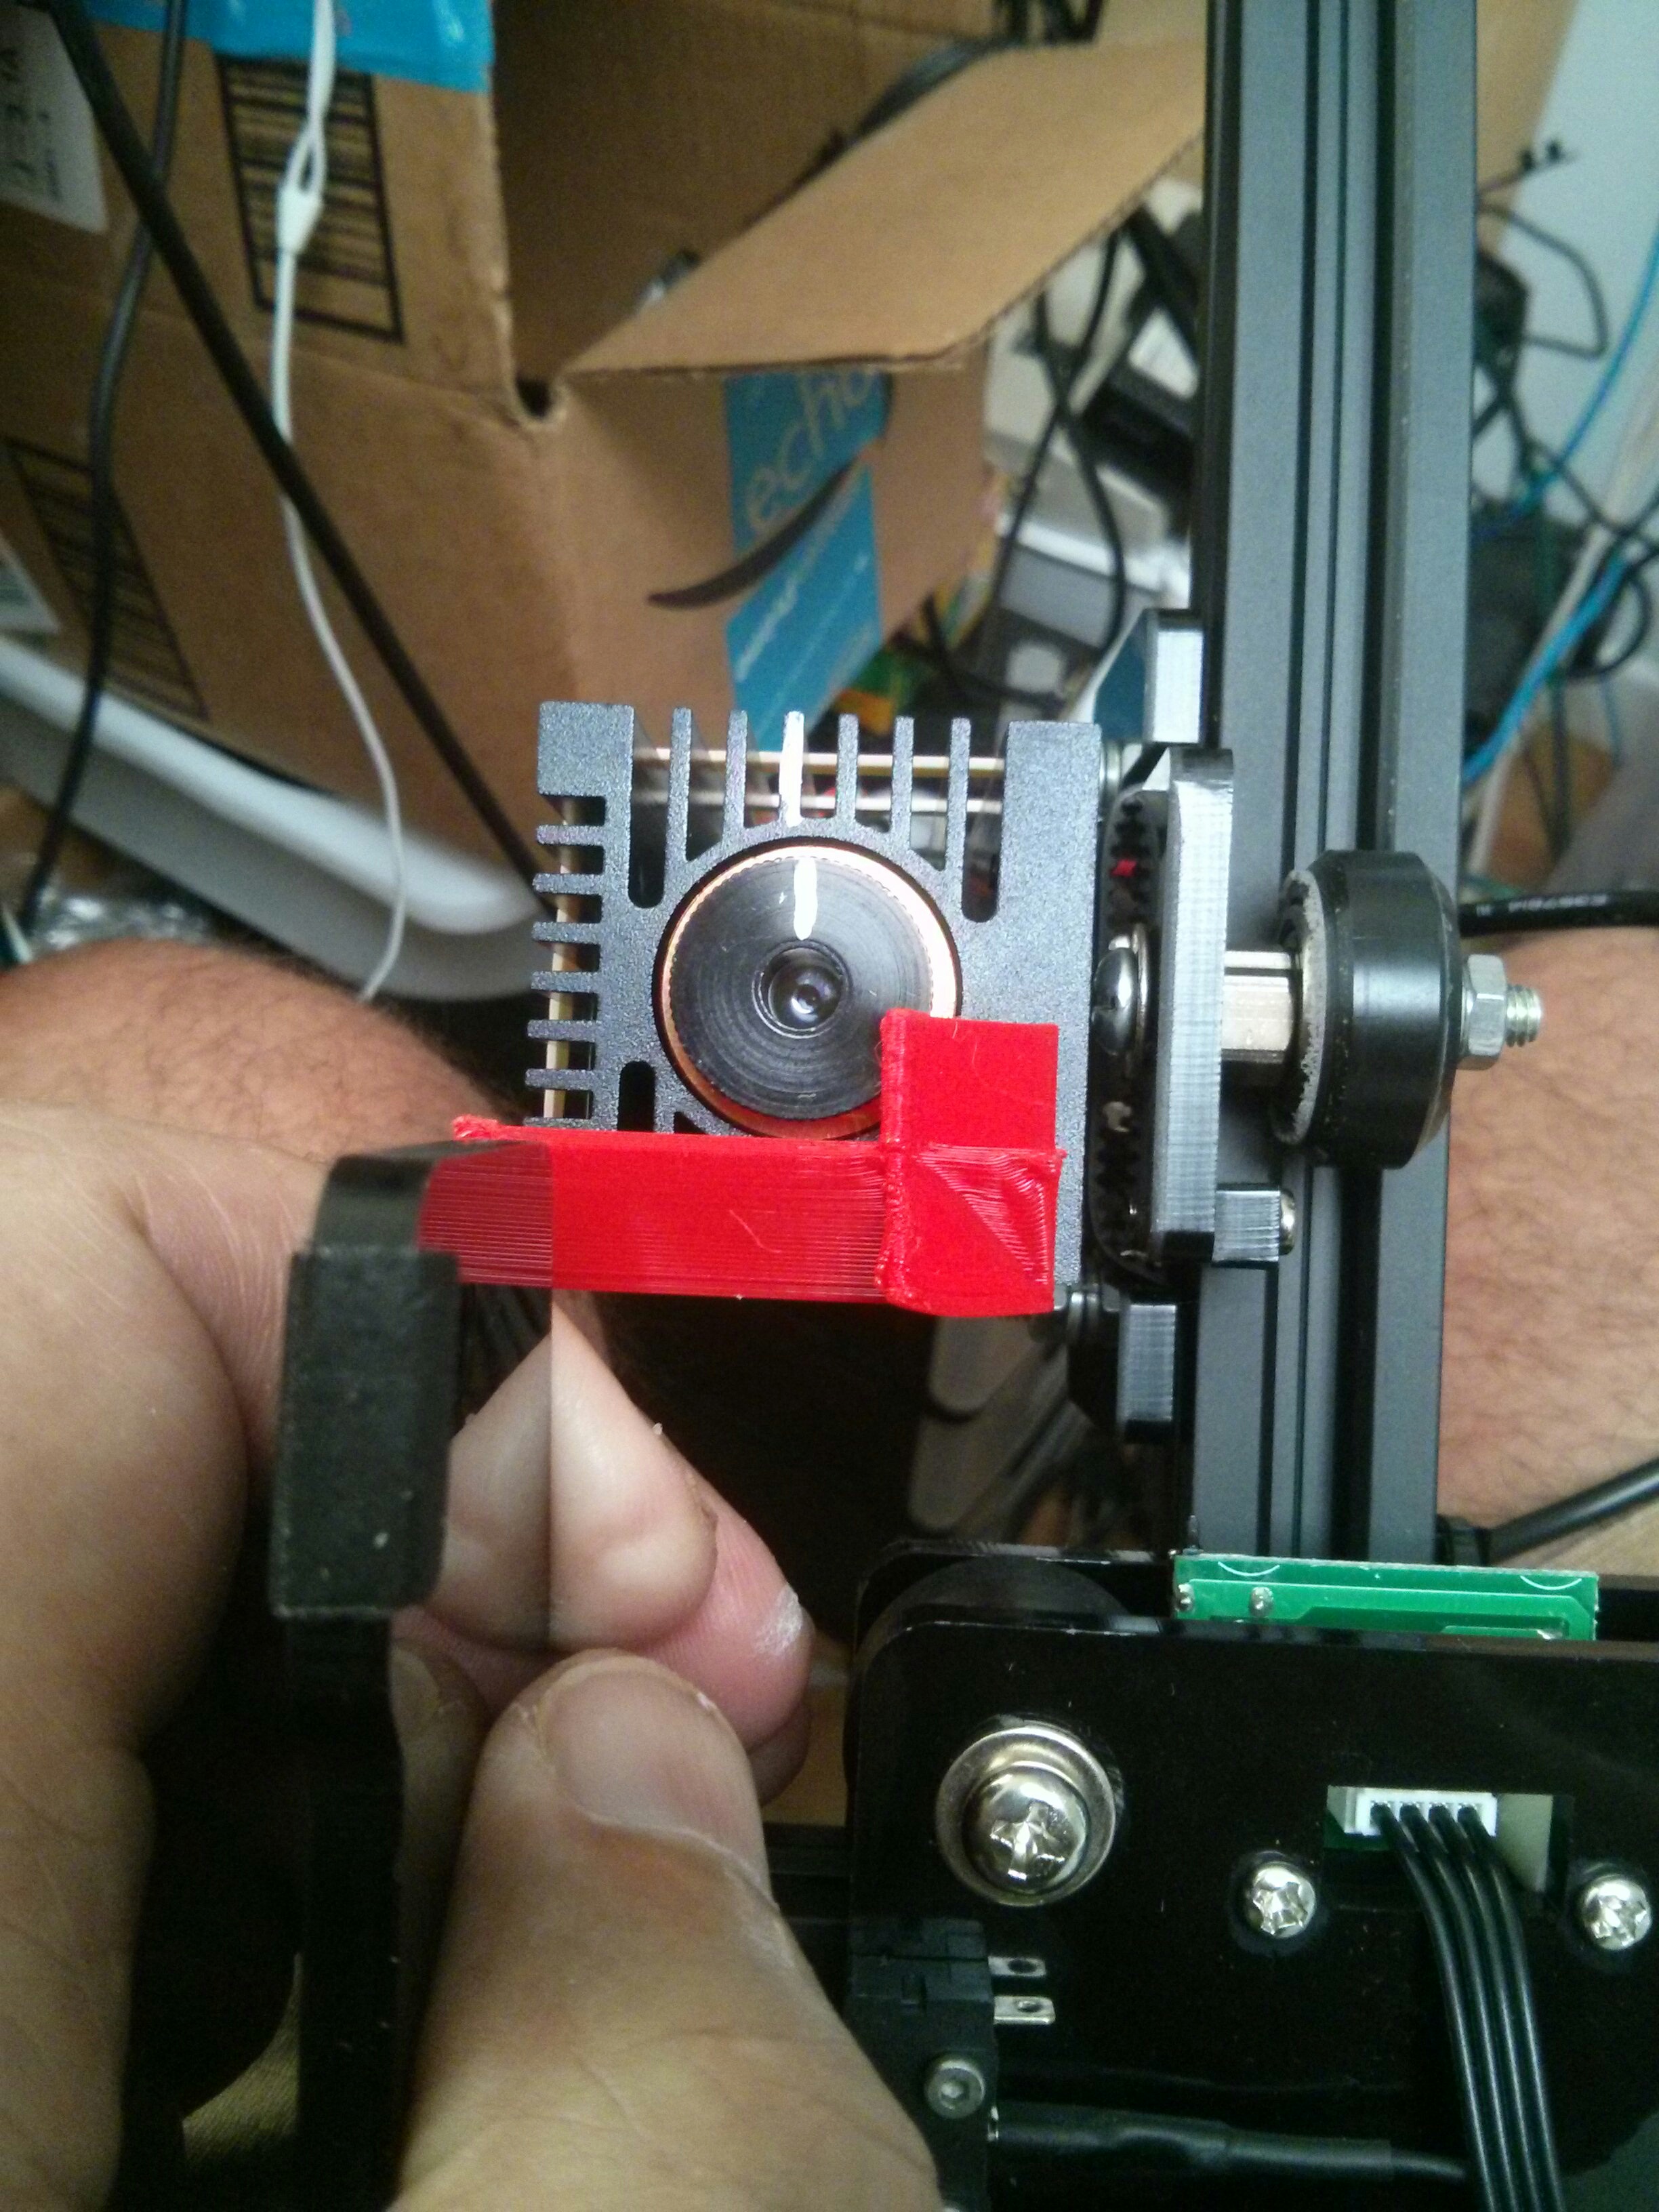
Good thing they are sending replacements. I discovered that the wheels are molded with a land in the center, and a bearing inserted on either side. There is a copper washer inside to keep the land from being over-compressed between the two bearings. In my case, the plastic wheels appear to have been deformed somehow, beyond simple repair.
1 Like
Tim, if you want wheels faster it turns out the wheels are the same used on the Ender 3 so lots of people sell them on Amazon( Prime 2day options too ). $10…
https://www.amazon.com/Printer-Plastic-Bearing-Passive-Creality/dp/B07RRJ54LK/ref=sr_1_2
Yes, I found those also and ordered them as a backup. Despite being “Prime”, they are scheduled to arrive Saturday, a week after the order
1 Like
Ya, I learned the hard way to look very hard for where they are shipping from even on Amazon. Bugs me to no end when I find out my 2 day delivery will be 2days+2 weeks.
1 Like
To be clear, one “monkey hair” is equal to 1/32"?
Remarkable that so little change makes such a difference.
If you do perform this test then please share your results with us.
I’d be curious to know if the Ortur is similarly sensitive.
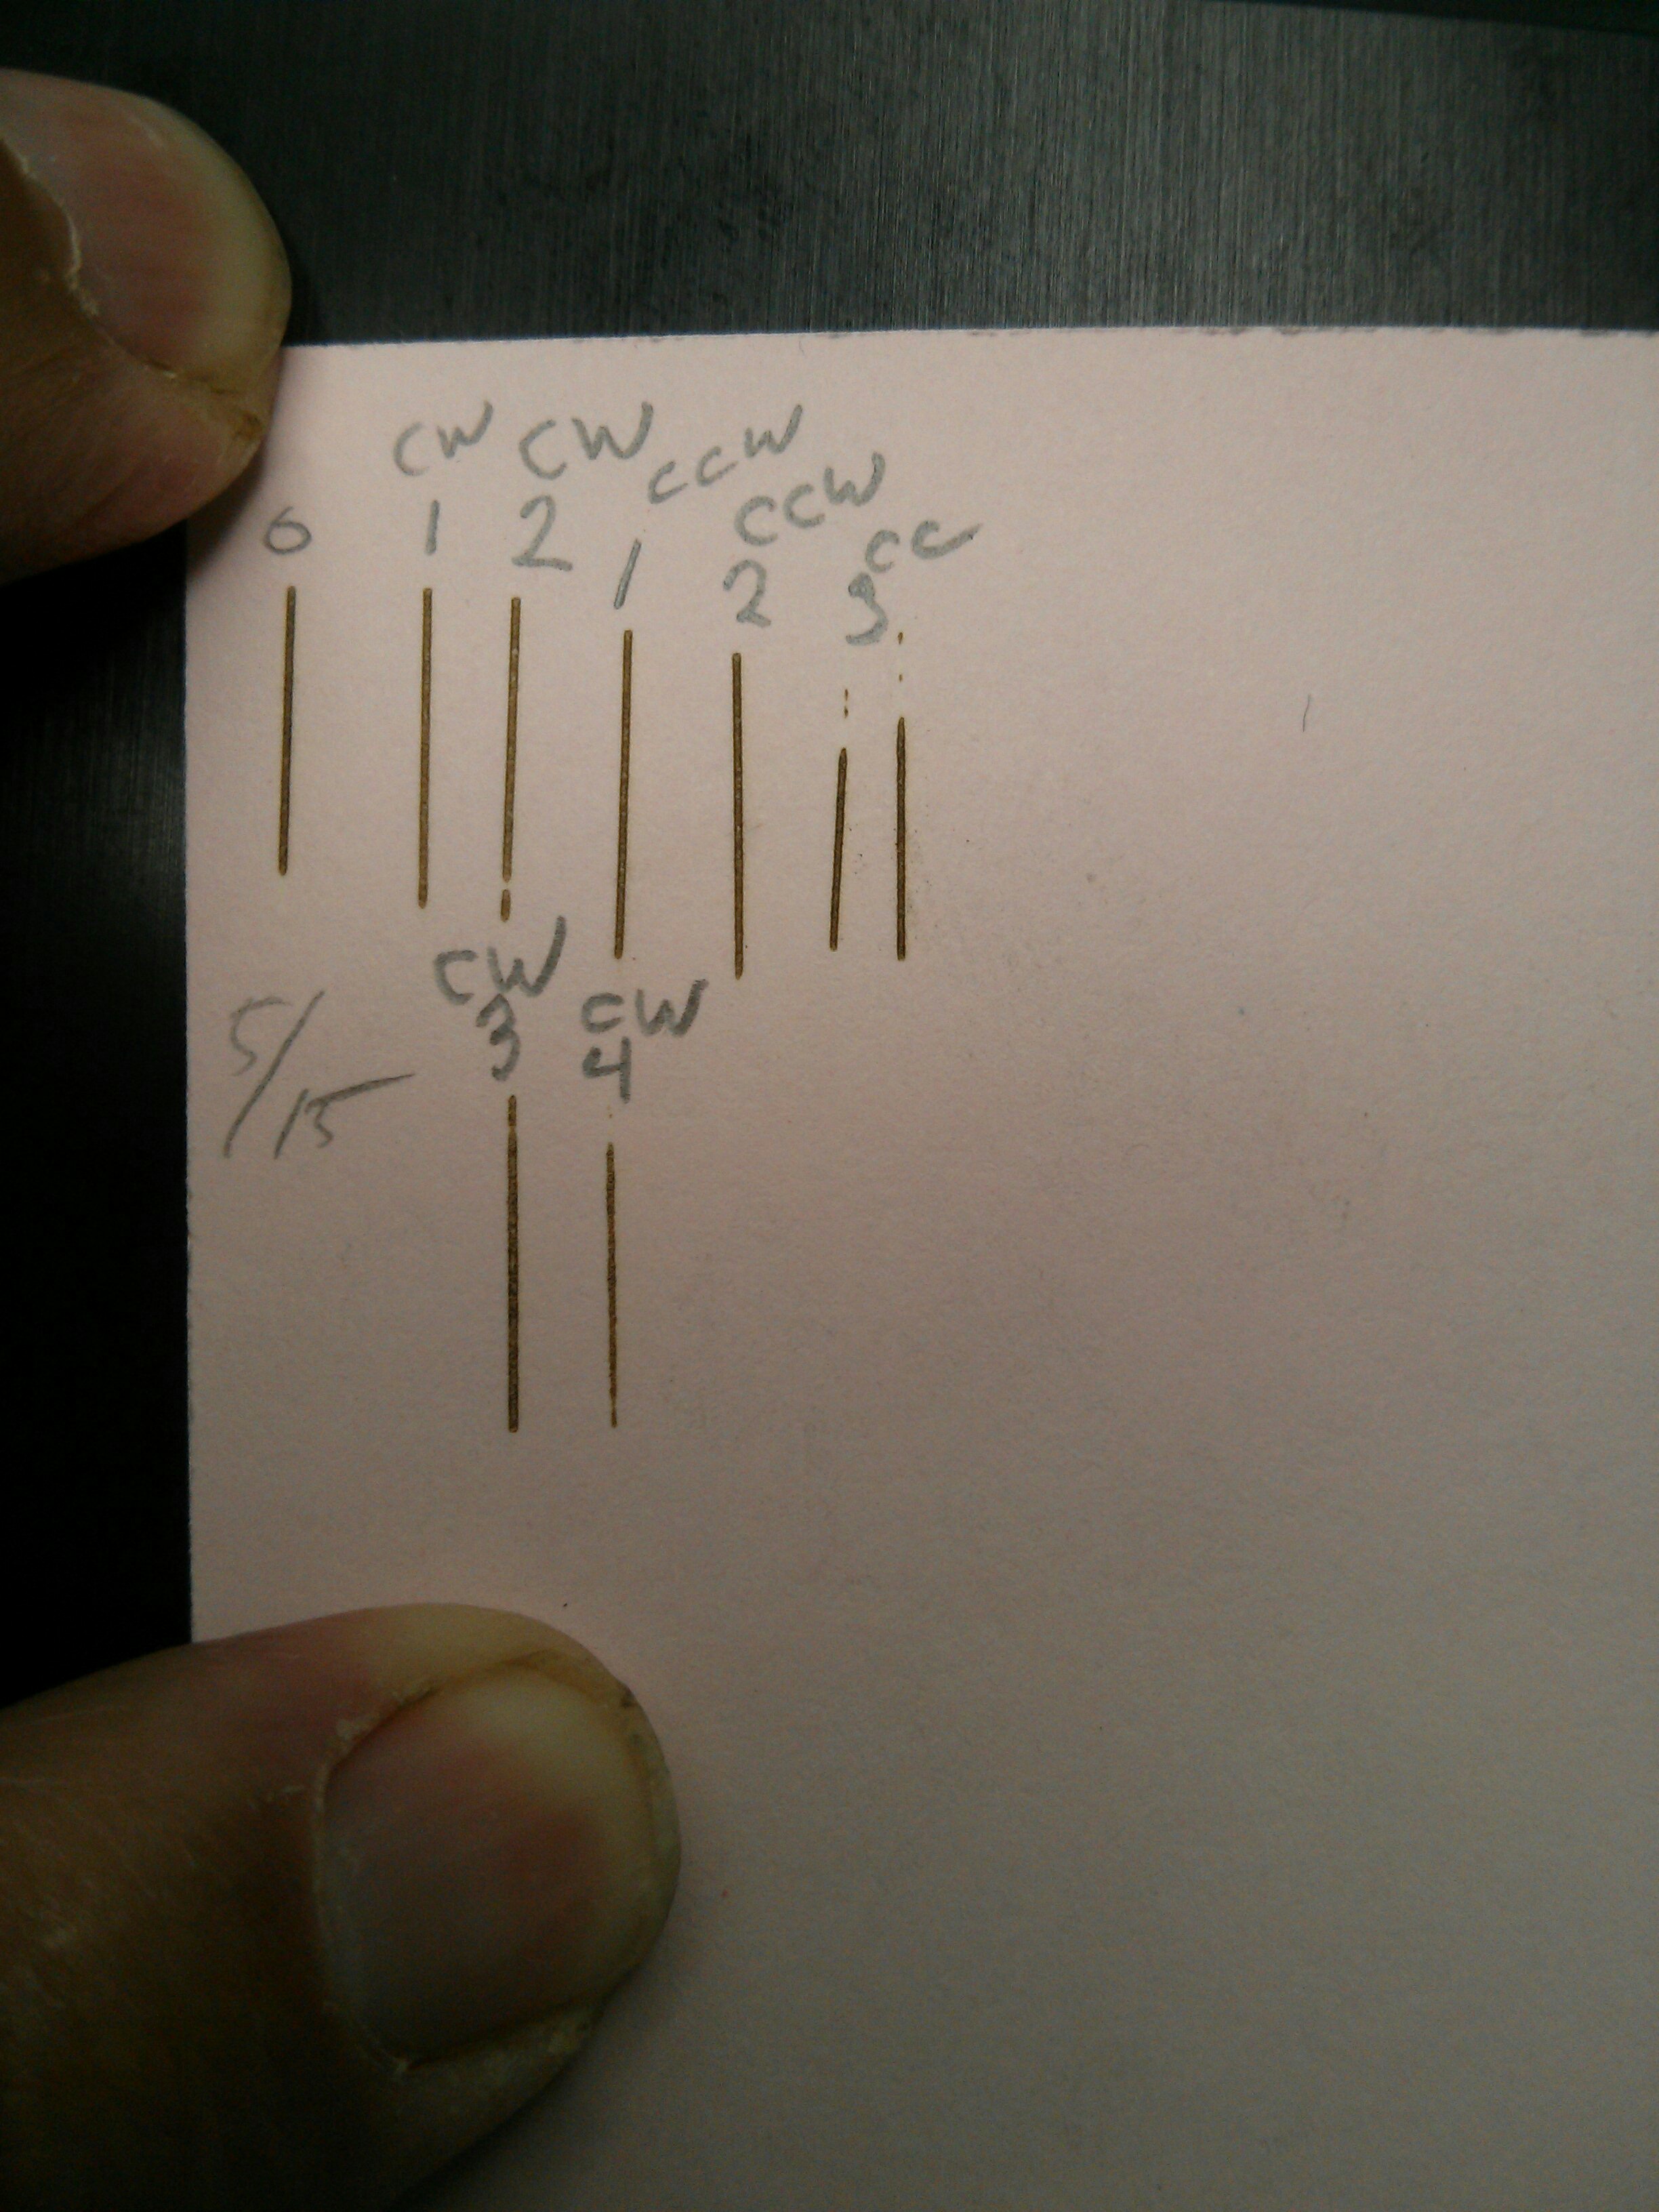
Do the sharp dot focus on black paper, it makes the world of difference. My default focus was 180 degrees off!
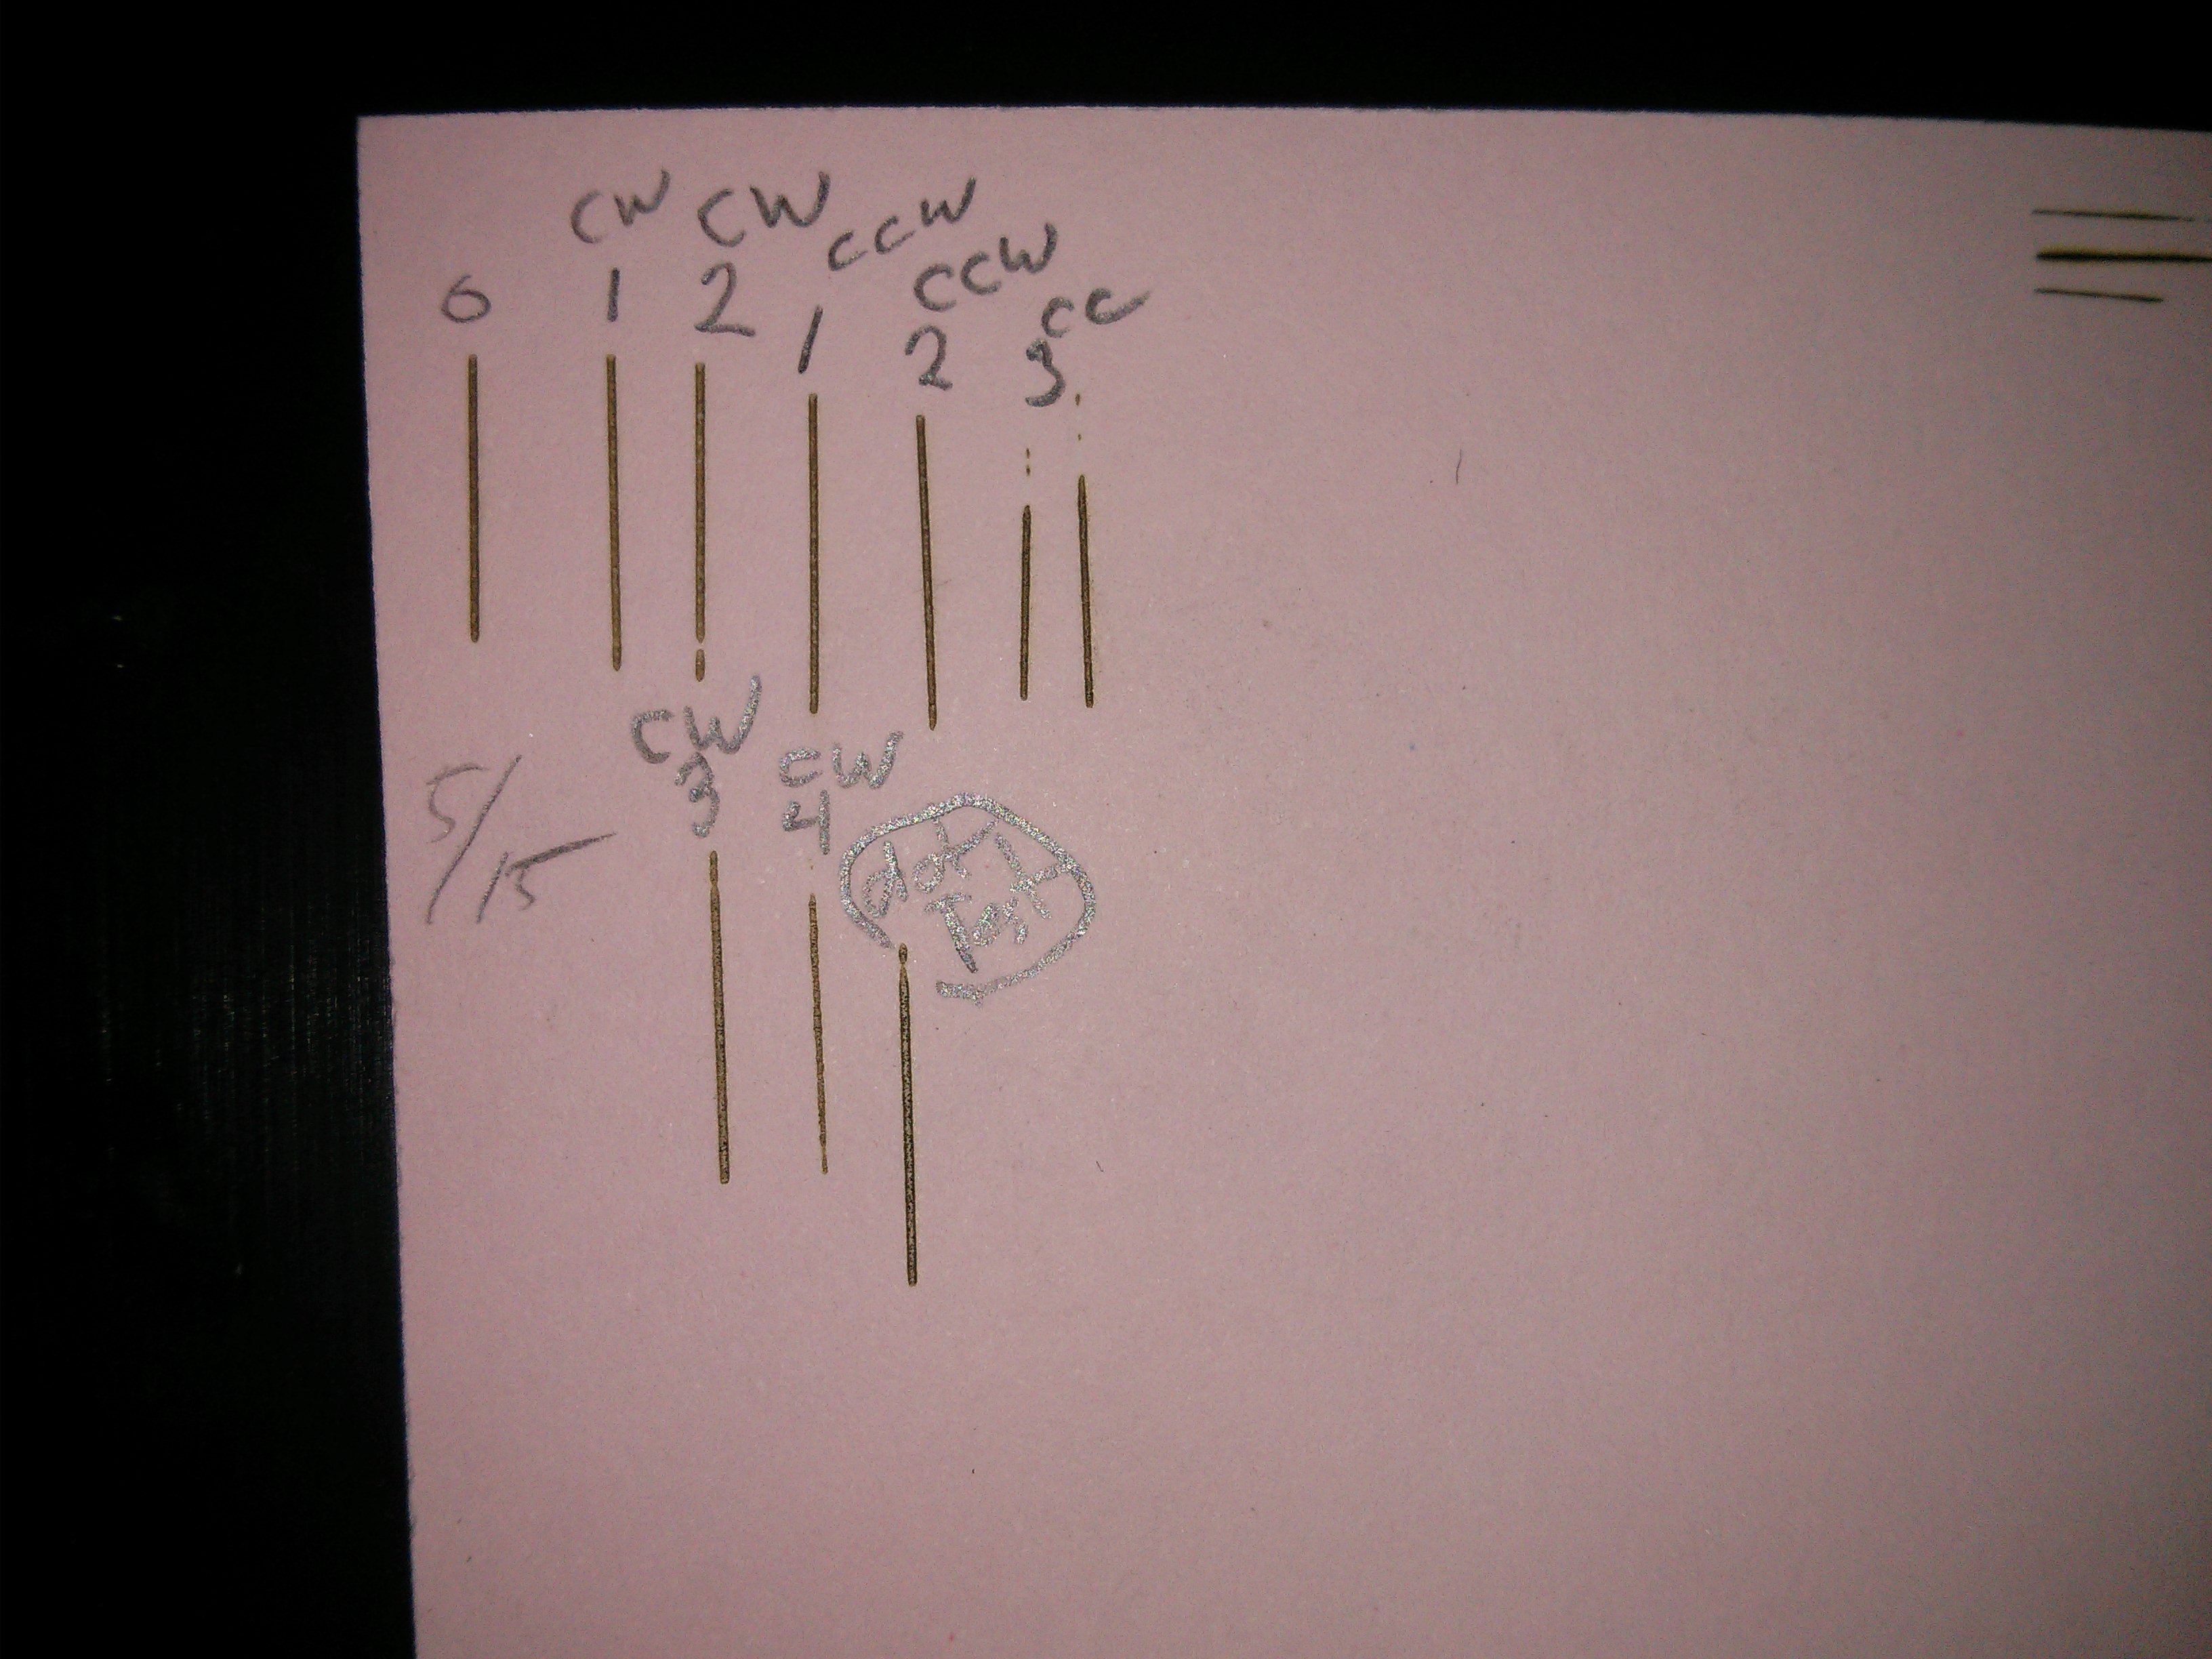
Correct me if I’m wrong but I don’t see much change with rotation in either direction.
correct and I didn’t know what to make of it. CCW started to look darker but quickly went light at 3-ccw.
But look at the added line in the bottom row, right side. That was after the dot focus on black paper and it is darker than the rest.
A friend had just turned 60 and his wife posted a “Vintage Dude” round emblem and since she is putting together a kit CNC router I told her she’ll need to get a laser for it eventually. She wasn’t sold so I took the emblem and did 3 tests with Lightburn and the Ortur to get the power set so there was decent gray scale and the small test was readable. Well, I just etched that emblem and it burned the letters so much I could not read them. Focus is definitely sharper. Not as obvious with monkey hair adjustments though and I tried a monkey hair CW and CCW from the dot focus point and got inconclusive results. ie CW one monkey hair and surprisingly it didn’t etch the paper. weird. Redid the dot test, the adjustment was slightly different from before ~2 monkey hairs CCW and it burns a dark line like the line etched after the first dot focus adjustment.
Black paper and wearing the laser glasses is a must.